Showing posts with label Halloween. Show all posts

Sunday, October 15, 2023

DIY Dollar Tree Witch Hat Wreath: Transforming Decorative Mesh into Spooky Elegance

Hey there! I hope you are doing well. The weather is finally acceptable here in Texas.  Yesterday my oldest son, my DIL, my grands and I went to our local Festival and we experienced the solar eclipse too!  We all had so much fun! Best of all, the weather was perfection! I wore a sweater yall!

Anywhoobs, lets get on to this little fun project.  It's kind of late in the season, but pin it for next year for sure.

Wreaths are a fantastic way to add a touch of festivity to your home, and when it comes to Halloween, there's nothing quite as iconic as a witch's hat. In this step-by-step guide, we'll show you how to transform rolls of decorative mesh from Dollar Tree into a bewitching wreath that's perfect for the season.


Materials Needed

  • 1 wire or plastic witch hat form
  • 3-4 rolls of decorative mesh in colors you prefer. I used orange, yellow, black and combo of colors
  • 1 package of decorative mesh tubing
  • 2 packages of Spooky Cloth, I used gray, but black would be best.
  • Pipe cleaners
  • Witch legs decoration
  • Foil
  • Scissors
  • Glue gun and glue sticks (optional)

  • Step 1: Gather Your Materials

    Before diving into the project, make sure you have all the necessary materials ready. You can find most of these items at your local Dollar Tree, making this project both budget-friendly and fun.


  • Step 2: Prepping the Hat Form

    Unroll the tinsel from the bottom to expose the form. If you find the wire form, this step will not be necessary. Use a piece of foil to create a more pronounced tip on the hat.

  • Step 3: Covering the Hat with Spooky Cloth

  • Use two packages of Spooky Cloth to cover the entire hat, top to brim. Start at the brim and wrap cloth around making sure to cover all the tensile as you go. Tuck in the end or glue to secire.


  • Step 4: Prepping the Mesh

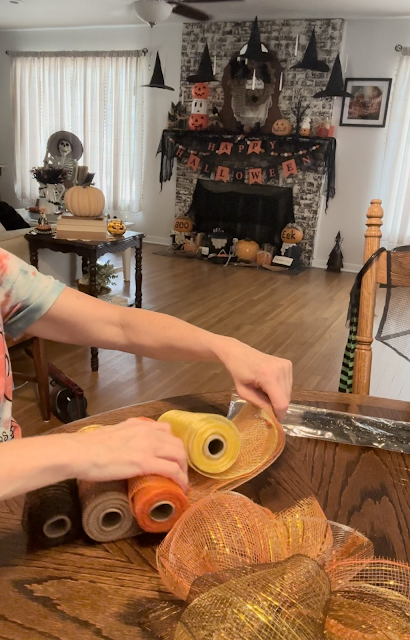
    Unroll your decorative mesh and cut it into 12-inch sections. You'll need quite a few, so take your time and be precise. This will form the base of your wreath. Stack all four rolls together for a quicker process.


    Step 5: Attaching the Mesh

    Gather a section of mesh and bunch it up in the center, creating a sort of bowtie shape. Attach it to the wire wreath form using a pipe cleaner or a piece of floral wire, securing it tightly. Repeat this process, slightly overlapping each section, until the entire wreath form is covered. Start in the middle for your first bundle, then alternate from side to side to get an even amount as you go.

    Step 6: Embellishing Your Wreath

    Now comes the fun part! Get creative with your embellishments. Add spiders, ribbons, or any other spooky trinkets you like. Secure them using hot glue, placing them strategically around the wreath to create balance and visual interest.

    Add the witch legs decoration, securing it with a pipe cleaner or floral wire.


  • Step 7: Creating a Hanging Loop (Optional)

    If you plan to hang your wreath, fashion a loop out of a pipe cleaner or ribbon and attach it securely to the back of the wreath using hot glue. The legs should dangle freely.  You can use some sticky tack to attach them to your door to position them.

  • Step 8: Final Touches

    Inspect your wreath for any loose ends or areas that need a bit more securing. Trim any excess mesh or wire to achieve a neat, polished look.

  • Congratulations! You've successfully transformed rolls of decorative mesh from Dollar Tree into a spooktacular Witch Hat Wreath that's bound to be the envy of your neighborhood. Hang it on your door, above the mantel, or anywhere else that could use a touch of Halloween magic. Get ready to receive compliments from neighbors and grocery delivery staff alike. Happy crafting!

    • For more fun Fall ideas, go visit my Instagram. I post every single day. Find me @TexasBlueBunglaow on Instagram.

      1. If you loved any of these ideas and want to save them for later, be sure to pin it to your favorite Pinterest board.  I have a Pinterest board set up for all kinds of Halloween ideas and it's called Boo to You.  I'm pinning something new on Pinterest every day. Won't you join me?

        ***I am a participant in the Amazon Services LLC Associates Program, an affiliate advertising program designed to provide a means for me to earn fees by linking to Amazon.com and affiliated sites.**


Pin It!

Sunday, October 8, 2023

Crafting Candy Corn from 2x4 Wood: A Whimsical DIY Project

Hey there! It's finally Fall weather here in Texas, but don't hold your breath because the hot weather will be back soon!  It is after all Texas ya know. LOL!  We have the Texas State Fair and the Dallas Arboretum putting on a Fall show right now, so if you're in the area, try those two activities out! I want to go do both if I can!  Anywhoooobs, do you like candy corn?  It's a long-time debate, some do and some don't.  I love it!

I have a fun project for you today and whether you do or don't like candy corn, you are going to love THESE candy corn!


Who says candy corn is just for Halloween? This sweet treat has become an iconic symbol of the season, and what better way to celebrate than with a unique twist? In this DIY project, I'll show you how to craft your very own candy corn using a surprising material: 2x4 wood. Get ready to unleash your inner artist and bring a touch of whimsy to your home decor.

Materials Needed

  • Two 2x4 wooden boards (scrap wood will do)
  • Saw
  • Sandpaper and Hand Sander
  • Acrylic paints (white, orange, and yellow)
  • Paintbrush
  • Raffia
  • Clamps
  • Optional: Sealant or clear varnish

  • Step 1: Preparing the Wood

    Begin by cutting the 2x4 boards into manageable pieces. Depending on the size you'd like your candy corn, you can adjust the lengths accordingly. For instance, you might consider cutting them into 1-foot sections to create a sizable candy corn display.

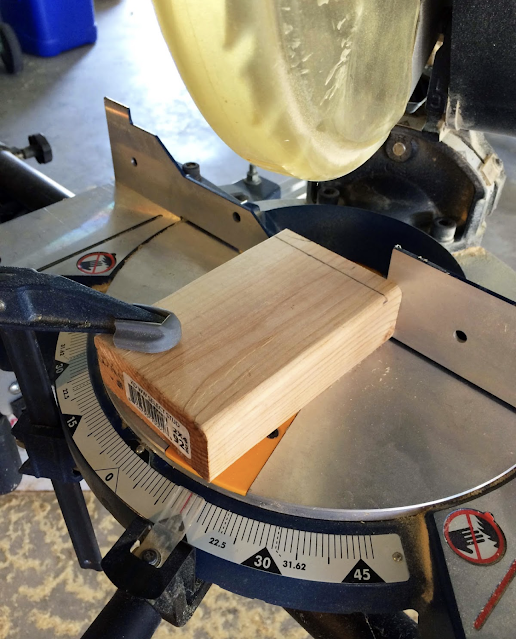
  • My corns measure 5", 4" and 3 1/2".  The size is up to you, I just decided to make 3 different sizes for my set.  Using scrap 2 x 4s we cut the long sides of each corn on a 15 degree angle.  Use a clamp to hold the small pieces of wood in place on the chop saw.

  • Step 2: Shaping the Candy Corn

    Using a saw, carefully taper one end of each wooden section to form a triangular shape. Remember, candy corn typically has a wider base and a narrower tip. Take your time, and remember to exercise caution when using the saw.
    Please wear safety glasses too please!

  • Cut the first long side after securing with a clamp safely out of touch with the blade. 

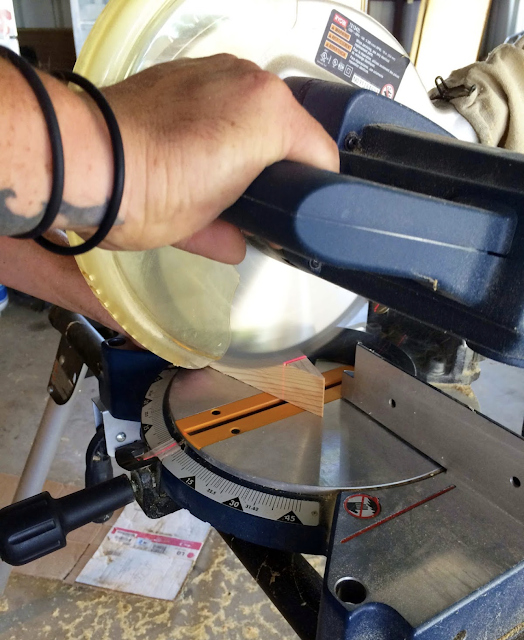
  • Flip your block around and cut the other side with the same angle.  My chop saw has a laser guide which helped to show exactly where the cut would go.

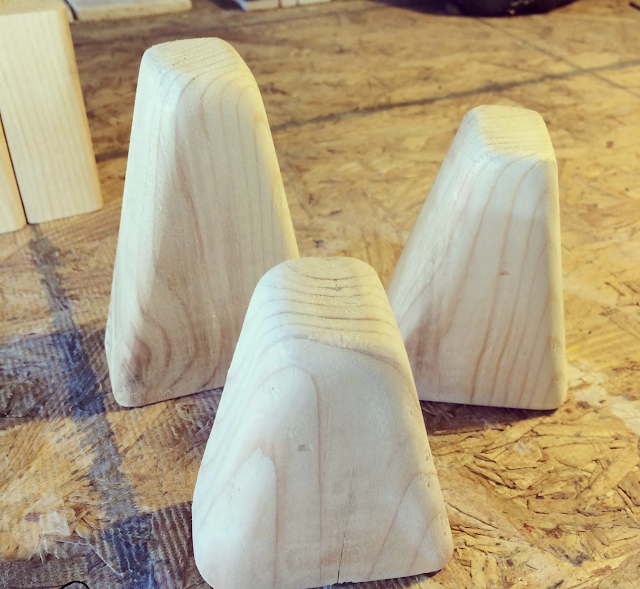
  • Next, if you choose, cut the point off.  I chose to do so because I wanted a more rounded look.
  • Next use a file to round off the edges.  Hold the piece still using the clamp again.

    Step 3: Smoothing the Surface

    To achieve a polished finish, sand the wood using a hand sander and sandpaper.
    I prefer to use the Black and Decker mouse sander for these small jobs.  This step is crucial for achieving a professional look.

  • Paint colors:  Pumpkin Orange, White and King's Gold acrylic paint, from Walmart.

  • Step 4: Painting the Candy Corn

  • Now comes the fun part—painting! Use painter's tape to section off each color. Begin by applying a layer of yellow paint to the wider base of the candy corn. Once dry, use orange paint to cover the middle section. Finally, paint the narrow tip white.

    Allow each layer to dry completely before moving on to the next. You may need to apply multiple coats to achieve the desired vibrancy.

  • It took 3 coats of paint to get good coverage.  I removed the painter's tape before it totally dried and then let that step dry really good under the ceiling fan before moving on to the next color.


  • Step 7: Finishing Touches

  • For my final touches, I used the mouse sander again and distressed the top and front sides.  Then I added a bit of raffia to go along with the look of my black cats and pumpkin and I was done!  If desired, apply a sealant or clear varnish to protect your candy corn and give it a glossy finish. This step is optional but can enhance the overall appearance and longevity of your project.

  • Congratulations, you've just created a charming wooden candy corn masterpiece! Whether you choose to display it as part of your seasonal decor or give it as a unique gift, this DIY project is sure to add a touch of whimsy to your home. So go ahead, embrace your inner artisan, and let your creativity shine. Happy crafting!

  • For more fun Fall ideas, go visit my Instagram. I post every single day. Find me @TexasBlueBunglaow on Instagram.

    1. If you loved any of these ideas and want to save them for later, be sure to pin it to your favorite Pinterest board.  I have a Pinterest board set up for all kinds of Fall Decorating ideas and it's called Fall Decor to Try.  I'm pinning something new on Pinterest every day. Won't you join me?

      ***I am a participant in the Amazon Services LLC Associates Program, an affiliate advertising program designed to provide a means for me to earn fees by linking to Amazon.com and affiliated sites.**


Pin It!
01 09 10