Showing posts with label Living Room. Show all posts

Sunday, April 26, 2020

How to Makeover a $35 Couch with a Slip Cover

Hello there! I hope this day finds you happy and healthy!  We are hanging in over here!  I'm still going to work and the patient load is still very low.  In our area they are slowly opening up some businesses, but mostly its all still the same as it was.

Excuse my Easter decor, but I received this couch cover back around that time and I'm just now getting around to reviewing it for you.  Long story short, this couch cover is amazing!

We've had this couch for a while now.  It made it through the move with us and it's a pretty comfy couch, but it needed a little pick me up!  Ok look at it!  Would you have known that there was a couch cover on here if I didn't just tell you? Maybe not?  The cover is all one piece.  It reminds me of a fitted sheet with a few extra pockets for the arms.
This is how it comes to you.  Ours is a Subrtex in the size Large and the color Ivory.  There are lots of colors to choose from.

I'm not going to lie, I was a bit skeptical when I first  took it out of the shipping box.  Then I opened it up and it was the softest material, oh my goodness!  Then, I pulled it out of the package and thought to myself, "This is not going to work!"  But it did, perfectly too!
BEFORE:  This is our $35 bargain couch that I found on Facebook Market Place.  It was in excellent shape but really dirty when my husband brought it home.  He didn't think it was going to work out, but I told him I'd try and clean it up with our portable carpet cleaner.  I took the cushion covers off and through them in the washer and then cleaned the rest of the couch and pillows with the carpet cleaner.  It was like brand new when I finished about an hour later!

As you can see, it doesn't have a typical back on it, it has lots of big pillows for the back cushion.  This is the reason I thought this cover may not work.

You can also see the big beautiful pom pom throw over the arm and that big beautiful cat laying there too, right?  Our three cats think that arm that the throw is over is their scratching post! Grrrr!

P.S. This is why we spend $35 on couches!  We love our cats like children, but I don't know how to make them NOT scratch the furniture! And NO, we do not believe in removing their claws! That is cruel and unusual punishment! They are cats! Oh and YES, they have a scratching post which they do use as well.
Anyway, look!  It fits perfectly and you can barely even tell that there is a cover on it!  It is super comfy to sit on and it actually stays put no matter how wiggly you are on the couch!

PRO TIP:  To put the cover on, I started at the bottom front edge and worked my way up to the back.  Tucking and straightening as I went, first one side then the other. After you get the entire cover on, just straighten the seams up with the lines of your couch. EASY!  I put this cover on by myself, with no second person needed.

NOTE: The back of the couch does show, so if your couch doesn't sit against a wall like ours does, this style may not work for you.
Best of all, you can take the cover off and wash it.  I just throw it in the washer on the gentle cycle and tumble dry on low heat.  So, if you've been wanting to try a slip cover, this is a very affordable one to try.  We are really enjoying ours! CLICK HERE to get you one too!

If you missed reading my last post RIGHT HERE, pop over and check it out. I have a discount code for you!

If you loved this idea and want to save it for later, be sure to pin it to your favorite Pinterest board.  I have a Pinterest board set up just for all things crafty called Farm House Decor Ideas and all kinds of other fun stuff and, I'm pinning something new every day. Won't you join me?

GREAT NEWS!  I now have an Amazon Storefront!  If you ever want to purchase anything I'm showing you here, you can pop over to my shop and see what I've picked out for you! Click right here to visit. You can find this bedspread in the "For Our Home" section.

It doesn't have to be done all at once.  It is a slow process in the works! C-ya next time!


Pin It!

Sunday, August 19, 2018

Building a Recessed Shelving Unit

Our home is small and there wasn't really a designated area in the living room for the TV.  The way the living room is laid out, you would think you'd need to put the TV area on one of the side walls.  Well, to us that would have made the room even smaller, so we decided to hang the TV over the fireplace.  Problem was, there wasn't anywhere for all the little black boxes to live.
As you can see just to the right of the fireplace, my honey created a space by building a recessed shelving unit.  Now all the little black boxes and a few pieces of decor have s spot to live!
Here's a blurry picture we snapped while touring our home before we bought it.  We knew right away that paneling had to go!  It was covering every wall in our tiny living area.
This is after we took all the ugly paneling down and my honey's Dad textured and painted the walls.  Ah, fresh and clean and no ugly paneling left now.  Also, still no storage for much at all either.
First we decided on the size that the shelving unit needed to be.  Our space allowed for 25 inches wide and 5' 7" tall.

This is a shot of the demo taking place to install the new unit.  FYI...cutting into dry wall with a power saw created LOTS of dust so wear a dust mask and be prepared to lots of cleaning up afterwards.
Here you see the freshly built cabinet installed into the space which happens to butt up to a tiny little closet in my craft room. This little closet is what allowed us to add the shelving unit for some much needed organization.
Using brown paper and painter's tape, we taped it all off and used the same paint color as the walls to finish it out.  The paint color is called Thin Ice.  Its hard to tell in these pictures, but its a very light color of gray.  The completed cabinet is 5' 7" tall x 25" wide x 13" deep and is constructed from 3/4 inch plywood and screwed together with 1-1/2" wood screws.  The shelf cleats are 1 x 2s cut to fit and spaced about 10" apart except for the top one and its slightly smaller.
Then my honey added the rough cedar trim which I stained to match the existing beams and trim already present.
Lastly, he added the trim on each shelf to hide the shelf cleats.  Perfect!  It helps us out tremendously and keeps all the little boxes neat and tidy!  He used his hole saw to drill holes in a few of the shelves and set it up to where all the electrical parts are accessible in the tiny closet in the other room.  The tiny closet also houses our internet network as well. Fancy huh?! :)
I can't tell you how proud I am to have my honey be able to create these awesome projects in our home, he's the best! :)

Here are two more projects we've done in this area:


It doesn't have to be done all at once.  It is a slow process in the works! C-ya next time!

I'm Linking to:
These lovely and FUN parties!
Between Naps on the Porch
The Dedicated House  - (I was featured)

Pin It!

Sunday, December 3, 2017

How to Create a Gorgeous Holiday Mantel on the Cheap!

You don't have to spend a lot on decorations to make your home look beautiful this holiday!  Try shopping your own home to see what you have before spending loads of money on holiday stuff!
I spent a total of $6 on our mantel this year.  I bought the two candles at the Dollar General on Black Friday for $2.50 each and I found the "Merry Christmas" sign at the Dollar Tree for $1! Bargain!  All the other items you see here I have collected over the years.
I knew I wanted a lit garland on the mantel, so I went to our Christmas goodies to see what we had.  I grabbed some twinkle lights and faux garland.  The garland was really long so I folded it in half and twisted it a bit to hold it.  Next I wrapped the lights around it to hold it all together.  Our mantle is a little over 5 foot long, so this was just right.
Next I shopped my stash of holiday picks.  I've saved these from fresh wreaths we've had in the past and my Mama saves things for me too. *wink*  I also went to my craft supplies and grabbed a ribbon and some baker's twine.  You'll see why shortly.

I placed the garland with lights up on the mantel and made sure the lights still worked after I "man-handled" them to get them wrapped up on the garland. Next I added my sign. Looking cute so far!
Then I added my sweet little bargain candles that smell delicious!  I just sat them in a vintage plate for added charm and protection.
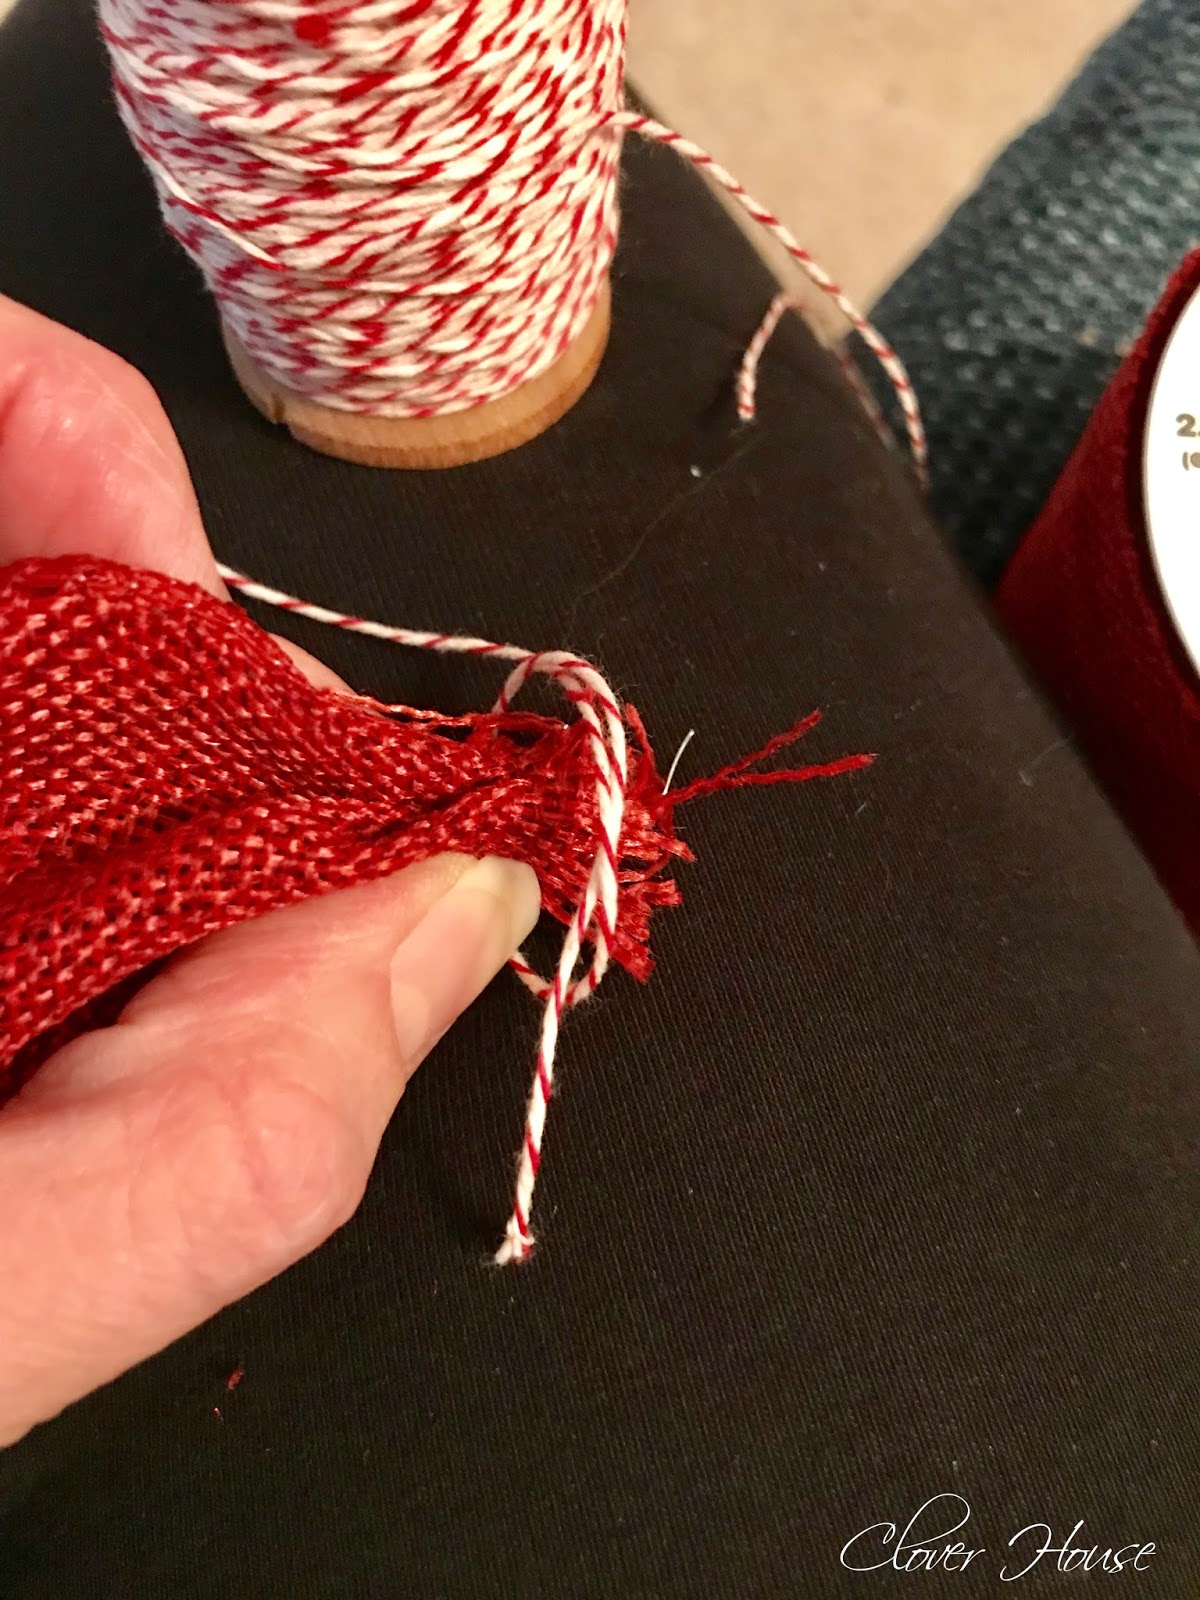
Now to decorate the garland.  I used this method of making little poofs so I didn't waste too much of my ribbon.  Cut your ribbon to size (depends on what look you want) and then tie the end with a small piece of twine to hold it all together.
Now you're ready to tuck them in here and there and everywhere.
I just placed them around the garland and then stepped back to see if it looked even to me. Anything YOU like is fine!
Next I just grabbed my floral holiday picks and started tucking them in here and there.  Again, no right or wrong here, just make it look the way you want it to.
I tied a regular bow for the center of the mantel and I added it right above the sign.  I made mine with long streamers so they could come down and tie the sign in to the whole set up.

Keep adding your picks and poofs until its just the way you like it.  I would just add a few things and then step back and see if it was all even looking and then go on from there.
Do you see the "cute" vent peeking through and disturbing my pretty mantel look?  Those are for when we use the fireplace, but that is rare because we live in Texas yall and its not normally cold enough for a fire, but anyways.  I thought of a way to "cover" them up.
I added a plastic plate charger that I got from Walmart a few years ago.  You can usually get these for $1 in most places.  Shop your stash yall!  Also, if we want to use the fireplace, I will just remove the chargers and we'll be good to go.
I snapped several pictures for this post and when I looked back at them all I could see is the little vent peeking through and looking at me!
And now you're just glowing in the back ground little vents! Um, no!  Let's fix that right now!
BAM!  No more vents peeking through!  Thanks for your service $1 chargers!  Of course all of this is temporary and when the holidays are over you can just take it all down and save it for another look some other year.

Want to see more Christmas Ideas?  Click on the links below.

Vintage Tablecloth Curtain - The Christmas Version

How to Make Stove Top Potpourri

Countdown to Christmas with Free Printables

Peppermint Pretzel Bark - A Sweet Little Gift 

Clothespin Snowflake Ornament

DIY Vintage Christmas Decor

Christmas Shutter Decor

Clothespin Christmas Tree

Our Front Porch Tree

How to Wrap a Gift

Our Burlap Forest

Twig Snowflake Ornament

It doesn't have to be done all at once.  It is a slow process in the works! C-ya next time!

I'm Linking to:
These lovely and FUN parties!
Between Naps on the Porch
The Dedicated House  - (I was featured)

Pin It!

Sunday, November 25, 2012

DIY Carpet Cleaning

A few weeks ago we decided to clean our very light colored carpet.  It was very dirty due to all the traffic from the back door (our main entry) and I could no longer stand to look at it.  My Honey came to my rescue!

I learned a long time ago not to use soap to clean carpets from a professional carpet cleaner, she says it causes them to be sticky.  We knew we needed something more natural, so we decided on a combination of warm water, vinegar and Oxy Clean.
DIY Carpet Cleaning Mixture:
2 1/2 cups of distilled white vinegar
2 scoops (4 tblsp) of Oxy clean
Warm to hot water to the fill line on the tank

The clean water tank on this particular machine was about 2 to 2 1/2 gallons capacity. 

NOTE:  Although this mixture worked for our light colored carpet, I'm not sure about using Oxy Clean on darker colored carpets, so be sure to test it before you start just to be safe.  Yes, there will be a slight vinegar odor, but it dissipates in about 24 hours time.
We rented the Bissell Big Green machine at our local Lowe's for $24.99 plus taxes. Its a 24 hour rental.  This machine is awesome just in case you are wondering.  We will be using it again in the future.
You can see here how dirty our carpets were.  The left side is the cleaned carpet and the right is still dirty.  The light spot to the right is where I had cleaned up a pet stain earlier in the week.
My guy actually spent a full 8 hours cleaning our carpets.  They were filthy.  To be honest with you, we did not know just how light colored the carpet really was until after he was done.  You can see in this picture the vertical lines.....he cleaned the whole room in one direction and then cleaned it again in the opposite direction.  I'm so glad he did this. What a difference!
The next morning it was completely dry and he vacuumed the entire room just to fluff it up, it was so pretty and most of all clean. No more stains. Thank you Honey! :)

Some day we will install a nice wood flooring, but for now we know how to make our carpet pretty when we need to!

Want to see more of my cleaning tips for using vinegar? Just click on the links below.


Cleaning an HE Washer with Household Products

Remove Hard Water Buildup Naturally 

DIY Carpet Cleaning 

Cleaning Your Hairbrush the Easy Way 

Cleaning Your Oven

Cleaning Your Sink's Spray Nozzle


THIS JUST IN: Did you know you could use COUPONS on Amazon? Me either, but look right here for all your favorites and start saving, I am! :)

It doesn't have to be done all at once.  It is a slow process in the works! C-ya next time!

I'm Linking to:
These lovely and FUN parties!
Between Naps on the Porch
The Dedicated House  - (I was featured)

Pin It!

Sunday, November 18, 2012

Entry Hall Table Makeover

We wanted a hobby we could do together and make a little extra cash at. We decided on refinishing furniture.  This is our very first project. Let us know how we did! :)

My guy was in a new resale shop in our neighboring town and happened upon this diamond in the rough.  He paid $50 for her.
Our dining room table that we use daily is similar to this one and this look is what we want to have ours turn out like, so we experimented with this nice little entry hall table first just for practice.
We just assumed it was a dining room table when my honey brought it home and never knew it was an entry hall or foyer table until the day we actually placed the two pieces together.  She was a shorty!  It was in 2 pieces at the resale shop and it stayed in pieces for many weeks while we worked on it.  We were a bit bummed it wasn't a dining room table, but we carried on anyways.
There was lots of sanding to do and also some repairs of the base were needed.  It was cracked and falling apart.  It came with only 3 original castors.  Well, original to the person who refinished it before we did, I don't think it came like that originally, but maybe it did.  The table is a bit of a Frankenstein, but still functions perfectly the way they rebuilt it. Some new parts and some old parts were used.
I decided on a very dark top and a lighter base color.  The pretty wood grain just popped with all its beauty when I added the stain.  I used Minwax Dark Walnut #2716 stain and Minwax Fast Drying Polyurethane Clear Satin (4 coats) to make sure it has a very long life.
The bottom was first primed with Zinsser Primer Ultimate Stain Blocker, excellent for blocking previously stained surfaces. No sanding required, just add the primer and then paint.  For painting we used a small amount of a gallon of Valspar $5 bargain paint from Lowe's in a mushroom color and then antiqued it with an almost black antiquing glaze by Valspar in the color of Asphaltum #98278.  We sealed the painted parts with Valspar Clear Protector for faux finishes.
You can still see it's cracks and years of wear, but I think it gives the vintage table character. I love it! The only sanding we did was on the top. We love the roughed up look.  We bought 4 new casters for her. They started out a putrid lovely gold tone finish but we ORB'ed them and they looked wonderful and looked like they came with the table.  The center shot shows how the wood grain catches the antiquing.  The 3rd picture is the after top in the natural sunlight. Pure BEAUTY! :)
Lovely isn't she? I wanted to keep her but that was not what we had planned so she now lives with a new family.  We are in search of our next project now.  See the Fall vignette on the table up there?  It's Our Thankful Tree for this year,  to see that post, go HERE.

THIS JUST IN: Did you know you could use COUPONS on Amazon? Me either, but look right here for all your favorites and start saving, I am! :)

It doesn't have to be done all at once.  It is a slow process in the works! C-ya next time!

I'm Linking to:
These lovely and FUN parties!
Between Naps on the Porch
The Dedicated House  - (I was featured)

Pin It!

Sunday, November 13, 2011

Clover House and Easy Canvas Prints

Happy Sunday!

Have you heard of Easy Canvas Prints?  Yes, No...Maybe so? Well, those fine folks contacted me and asked if I'd be interesting in trying one of their canvas prints and writing a review about them.  Of course I said YES!  I already had today's project in mind so we made a print to go on our collage wall.  More about that further down in the post.

I worked on our wall collage project several weeks back, but I'm just now getting the chance to post it. I'm still not completely satisfied with the whole design, but I love the idea and the color!
I love to scan through Pinterest and there are a million and one ideas for collage walls, this is where I got my inspiration for our wall collage.
This is a very picture heavy post, but stay with me, I just wanted to show you the process I took to create our wall collage.
First I gathered several frames and mirrors I've been collecting from yard sales, auctions and thrift shops and arranged them how I thought I wanted them to look on the wall.
Then I grabbed my spray paint.  I used Valspar white primer and Rustoleum's Fern Green for my color of choice. Yeah, I said green....who knew it would jump out at me when I went paint shopping!  {FYI, I used a can and a half of the green paint.}
I removed the mirrors and glass and cleaned each frame really well. {Another FYI, be careful with the mirrors, they WILL cut you! Yikes! Ouch!}
I primed first. Just enough to cover with one good even coat. Let dry for the time directed on the spray can.
Then I added the color! WOW! Isn't it beautiful and bright?  I knew then this collage would add some color to our pretty much all white living room.
Here's all my pieces drying under the ceiling fan. I wanted to make sure they weren't tacky when I started handling them all for reassembly.
Ok, remember I spoke about Easy Canvas Prints at the top of the post?  This is our canvas print.  We found the saying on Pinterest HERE.  Then I created our print in Photoshop.  See how the upper right corner says "Auction Sale"...we love auctions, so when I saw this old ledger paper from Raspberry Road Designs, I knew I needed to use it for our print.
I added the vinyl hearts as an after thought when I was "framing" the print.  I wish I would have thought of them while creating the image.  Our canvas is 11" x 14", but they have all sizes, even really big ones if your heart desires.  It was less than 2 weeks from the time I ordered our canvas till the time we received it. FAST service!  I would definitely use them again in the future!
That's all for today. We still have loads to do, just not the time to do it right now.  But sometime very soon it will all get back to normal.  Some other day I will tell you about the framed "art" in the upper left corner of our collage wall. Can you tell what it is?


It doesn't have to be done all at once.  It is a slow process in the works! C-ya next time!
I'm linking up with:

Pin It!
01 09 10