Showing posts with label Recipes. Show all posts

Sunday, August 10, 2025

Sour Cream Blueberry Muffins that Melt in Your Mouth

 A soft, bakery-style muffin bursting with blueberries and a hint of tangy richness.

There’s something magical about a tray of muffins fresh from the oven, the way the tops rise into golden domes, the sweet scent of berries filling the kitchen, and that first bite when the still-warm blueberries burst with flavor.

These sour cream blueberry muffins are my go-to when I want something a little extra special without a lot of fuss. The sour cream makes them incredibly moist and tender, while the blueberries give that pop of juicy sweetness in every bite.

Whether you enjoy them with your morning coffee, pack them for a picnic, or bring them to share with friends, these muffins always disappear fast.

Why You’ll Love Them Too

  • Bakery-style domed tops without fancy equipment

  • Extra moist and tender crumb from full-fat sour cream

  • Bursting with blueberries (fresh or frozen work beautifully)

  • Easy to make ahead because they freeze well

Recipe: Sour Cream Blueberry Muffins
Makes: 12 muffins
Prep time: 15 minutes
Bake time: 20–22 minutes

Ingredients

  • 1 ½ cups all-purpose flour

  • 2 tsp baking powder

  • ½ tsp baking soda

  • ¼ tsp salt

  • ½ cup unsalted butter, softened

  • 1 cup granulated sugar

  • 2 large eggs

  • 1 tsp vanilla extract

  • 1 cup full-fat sour cream

  • 1 ½ cups blueberries (fresh or frozen, see tip below)

  • 1 tbsp all-purpose flour (for tossing blueberries)

  • Optional: coarse sugar for sprinkling tops

Instructions

  1. Preheat oven to 375°F. Line a 12-cup muffin tin with paper liners or grease lightly.

  2. Mix dry ingredients: In a medium bowl, whisk together flour, baking powder, baking soda, and salt. Set aside.

  3. Cream butter & sugar: In a large mixing bowl, beat butter and sugar with an electric mixer until light and fluffy, about 2–3 minutes.

  4. Add eggs & vanilla: Beat in eggs one at a time, then stir in vanilla.

  5. Add sour cream: Mix in sour cream until smooth.

  6. Combine wet & dry: Gently fold the dry ingredients into the wet mixture until just combined, don’t overmix; the batter should be thick and slightly lumpy.

  7. Prepare blueberries: Toss blueberries with 1 tbsp flour (this helps prevent sinking) and gently fold into the batter.

  8. Fill muffin tin: Divide batter evenly among muffin cups, filling each about ¾ full. Sprinkle with coarse sugar if desired.

  9. Bake: 20–22 minutes, or until a toothpick inserted in the center comes out clean.

  10. Cool & enjoy: Let muffins cool in the pan for 5 minutes before transferring to a wire rack. Serve warm or at room temperature.

Tips for the Best Muffins

  • Frozen berries: Use straight from the freezer, no thawing. Add 2–3 minutes to baking time.

  • Don’t overmix: This is the #1 way to keep muffins light and tender.

  • Extra flavor boost: Add a pinch of lemon zest to the batter for a fresh twist.


Storing & Freezing

  • Store in an airtight container at room temperature for up to 3 days.

  • Freeze in a freezer bag for up to 2 months. Thaw at room temperature or warm in the microwave for 15–20 seconds.


Serve these with a pat of butter or a drizzle of honey for an irresistible breakfast treat.


Bakery-Style Blueberry Muffins at Home

Pin It!

Sunday, July 13, 2025

Easy Homemade Refrigerator Pickles

There’s nothing like that first crunchy bite of a homemade pickle, and when the cucumbers come from your own backyard? Even better. This easy refrigerator pickle recipe is one of my favorite ways to use up a garden haul. No canning required, just a few simple ingredients and a little fridge time.

If you’ve got fresh cucumbers, garlic, black peppercorns, and some dill (fresh or dried) on hand, you're just a few steps away from the best little pickles you’ll ever make!

Ingredients:

  • 3 - 4 small cucumbers, sliced into spears or rounds

  • 3 garlic cloves, smashed

  • 1 tablespoon black peppercorns

  • 1 tablespoon dried dill (or 3 sprigs of fresh)

  • 1 cup white vinegar

  • 1 cup water

  • 1 tablespoon salt

  • 1 tablespoon sugar (optional, but I like to add just a bit for balance)

  • NOTE: I use these jars and I love them!


Instructions:

  1. Prep the cucumbers.
    Wash and slice your cucumbers however you like, spears, chips, or even ribbons if you're feeling fancy.

  2. Fill your jar.
    Pack the cucumbers into a clean mason jar. Tuck in the garlic cloves, peppercorns, and dill as you go.

  3. Make the brine.
    In a small saucepan, combine the vinegar, water, salt, and sugar. Bring to a gentle simmer, stirring until everything is fully dissolved.  LET COOL COMPLETLY for crunchier pickles.

  4. Pour the brine.
    Carefully pour the cooled brine over the cucumbers until they’re completely covered.

  5. Clean up and chill.
    Clean up the outside of the jar and then seal it with a lid and pop it in the fridge. The pickles will start to develop flavor in about 24 hours, but they’re even better after 2 - 3 days.


Storage:

These refrigerator pickles will stay fresh in the fridge for up to 2 - 3 weeks (if they last that long!).


Why I Love This Recipe:

  • It’s a no-fuss way to preserve fresh cucumbers.

  • You can tweak it with other spices like red pepper flakes or mustard seeds.

  • No special equipment needed, just a jar and a few pantry staples.

  • It’s perfect for gifting, snacking, or adding a tangy crunch to your summer meals.


Quick Tip:

If you want to get extra fancy, try adding a few slices of onion, a pinch of celery seed, or even some thinly sliced jalapeƱo for a spicy twist.


I make pickled onions too, let me know if you want me to share that recipe also.


Pin It!

Sunday, August 27, 2023

Crafting Delightful Faux Pumpkin Cookies with Polymer Clay

Hey there! I hope y'all are doing well.  I once read that broken cookies have no calories.  Well, I have an absolute calories free cookie for you today!

As the autumn breeze starts to whisper through the air (remember, just not in Texas right now), the season of pumpkins and cozy gatherings is just around the corner. If you're looking to add a touch of seasonal charm to your decor, why not try your hand at crafting faux pumpkin cookies out of polymer clay? This delightful DIY project allows you to create everlasting pumpkin-themed goodies that can be cherished year after year. In this blog post, I'll guide you through the step-by-step process of making these adorable and lifelike faux pumpkin cookies using polymer clay.

If you're not crafty and want to purchase these cookies, check out my Etsy Shop!


Materials You'll Need

  1. Polymer clay, I used air dry but will be trying the baked version soon.
  2. Rolling Pin
  3. Waxed or Parchment Paper
  4. Knife or clay cutting tools
  5. Craft Paints
  6. Paint brushes
  7. Antique Glaze
  8. Toothpick
  9. Cookie Cutters - I have this one and the larger one is vintage and no longer available.
  10. Baking sheet and oven (for the clay that needs to be baked).
  11. Gloss glaze (optional, for a shiny finish).

  12. FUN FACT: I used to collect cookie cutters when my boys were small, so I dug into my stash and found the cutter on the right hand side. It's marked .69 cents. You can not find them that cheap any longer, unless you thrift one. Actually, they are no longer available in stores.

  13. Shape the Pumpkin Body: Condition the clay by kneading it until it's soft and pliable. I just stored mine in the garage where it stays warm constantly, day and night. Roll it into a ball and then flatten it slightly to form the base of your pumpkin cookie. You can use your fingers or a rolling pin roller for this step. I placed my clay between two pieces of parchment paper and rolled it out with a rolling pin.

  14. Create the Pumpkin Cookie: After you roll out your clay to about a 1/4" thick, cut out your cookie shapes. I used my large cutter to cut out the pumpkin shape and then the smaller cutter with the plunger to make the face and other lines.


Add Textures:
For a realistic touch, I used this cutter from Michaels, it was a perfect face and details. Of course, you can also use a knife and cut out your own face and create your own lines, which is what I did on my trial run before the fancy cutters.

Form the Layers: You will need one layer with a face (top) and one layer plain (bottom). In essence you need two cut outs for each cookie.


Create the Face:
Take a knife and carefully cut out the eyes, nose and mouth. Smooth rough edges with your fingertips.

Add Layers Together: For a realistic looking cookie, you want it to be thick, so adding the cutout layer to the plain layer will create the illusion of a real cookie. Use your fingertips to smooth out the seams.

Form the Details: After you have the seams smoothed out and looking the way you want it, you can use a toothpick or needle tool to make the small lines around the edges, this also helps to seal the two layers and adds to the realism.
Bake or Air Dry the Clay: Air Dry for 2-3 days. If you use the baking clay, preheat your oven according to the instructions on your polymer clay package. Place your pumpkin cookies on a baking sheet lined with parchment paper and bake them according to the recommended temperature and time. Be cautious not to overbake, as it may cause the clay to darken.
NOTE: My air dry cookies take 3 days inside the air conditioning to dry, I'm currently trying a batch in the hot garage to see how long that takes them out there.
Choose Your Paints: These are the paints I chose to create my baked cookie look. I used Orange for the eyes, nose and mouth. I mixed the Lite Mocha and Golden Sunset to achieve the cookie color and then finished everything up with the Waverly Wax in Antique to arrive at the baked look.
Painting the Cookies:
You will need to experiment and practice to arrive at the finished look. It's a process. Mix your paints until you like the look, but remember the antique wax will darken the end results.

Adding the Wax:
For a realistic look, I added the wax in small amounts around the edges making sure to get it down in the crevasses. Using a flat paint brush, gently press the wax into the all the fine lines around the pumpkins. The edges will be darker than the center.

Finishing Touches: Using a damp cloth, buff out the remaining wax to achieve the just right baked look you want. I felt like the eyes, nose and mouth were a bit too bright, so I toned them down with a dry brush method using the antique wax. Perfection!
Crafting faux pumpkin cookies out of polymer clay is a wonderful way to embrace the beauty of autumn and infuse a touch of creativity into your decor or accessories. With just a few simple materials and a little patience, you can create lifelike pumpkin cookies that will last for years to come. Whether you're an experienced clay artist or a beginner looking for a fun project, this DIY endeavor is sure to bring joy and a sense of accomplishment. So, gather your materials, unleash your imagination, and start crafting your very own pumpkin-inspired treasures!

Also, they will never go bad and they are definitely calorie free! Heehee!

If you're not crafty and want to purchase these cookies, check out my Etsy Shop!
  1. For more fun Fall ideas, go visit my Instagram. I post every single day. Find me @TexasBlueBunglaow on Instagram.

  2. If you loved any of these ideas and want to save them for later, be sure to pin it to your favorite Pinterest board.  I have a Pinterest board set up for all kinds of Fall Decorating ideas and it's called Fall Decor to Try.  I'm pinning something new on Pinterest every day. Won't you join me?

    ***I am a participant in the Amazon Services LLC Associates Program, an affiliate advertising program designed to provide a means for me to earn fees by linking to Amazon.com and affiliated sites.**


Pin It!

Sunday, July 31, 2022

How I make Single Serve Sun Tea

Hello there!

Sweet or Unsweet?

Here in Texas we love our sweet tea, with ice.....in case you didn't know.  It's especially refreshing on our 100 plus degree days in the summertime.  We've had 34 of those days so far in 2022 and it's not even August yet!

OMGoodness!

Once upon a time I wrote a post on my secret to the best sweet tea.  It was for a gallon size and not a single serving.  You can see that here.

In this post I'm going to share with you how I make a single serving of the best sweet tea!  The actual best part, no heating up the kitchen stove!

You will need the following items to make my single serving sweet tea:

1 pint jar with lid (preferably glass)

1 family size tea bag - I like my tea strong, so adjust to your liking.

Water - I use bottled water because I am not boiling the water.....or am I? LOL!

Mint (optional)

Sugar

Sunshine - 2-3 hours worth
 

Fill your jar with water, leaving room for the tea bag.

Add the tea bag to your jar of water, push down to wet the paper.

I added mint from my half dying herb garden, just for fun!

Place the lid on tight.

Sit your jar in full sun for about 2-3 hours.

It was still 105 degrees when I brought my tea in a little after 6pm!  It's ridiculous here yall! Help!

Remove the tea bag, squeeze, trash or throw into your compost bowl.

Remove your mint leaves if you added them.  You would add sugar at this point as well, if you prefer it.

Pour over LOTS of ice, the tea is still hot and will melt the ice slightly to add water to you mixture.  If you prefer to drink it hot, you may need to add some hot water as well, its up to you!

My plastic glass and straw are by Pioneer Woman, from Walmart. THIS is my coaster set, also PW.

Garnish with mint and enjoy!  Patio sippin' is best, but sip anywhere that makes you happy!

I hope you get to try this soon and enjoy it as much as I do!

If you loved any of these ideas and want to save them for later, be sure to pin it to your favorite Pinterest board.  I have a Pinterest board set up for all kinds of food and drinks and its called YumminessI'm pinning something new on Pinterest every day. Won't you join me?

***I am a participant in the Amazon Services LLC Associates Program, an affiliate advertising program designed to provide a means for me to earn fees by linking to Amazon.com and affiliated sites.***

Pin It!

Sunday, March 21, 2021

An Easter Spin on Deviled Eggs - How to Make Deviled Egg Chicks

Hey there!  We are just days away from Easter now and I have a fun idea for your Easter lunch this year!

My granddaughters are going to love this! Let's make Deviled Egg Chicks!

Deviled eggs are a staple at our Easter lunches. We love them!  There are many ways to make deviled eggs, but this is how we like them.

DEVILED EGGS

Eggs - 18

Mayo - 1/2 cup

Mustard - 1 tsp

Sweet Relish - 1/4 cup

Sometimes I sprinkle a little dried dill too!

I don't normally measure my ingredients, I just add a little of each and mix together, but above is my guesstimate of ingredients for you.

  1. Boil eggs (I add 1/4 tsp of baking soda to the boiling water to help peeling easier). Bring to a full rolling boil for 5 minutes, turn off heat and cover for 20 minutes.  Cool in an ice bath, peel and rinse off.
    Slice eggs in half (in the middle of the egg instead of the normal lengthwise) remove yolk into a bowl and then place the empty eggs whites on an egg tray or platter.
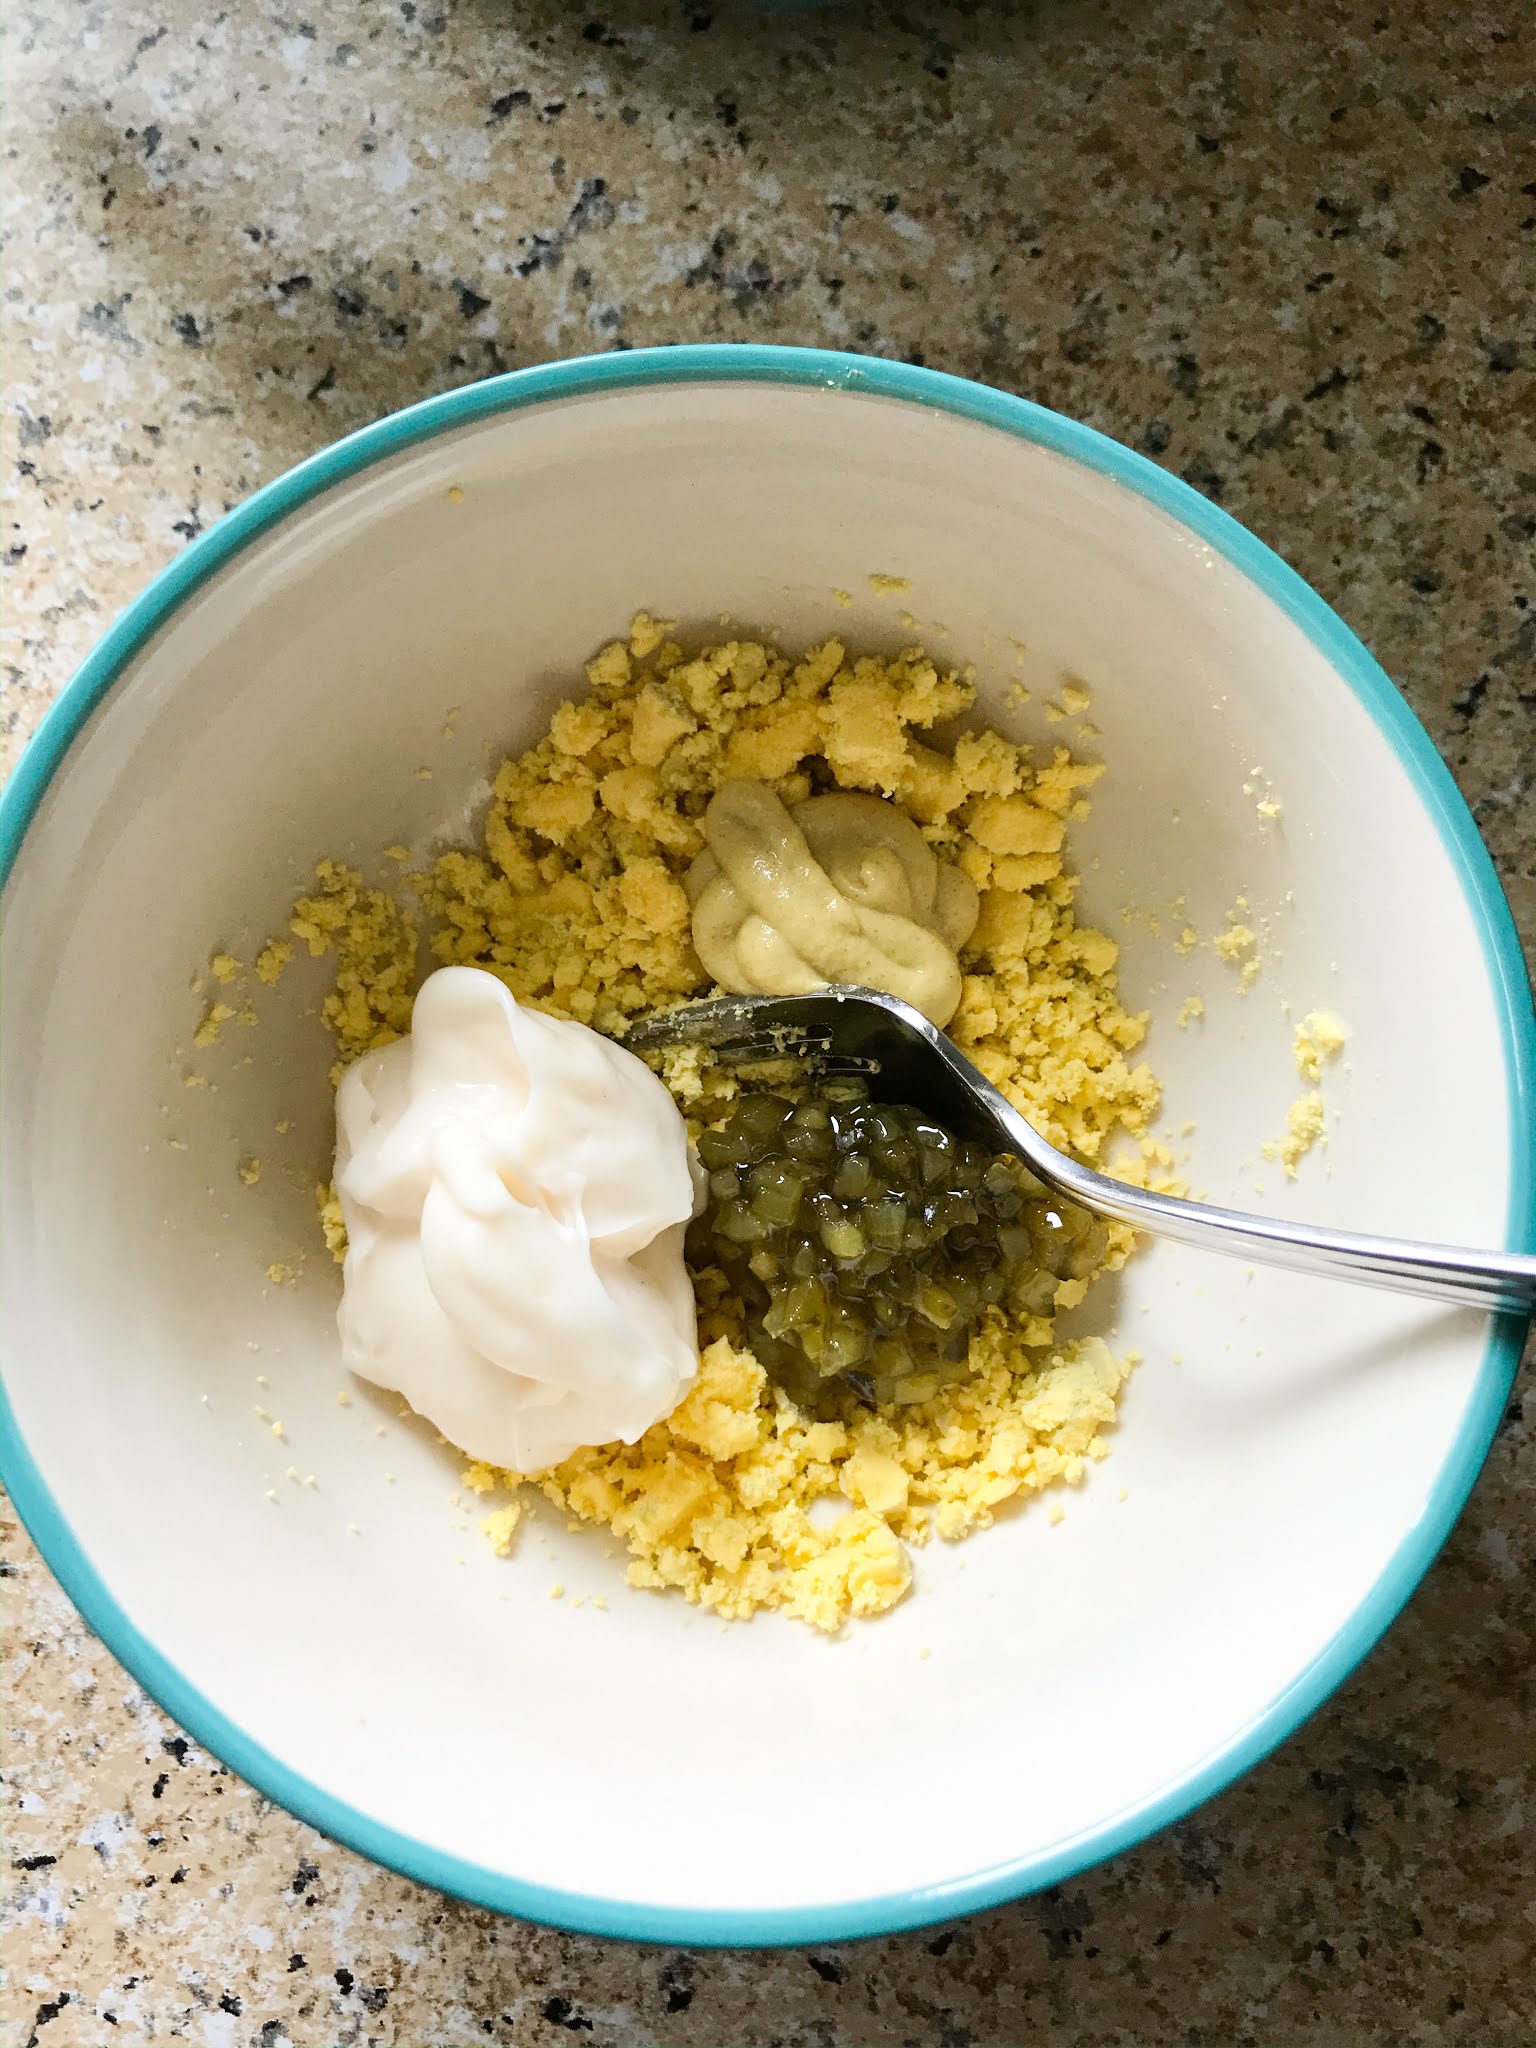
  2. With a fork, mash the egg yolks you placed in the bowl.  Add Miracle Whip, mustard and sweet pickle relish. Blend well.
  3. Transfer the mixture to fill your egg halves with using a zip lock baggie (see below). Fill each half with the mixture.
  4. Add a triangle shaped piece of carrot for the beak and tiny pieces of black olive for the eyes.  Optional: Use peppercorns or tiny dots of black gel icing for the eyes.

NOTE: Photos below are me making a small batch (test run) for my hubs and I.


You can certainly use your adorable deviled eggs for decor on your Easter table, but they probably wont last long, or at least at my house they don't!

Visit me over on Instagram @texasbluebingalow for pretty views of my vintage decor!

If you loved this idea and want to save it for later, be sure to pin it to your favorite Pinterest board.  I have a Pinterest board set up for all things related to Easter and Spring and its called Here Comes Peter Cottontail and I'm pinning something new every day. Won't you join me?

GREAT NEWS!  I now have an Amazon Storefront!  If you ever want to purchase anything I'm showing you here, you can pop over to my shop and see what I've picked out for you! Click right here to visit.
 

It doesn't have to be done all at once.  It is a slow process in the works! C-ya next time!

Pin It!
01 09 10