Showing posts with label Wreath. Show all posts

Sunday, October 29, 2023

Crafting a Literary Masterpiece: Rolled Book Page Wreath

Hey there! I hope you are doing well.  We are getting some much needed rain here in Texas and a cold front has moved in. Am I complaining? No ma'am, I am not.  It's wonderful, even if I do hate the cold weather!

Anywhoobs, let get on to the project today.  I'm going to show you how to make a wreath using rolled book pages.  If you're a book lover, you know that there's something truly magical about the feel and smell of old books. They hold a special charm, and what better way to honor them than by turning their pages into a beautiful wreath? In this step-by-step guide, we'll walk you through the process of creating a stunning rolled book page wreath that will not only add a touch of literary elegance to your space but also serve as a unique conversation starter.

This craft is simple, but time consuming so grab a drink and let's get to it!

  • Materials You'll Need:

    • Old Books: Choose books that are no longer readable due to damage or age. This way, you're giving them a new life and purpose.

    • Wreath Form: You can use a foam or wire wreath form, depending on your preference. A foam form will provide a more solid base, while a wire form allows for a more flexible design.

    • Hot Glue Gun and Glue Sticks: Essential for securing the rolled pages onto the wreath form.

    • Scissors: To cut out the pages from the book.

    • Ribbon or Twine: For tying the bundles and hanging the wreath.

    • Wooden Skewer: For rolling the pages.

    • Embellishments (Optional): This could include faux flowers, leaves, or any other decorations you'd like to add for a personalized touch.

    • Step 1: Prepare the Pages

      Begin by carefully removing pages from your chosen book. If the book is particularly fragile, consider using a craft knife to gently cut out the pages. Aim for a variety of page sizes and text densities to add visual interest to your wreath.

    • Step 2: Roll the Pages

      Take one page at a time and roll it tightly from one corner to the other. This will form a tube-like shape. Secure the end with a small dab of hot glue. Repeat this process for all your pages.


    • Step 3: Building Layers

      Wrap single book pages around the wire form and secure with hot glue.

    • This step is optional. I figured out after I was finished, that I did not really need or want it on there. I added some dried moss to the book pages.

      Step 4: Attach the Rolled Pages

      Start by gluing the rolled pages onto the wreath form. Begin on the inner or outer edge, and work your way around, slightly overlapping the pages to create a full, layered look. Be sure to press the pages firmly onto the form to ensure they're securely attached.


    • Continue adding layers of rolled pages until the entire wreath form is covered. You can alternate the direction of the rolls or vary the sizes of the pages to add depth and texture.


    • Step 5: Add Embellishments (Optional)

      If you want to add a little extra flair to your wreath, consider incorporating some embellishments. Faux flowers, leaves, or even a decorative bow can be attached using your hot glue gun.

      Step 6: Attach a Hanging Mechanism

      Flip your wreath over and attach a ribbon or twine to the back using hot glue. This will serve as the hanger for your masterpiece.

    • Step 7: Finishing Touches

      Inspect your wreath for any loose pages or areas that may need reinforcement. Make any necessary adjustments, and your rolled book page wreath is ready to adorn your space!

      Display Tips:

      • Hang your wreath on a blank wall to create a focal point in any room.

      • Use it as a centerpiece for a literary-themed event or as a decoration for a book club gathering.

      • Pair it with other bookish decor, such as vintage bookends or literary-inspired prints, to complete the look.

      Crafting a rolled book page wreath is not only a creative endeavor but also a wonderful way to pay homage to the written word. Each page carries the history and spirit of the book, adding a unique charm to your space. So, gather your materials, unleash your inner artist, and let your love for books shine through this one-of-a-kind creation!

      • For more fun Fall ideas, go visit my Instagram. I post every single day. Find me @TexasBlueBunglaow on Instagram.

        1. If you loved any of these ideas and want to save them for later, be sure to pin it to your favorite Pinterest board.  I have a Pinterest board set up for all kinds of beautiful wreath ideas and it's called Wreaths.  I'm pinning something new on Pinterest every day. Won't you join me?

          ***I am a participant in the Amazon Services LLC Associates Program, an affiliate advertising program designed to provide a means for me to earn fees by linking to Amazon.com and affiliated sites.**


Pin It!

Sunday, March 24, 2019

Farmhouse Spring Decor

I don't know about you, but I'm so glad that Spring is here! It brings with it, warmer weather and a fresh new start.  With that being said, that means a change of scenery in our home!  Let me show you a bit of the Spring decor I have up so far.
Let me just start by saying that we are on an extreme budget and I decorate our home using mostly things that I already have or a new find from a thrift shop or Goodwill, so CHEAP!  In case you can't tell, I love vintage farmhouse decor.
Another tip for you, shop at Dollar Tree for your florals.  They are only $1 per stem and they are pretty good quality for one dollar too.  I have so many different flowers from there and I just shop my stash when the season changes.
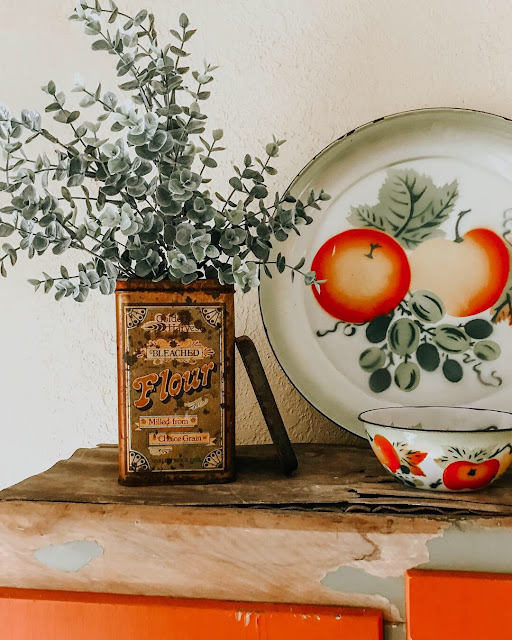
This flour tin is my latest treasure.  My youngest son bought it for me on our most recent junkin' trip.  I found the frosted eucalyptus stems at Marshall's.  There were 3 stems in the bunch for $9.99.  You'll see where I used one more stem in another spot further down in the post.
This was my coffee station done up for St. Patrick's Day.  I made the chalk board several years back and I change out the sayings on it to match the current season or holiday.  I've updated the color since I made it, you can see how HERE.
A few more little St. Patrick's Day decorations on my vintage mailbox wall, the little rag shamrocks that my honey and I made a few years ago and the paper shamrocks I made lots of years ago!
This is currently the look I have going on my mailbox wall.  Here's the last stem of eucalyptus that I stuck in the long mailbox.  This is the mailbox that I normally change out the florals in for each changing season.
I seriously love how this looks!  You can click here to see how I created this old book page/vintage mailbox wall.
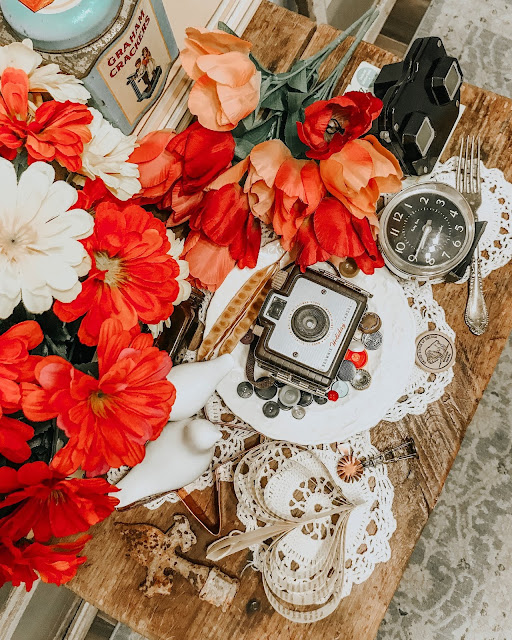
This is the small but tall farmhouse table that sits in our entry hall and I always change up the decor to match the seasons in here too.  Again, I shopped my house for lots of vintage goodies that I staged for a flatlay picture that I posted on Instagram.

Do you Instagram?  Please come follow along with me @ddcamp170  If you decide to follow me, let me know you found me here on my blog. :)
Now into our master bedroom.  This sweet bunny pillow cover that I got from Three Little Mommas is so very cute and my favorite of all times, but, its SOLD OUT!

GREAT NEWS: I will be giving away one of these bunny pillow covers along with a few more fun items on my Instagram to celebrate reaching 2K followers.  Come on over and enter for a chance to WIN!

Hurry, contest ends Friday March 29, 2019 @ 7PM CST.  CLICK HERE to enter.
Oh my goodness, she's so adorable!  These faux lavender stems are from the Dollar Tree.  $1 yall, go getcha some!  Speaking of lavender, did you see my lavender post?  Click here.
Eeeeek! So cute!  Ok, I'll stop with the bunny pillow now! :)
But, speaking of bunnies, look at how cute he is! He was a free printable from Pinterest.  I just printed him out and put him in this frame I made over.  See that HERE.

This little shelf is in our master bathroom. Click here to see that.
He's so adorable too! I love bunnies for this Spring season.....as if you couldn't tell! Ha!
Now, lets go out to the front porch.  I just posted about this little crafty project last week.  You can get all the details HERE.  More vintage goodies out here too, its everywhere yall!
That its for my Spring decor tour.  I hope you got some good ideas that you can try in your home too.

If you want to look at more farmhouse decor goodies, check out my list HERE.

If you loved any of these ideas and want to save them for later, be sure to pin it to your favorite Pinterest board.  I have a Pinterest board all set up just for Farmhouse Decor Ideas and I'm pinning something new every day.


It doesn't have to be done all at once.  It is a slow process in the works! C-ya next time!

I'm Linking to:
These lovely and FUN parties!
Between Naps on the Porch
The Dedicated House  - (I was featured)

Pin It!

Sunday, March 17, 2019

Garden Hose Spring Wreath

Spring is almost here and I'm getting ready to be outside more!  One of the first places I like to start freshening up is our front porch.  I always like for it to look nice for when someone comes to our home.
I decided to make this Garden Hose Spring Wreath to add a fresh touch of Spring to our front porch.  The old shutter its hanging on stands in the corner and I always have some type of seasonal goodie on there.

There are lots of different versions of this wreath on Pinterest, but this is the one I ended up choosing for mine! Plain and simple.
This whole wreath cost me right at $10 to make.  I found the garden hose at Walmart for $6.97, the gloves and flowers at DollarTree for $1 each and the rest of the items I already had in my stash. You'll notice that I switched ribbons in the end.  The butterfly ribbon didn't really look good after I tied it on the wreath.
When I removed the packaging from the hose, I thought at first I could use the cable ties that was already on it, but the "wreath" was too small and too compact for my liking, so I cut off those ties and used my own. After I got the hose adjusted to my liking, I secured its shape with one 18" cable tie and trimmed the excess off with scissors.
Next I arranged my gloves and florals the way I thought they'd look the best on the wreath.
You can see here that I had already tied on my orange and white striped ribbon, but it wasn't enough to hold all the florals in place, so I grabbed a length of jute twine and secured it again a little higher up.
I tied it securely and made sure it was in the right place that the gloves would cover it up and not let it show.  I ended up adding a few dots of hot glue to hold the gloves in the exact place I wanted them.

I think it turned out cute and it already makes the front porch all fresh and happy looking.  Now I just need to make sure there is no more freezing temps and bring out all my plant babies to keep the new wreath company!

Would you like to see more of my wreaths?  Click here.

If you loved this project and want to save it for later, be sure to pin it to your favorite Pinterest board.  I have a Pinterest board all set up just for Wreaths and I'm pinning something new every day.


It doesn't have to be done all at once.  It is a slow process in the works! C-ya next time!

I'm Linking to:
These lovely and FUN parties!
Between Naps on the Porch
The Dedicated House  - (I was featured)

Pin It!

Sunday, November 4, 2018

Rolled Book Page Wreath

Wreaths are so fun to make and I've made many!  This one is easy but a little time consuming so grab a yummy drink, turn on Netflix and let's get to rolling!

I saw a wreath like this on Instagram and I instantly saved it because I knew I had to make one for us!  Kelly @rusticcreekhouse made hers for Halloween but I thought I'd make mine generic so I could add a little something for each holiday or occasion to specialize it if I wanted to.
What you will need:

12" wire wreath form - I got mine at Dollar Tree for $1
Old Book that you don't mind harvesting pages from
Wooden Skewer or something small and round
Jute twine
Scissors
Hot glue gun and glue
Floral Moss - Optional - I decided it was not needed after the fact - I got it at Dollar Tree
I trimmed the blank edges off my pages, this is just a preference and not necessary.
You will need LOTS of book pages.  I'd already used this book for my book page wall, but I ended up using all the remaining pages in this book to finish my wreath.  LOTS. OF. BOOK PAGES.
Roll each page on the wooden skewer as tight as you can get it.  At first this was hard for me, but you WILL get the hang of it soon.
After you've tightly rolled the book page all the way to the end, release your grip, let the page relax and remove the skewer.  Your roll should look like this.
Keep rolling until you have a giant pile of 1 million book page rolls! Remember your drink and Netflix? Yep, keep on keeping on! :)
I created bundles of pages tied with twine like this.  Some had three, some two and some just one.  I had some singles that I used a dab of glue on to hold them together that I didn't put twine on.
Make lots of bundles with twine and a some without.
With the wreath form back side up (Groove toward you) I took several full pages and glued one to each section of the wreath form like so.
Just run a line of hot glue on the end of each page and hold together until cool.
I'm going to show you these steps because this is how I did it, but in the end, it was not necessary at all! It's a really messy process, so save yourself the trouble!
I hot glued the moss on top of the pages I glued on.  I thought it was going to show through, but it did not.
Using hot glue, I just started adding my bundles, first I added one bundle of three to the space between each book page I glued to the wreath form.
Now fill in each section.  There is no perfect way to do this, I just added a scroll here and there until I liked the way it looked.
Keep going, you've got millions of scrolls to glue on! You can do it! :)
This is what it will look like when you're finished.
I'm a perfectionist and it didn't turn out perfectly symmetrical and I literally could've kept adding rolls, but I ran out of pages and this is what I ended up with. I still love it so much!  It was tons of work, kind of like my pinecone wreath here, but it was so worth it!

If you loved this project and want to save it for later, be sure to pin it to your favorite Pinterest board.

Here are a few more farmhouse inspired wreaths that I've made:

Dollar Tree Fall Burlap Wreath
Simple Hydrangea and Burlap Wreath 
Chevron Burlap Fall Wreath 


It doesn't have to be done all at once.  It is a slow process in the works! C-ya next time!
I'm Linking to:
These lovely and FUN parties!
Between Naps on the Porch
The Dedicated House  - (I was featured)

Pin It!
01 09 10