
Hey there! It's finally Fall weather here in Texas, but don't hold your breath because the hot weather will be back soon! It is after all Texas ya know. LOL! We have the Texas State Fair and the Dallas Arboretum putting on a Fall show right now, so if you're in the area, try those two activities out! I want to go do both if I can! Anywhoooobs, do you like candy corn? It's a long-time debate, some do and some don't. I love it!
I have a fun project for you today and whether you do or don't like candy corn, you are going to love THESE candy corn!

Who says candy corn is just for Halloween? This sweet treat has become an iconic symbol of the season, and what better way to celebrate than with a unique twist? In this DIY project, I'll show you how to craft your very own candy corn using a surprising material: 2x4 wood. Get ready to unleash your inner artist and bring a touch of whimsy to your home decor.
Materials Needed
- Two 2x4 wooden boards (scrap wood will do)
- Saw
- Sandpaper and Hand Sander
- Acrylic paints (white, orange, and yellow)
- Paintbrush
- Raffia
- Clamps
- Optional: Sealant or clear varnish
Step 1: Preparing the Wood
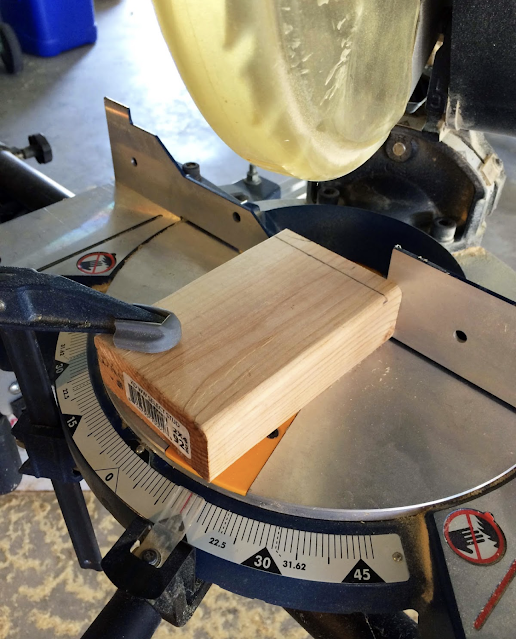
Begin by cutting the 2x4 boards into manageable pieces. Depending on the size you'd like your candy corn, you can adjust the lengths accordingly. For instance, you might consider cutting them into 1-foot sections to create a sizable candy corn display.- My corns measure 5", 4" and 3 1/2". The size is up to you, I just decided to make 3 different sizes for my set. Using scrap 2 x 4s we cut the long sides of each corn on a 15 degree angle. Use a clamp to hold the small pieces of wood in place on the chop saw.

Step 2: Shaping the Candy Corn
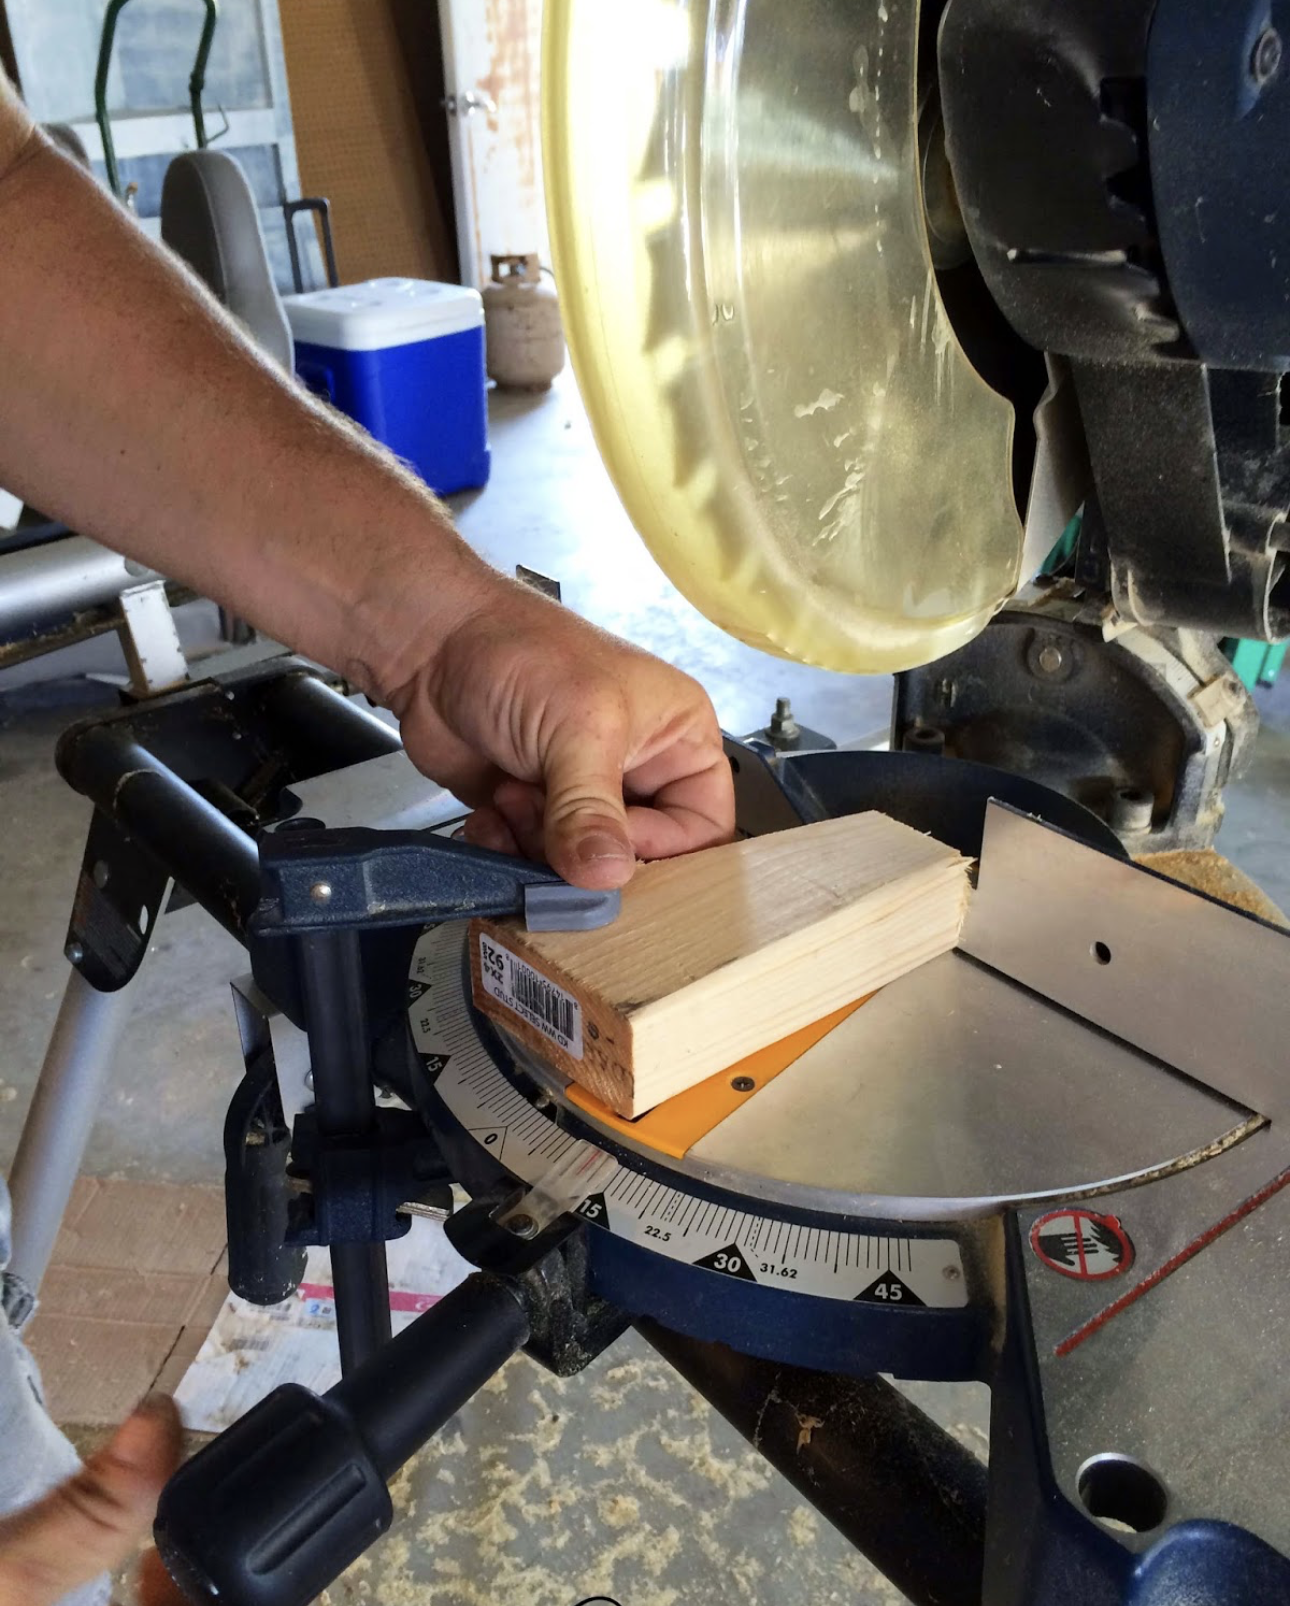
Using a saw, carefully taper one end of each wooden section to form a triangular shape. Remember, candy corn typically has a wider base and a narrower tip. Take your time, and remember to exercise caution when using the saw. Please wear safety glasses too please!- Cut the first long side after securing with a clamp safely out of touch with the blade.

Flip your block around and cut the other side with the same angle. My chop saw has a laser guide which helped to show exactly where the cut would go.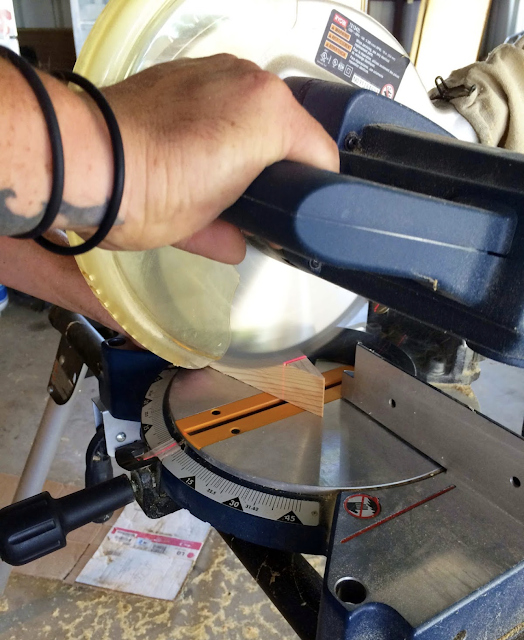
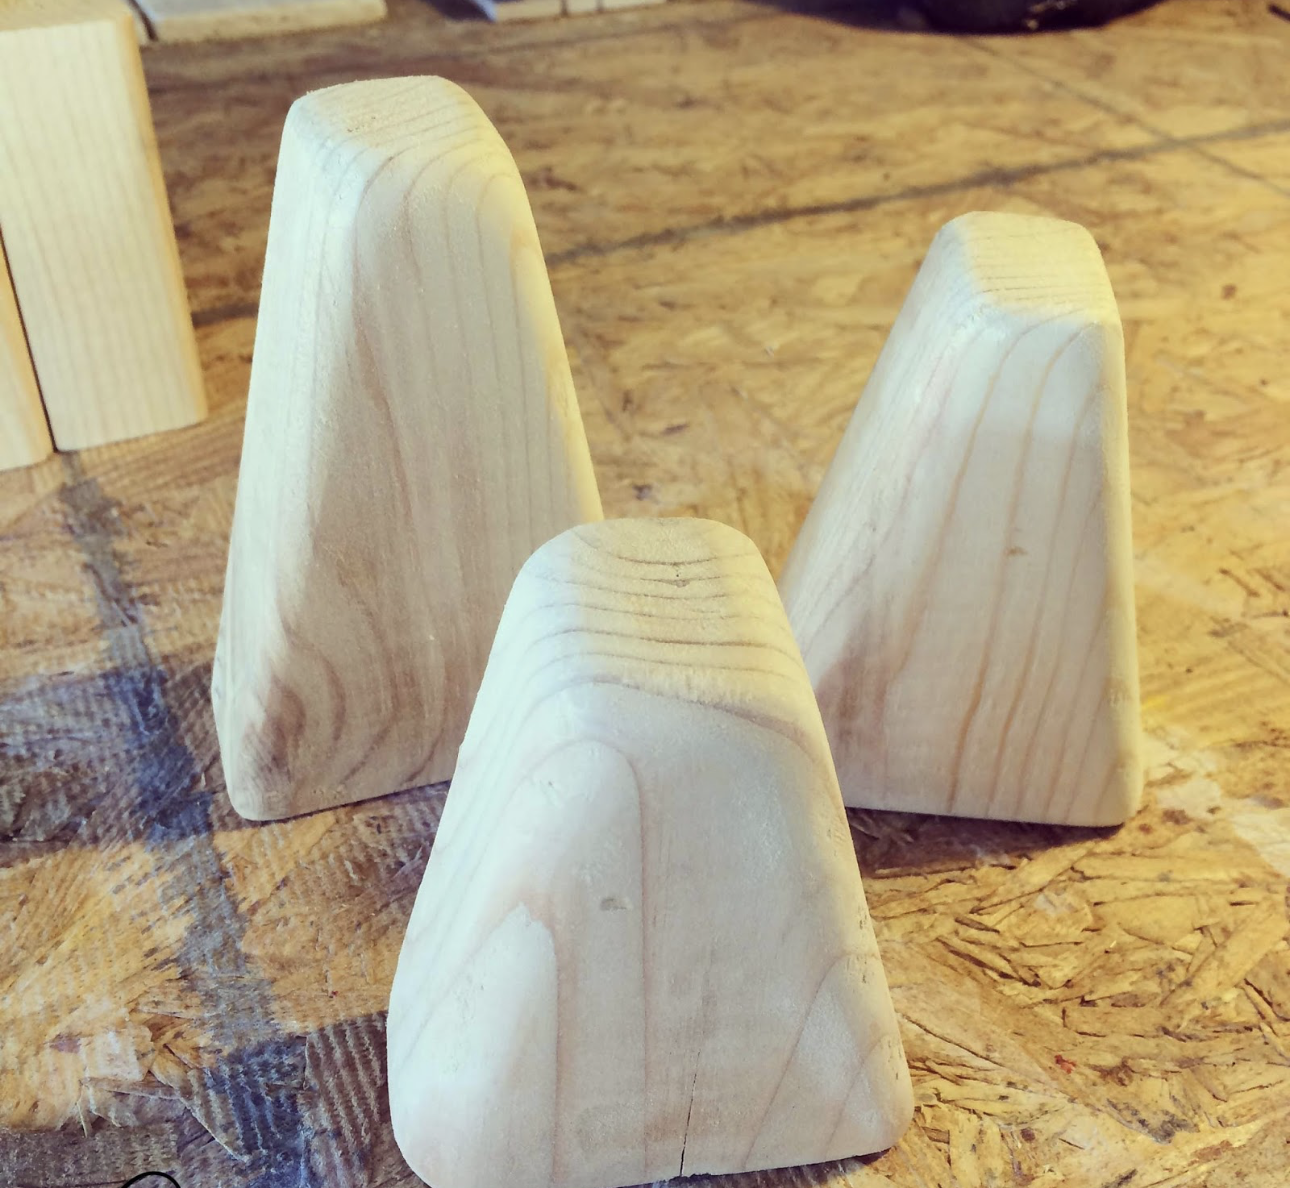
Next, if you choose, cut the point off. I chose to do so because I wanted a more rounded look.- Next use a file to round off the edges. Hold the piece still using the clamp again.


Step 3: Smoothing the Surface
To achieve a polished finish, sand the wood using a hand sander and sandpaper. I prefer to use the Black and Decker mouse sander for these small jobs. This step is crucial for achieving a professional look. 
Paint colors: Pumpkin Orange, White and King's Gold acrylic paint, from Walmart.

Step 4: Painting the Candy Corn
Now comes the fun part—painting! Use painter's tape to section off each color. Begin by applying a layer of yellow paint to the wider base of the candy corn. Once dry, use orange paint to cover the middle section. Finally, paint the narrow tip white.
Allow each layer to dry completely before moving on to the next. You may need to apply multiple coats to achieve the desired vibrancy.

- It took 3 coats of paint to get good coverage. I removed the painter's tape before it totally dried and then let that step dry really good under the ceiling fan before moving on to the next color.


Step 7: Finishing Touches
For my final touches, I used the mouse sander again and distressed the top and front sides. Then I added a bit of raffia to go along with the look of my black cats and pumpkin and I was done! If desired, apply a sealant or clear varnish to protect your candy corn and give it a glossy finish. This step is optional but can enhance the overall appearance and longevity of your project.

Congratulations, you've just created a charming wooden candy corn masterpiece! Whether you choose to display it as part of your seasonal decor or give it as a unique gift, this DIY project is sure to add a touch of whimsy to your home. So go ahead, embrace your inner artisan, and let your creativity shine. Happy crafting!
For more fun Fall ideas, go visit my Instagram. I post every single day. Find me @TexasBlueBunglaow on Instagram.
If you loved any of these ideas and want to save them for later, be sure to pin it to your favorite Pinterest board. I have a Pinterest board set up for all kinds of Fall Decorating ideas and it's called Fall Decor to Try. I'm pinning something new on Pinterest every day. Won't you join me?
***I am a participant in the Amazon Services LLC Associates Program, an affiliate advertising program designed to provide a means for me to earn fees by linking to Amazon.com and affiliated sites.**


Now this is MY KIND of candy corn, DeeDee!
ReplyDeleteLOL! Thank you so much sweet lady! :)
DeleteI love candy corn... and I love these sweet little wooden pieces, too! Thanks for sharing at Tuesday Turn About, DeeDee. Your post will be featured this week. Pinned!
ReplyDeleteOh my goodness, thank you so much sweet Julie! I really appreciate the share! :)
Delete