
Hello there! How are you? I'm getting better and stronger every day. CLICK HERE for the details!
I wanted to share with you how I made these beautiful brown bag snowflakes or stars if you may. I also want to share with you how I'm still using them in my Winter decor. They are not just for Christmas! I made three of my snowflakes back at Christmas time and used them around my tree in the dining room. When I started putting away my Christmas decorations, I figured these paper stars are perfect to carry on through the winter as well, so I made two more. Haha!
The wall over our fireplace is huge and sometimes I have trouble finding something large enough to use up there. I started out with the three I had already. Those are the three surrounding the mirror. I felt like it needed more, so I made the two on the left of the original three.

SUPPLY LIST
Brown Paper Lunch Bags (9)
Hot Glue Gun and glue
Scissors
Hole Punch
Jute Twine (for hanging)

Count out 9 bags. Make sure all the flaps are stacked in the same direction. They should come out of the package like that, but who knows, maybe you drop the entire package on the floor and have to pick them up again!
Who me? No, I did not! Yes I did! LOL!
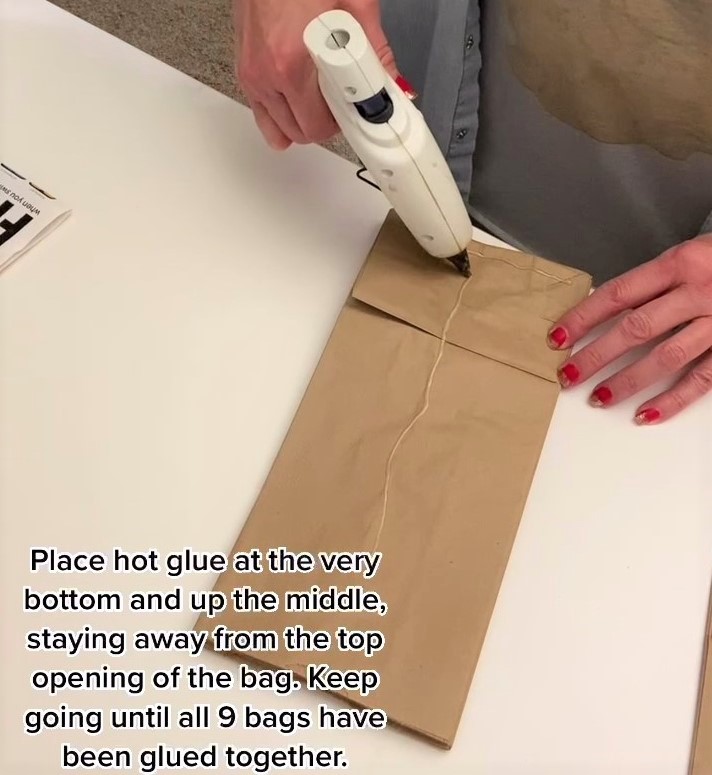
Flap side up, start hot gluing all 9 bags together. I use the low heat setting so it cools faster. Be careful and not get glue at the top opening of the bag or your snowflake/star will not open up properly. I found this out the hard way.

After you have all the bags glued together, this is where you will make the designs of your snowflake. There is no right or wrong way to do this, just be careful not to cut too far into the bags or there will be parts that aren't attached to anything. Cutting in too far causes your snowflake not too be sturdy.

When you get to the last bag, you will run your glue as you have been and then pull the top bag and the bottom bag together. I put my hands on the inside of the bags to hold them for a minute until cool. Now you are ready to hang them! The two bags you just joined together will be the hanging point, or at least that's how I did it. I used my hole punch in the center and then strung a long piece of twine through it.


We are enjoying our paper snowflakes over the fireplace for Winter. Did you make paper snowflakes this year? If so, are you still showing them off?
Visit me over on Instagram @texasbluebingalow for more pretty views of my vintage holiday decor!
If you loved this idea and want to save it for later, be sure to pin it to your favorite Pinterest board. I have a Pinterest board set up just for all things related to Valentine's Day and its called Love Day and I'm pinning something new every day. Won't you join me?
GREAT
NEWS! I now have an Amazon Storefront! If you ever want to purchase
anything I'm showing you here, you can pop over to my shop and see what
I've picked out for you! Click right here to visit.

Very pretty.
ReplyDeleteHi there! Thank you so much sweet friend! :)
DeleteHi Marilyn! Thanks so much sweet friend! :)
ReplyDeleteThis is a good idea. The area over my mantel is also very large and I struggle to fill it at times. I cant wait to see what you do for Spring. On a side note - I have that same poster from Breakfast at Tiffany's! I have always loved it. Thanks for sharing with us this week at #HomeMattersParty
ReplyDeleteHi Donna! I've had lots of people tell me they have that poster too! Mine is actually a painting that my hubs found at Goodwill for $7.99! Can you believe that! Thanks so much for stopping by my blog! :)
DeleteGenius! I love this! So clever and easy. thank you for sharing.
ReplyDeleteHi Kristin! You are very welcome! Thanks so much for the kind words! :)
DeleteVery clever. I've used paper clips to hold mine, then I can remove to store them for next year.
ReplyDeleteThank you so much sweet friend, that's a great idea!
Delete