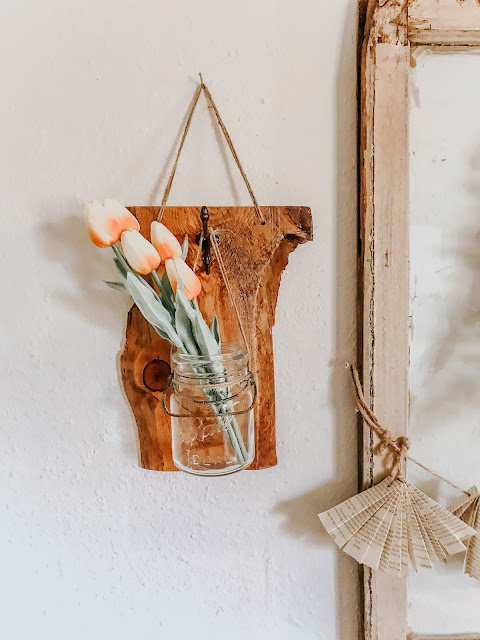
I'm going to share with you how my honey and I made these beautiful Vintage Hanging Planters. They are truly vintage because the wood we used is at least 100 years old (we're not sure of the exact age) and all of the other details are vintage as well. How fun is that?
We are renting here, so nothing we do in the decorating category can be permanent. These hanging planters brought lots of beauty to our living room and best of all, we can take them with us when we find our forever home! When we moved, we made sure to bring our treasured wood with us. We had to get rid of a bunch of our other scrap wood, but not these pieces, they are like treasure!
Go here and here to see what else we've made with our 100 year old wood.
This wood is considered a family heirloom by my honey's mother. Most of this beautiful wood that was so cherished by his mother was stolen. The wood was hand milled by his grandfather many, many years ago. Several years ago and with the urging of his mother, we went and rescued the remaining wood from the old barn on the family property.
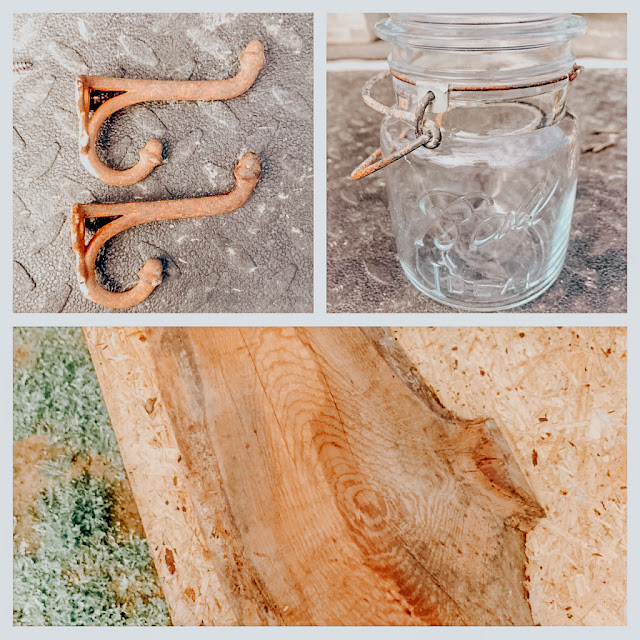
So, to recap, the wood is extremely old for sure. We have an excellent antique mall just a mile or two up the road form us. Its awesome! We found the old metal hooks, vintage Ball jars and even the brass screws to hold the hooks on with!
Life like tulips can be found right here. You get 30 tulips for $18!
To recreate your very own hanging planter you will need the following items for each planter:
Wood - approximately 6" x 12" THESE would be perfect for your project!
Metal Hook, one for each planter
Glass Jar, one for each planter
Twine
Paint Brush
Sealer or paint - optional
Sanding block with 120 grit paper
Measuring Tape
Saw
Drill
Screwdriver
STEP 1: Cut two pieces of wood that measure approximately 12" tall by 6" wide.
Step 2: Sand the entire piece of wood with 120 grit sand paper until its smooth and free of rough spots.
Step 3: Find placement for your metal hook. We chose center from side to side and then 1 inch down from the top. Mark the holes with a pencil.
Step 4: Using your pencil marks, drill pilot holes for your hook screws. Add the hook and screws.
Step 5: Seal the wood. I used Spar Urethane because our wood is very old and I wanted to protect it from UVs. You can use Polyurethane if that's what you have on hand. I applied the sealer to the wood and the metal hook to preserve the look we have now.
NOTE: If you prefer to paint your wood a certain color, do the painting step before you add your metal hook.
You'll notice in the first pictures up above how light in color the wood is. After adding the sealer your wood will change colors slightly, so be prepared for that.
Step 6: Drill holes for the twine to thread through for hanging. Our holes are slightly above the hook top and about 5" apart.
NOTE: You can also do this step before the sealer step, but we totally forgot because we got so excited about how pretty they looked. Haha, we were like, wait, how are we going to hang them!?
NOTE: If your jar does not have the bail, then tie it around the top of the jar under the lip to hold and then add your twine for hanging to each side.
Step 8: Add hanging twine. Cut twine at about 24" to start with. Thread twine through the drilled holes and tie in a knot like you see here. We actually threaded it through backwards here, you'll want it to look like the photo below for end results.
NOTE: Depending on the size of your twine and the weight of your wood, you may need to double or triple your twine. My good heavy twine is in storage, so we had to use this thin dollar store twine and I chose to triple it for a better look!
Here is the hanger with plain greenery in it. You can add anything you like to your jars, the sky is the limit! You could even add little fairy lights too!
Both of these hanging planters took approximately 1 hour from start to finish to complete. I hope you will pin this idea for later and try it yourself! We had lots of fun making them and now we have a family heirloom we can pass down to one of our kids!
Please keep hopping along for more beautiful home decor and fun projects!

I'm thrilled to be joining in today as 28 talented bloggers bring you the best of spring for all throughout the home! Please continue along this inspiring tour, and visit the other participants in each of the following categories.


Rain & Pine || Harper Home Designs || Land of Laurel || Deb Vuagniaux Designs & Home || The Crowned Goat


Thank you so much for stopping by today! :)
Want to make a book page garland like mine? Click right here for the tutorial!
If you loved this idea and want to save it for later, be sure to pin it to your favorite Pinterest board. I have a Pinterest board all set up just for Farmhouse Decor Ideas and all kinds of other fun stuff and I'm pinning something new every day. Won't you join me?


Those are cute.
ReplyDeleteThank you so much sweet friend, I appreciate that! :)
DeleteThese are fabulous! What a great idea!
ReplyDeleteHi Deb! Thank you so much sweet friend! :)
DeleteThis is such a cute and creative idea! I love the live edge wood piece you chose and the hooks too. I've been pinning ideas for our potting shed so I'll definitely be adding this one. Thanks for this inspo! Hugs, CoCo
ReplyDeleteHi CoCo! That would be a great idea, thank you so much for stopping by! :)
DeleteWhat a great project! It's extra special because of that wood.
ReplyDeleteI love decorating with things that have meaning.
Hi Carol! Me too! Thank you so much sweet friend! :)
DeleteThese are gorgeous, DeeDee! I love that the wood is a family heirloom too...what an amazing story to tell! This project sounds so easy for something that turns out so beautiful, and I love the suggestions you had for decorating the jars. Just beautiful, my friend! xo, Kristi
ReplyDeleteHi Kristi! Thank you so much my sweet friend! We are so pleased with how they turned out. I appreciate you for stopping by and leaving such a wonderful comment! :)
DeleteBeautiful vintage wood! I like that it has sentimental value to you and that you were able to use it for such a wonderful project. Visiting from Friday Features.
ReplyDeleteHello there! Thank you so much! We love using the wood for something we can enjoy for years to come! Thanks for stopping by!:)
DeleteThis is seriously so cute! Simple and totally doable. I will have to try it out! :)
ReplyDeleteHi there! Thank you so much, I appreciate that! Enjoy your project! :)
DeleteWhat a fabulous DIY project! I love how these cute jar wall hangers turned out! You did a great job explaining the steps!
ReplyDeleteHi there! Thank you so much, I really appreciate that! I'm glad you liked it! :)
DeleteThis is so creative DeeDee! I love it
ReplyDeleteThank you so much, I really appreciate it! :)
DeleteEverything looks so beautiful. Thank you for all of the ideas.
ReplyDeleteHi Amanda! Thank you so much and you're very welcome! :)
DeleteDeeDee, these are just gorgeous... and perfect for your living area! Love the live edge wood you used... and of course the coral tulips are perfect, too! Pinned... So fun touring with you, my friend!
ReplyDeleteHi Julie! Thank you so much for pinning me and also for your kind comment sweet lady! This tour is so much fun! :)
DeleteGreat idea for utilizing wood and mason jars into crafting an amazing project.I can think of so many ways to use it around the home even after one is done with spring! Love such ideas that have numerous crafty possibilities!
ReplyDeleteHi Hani! Right! Thank you so much, I'm glad you liked it! :)
DeleteHow amazing that you have such a rich piece of history in your living room, beautiful!
ReplyDeletePamela ~ DIY Vibes
Hi Pamela! We are so honored to have it, that is for sure! Thank you so much! :)
DeleteJust stopping by to say I hope you are staying safe and to let you know that your post is part of the Friday Features on Oh My Heartsie Girls Linkup this week!
ReplyDeleteStay safe!
Hugs
Karen
Hi Karren! Oh wow! Thank you so much my sweet friend, what an honor this is for sure! :)
DeleteVery cute project and great tutorial. Thanks for sharing at Tuesday Turn About.
ReplyDeleteHi Carol! Thank you so much sweet friend, its always my pleasure! :)
DeleteLove this! So meaningful and beautiful. Thanks for the inspiration.
ReplyDeleteHi Deb! Thank you so much, it is truly something to pass down to our children some day. :)
Delete