I've had this old chair for about three years now. I bought it at a yard sale for $5!!! Yes, that's right 5 doll hairs! I think the lady sold it so cheap because it needed to be repaired. I wasn't worried though, I knew I could fix her right up...just didn't get in any hurry to do so! Ha, ha!
Isn't she pretty though? Someone had already refinished it to just the way I like it. Farmhouse fresh! It still needed a little sanding here and there, so I did that while I had it all apart for the repairs. I used
a small piece of 220 grit sand paper I had in our stash to remove all the rough patches left by the paint.
This is the
gorilla wood glue we ALWAYS buy, we use it for almost every wood working project we tackle. It's so good and it doesn't take forever to dry down. I highly recommend it if you're looking for a good wood glue..
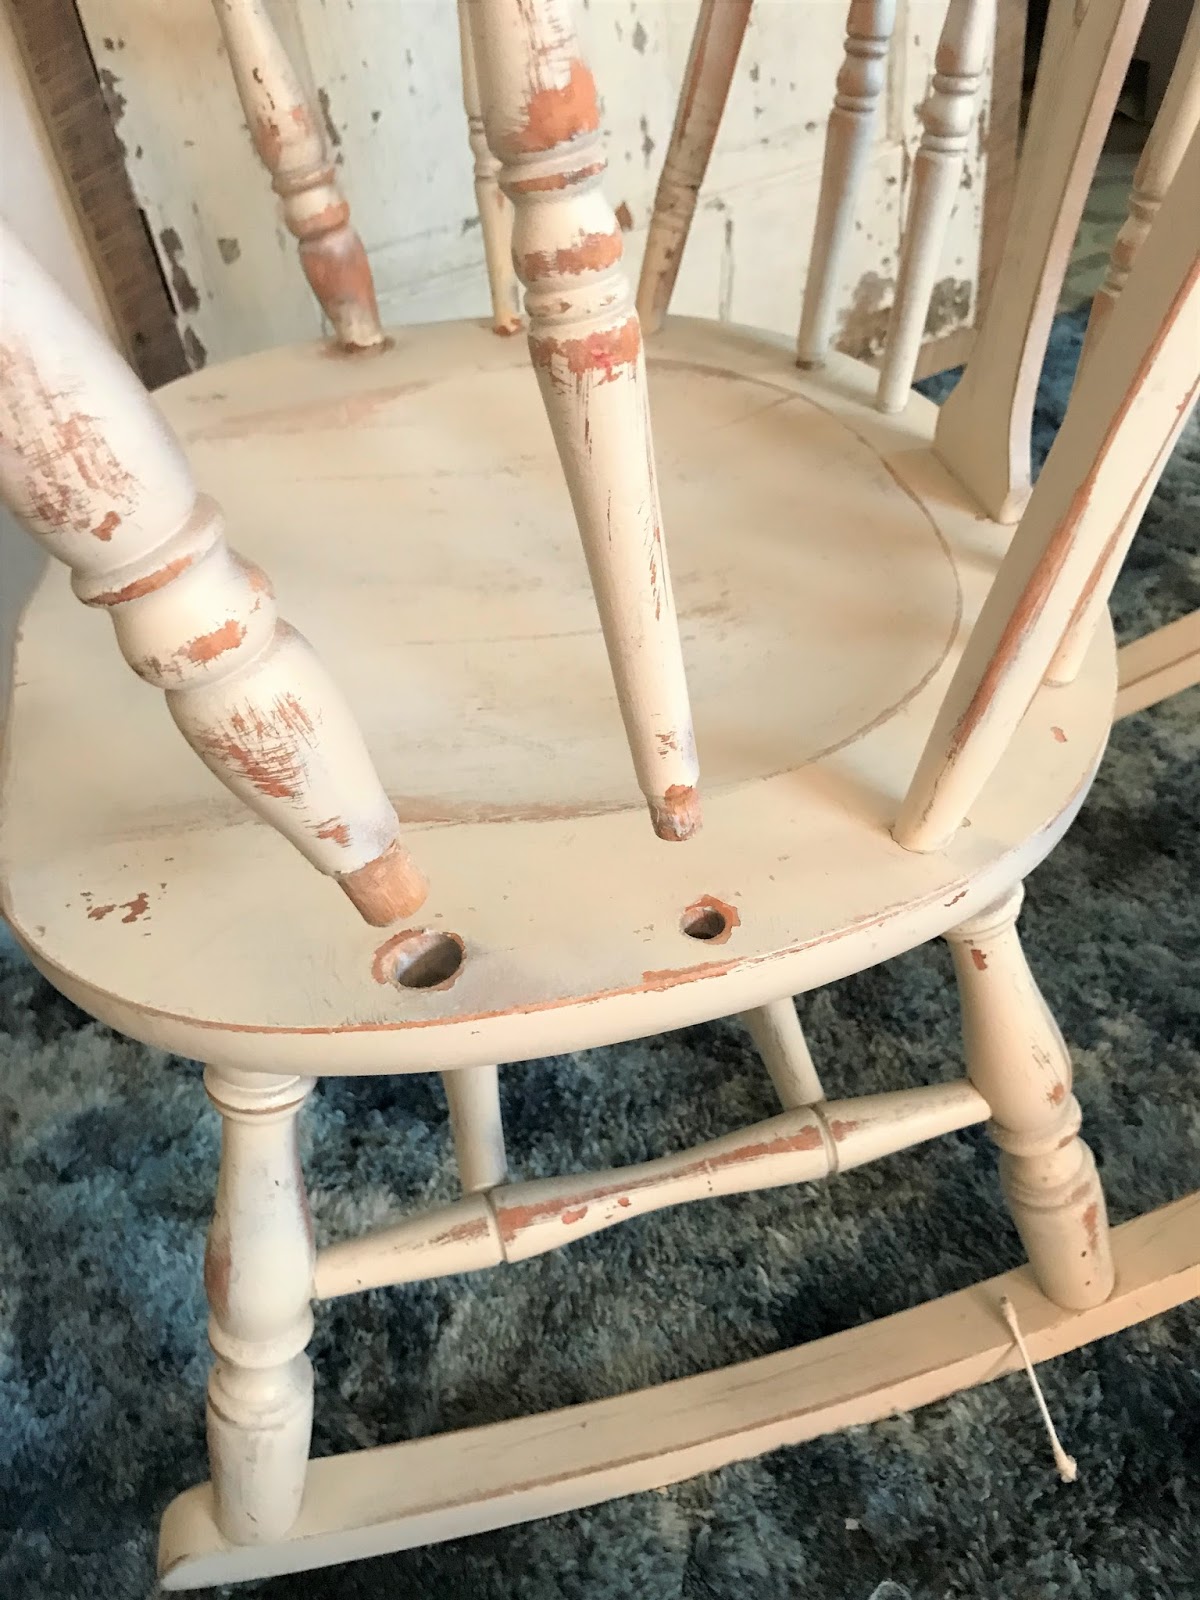
The arms were the main problem that needed repairing. They were really loose and the right hand side would lift right out of the seat because the screw on that side that held the arm on, was what we call in Texas, "wallered out". In other words, it was stripped and wouldn't tighten down anymore. I replaced it with a slightly longer screw than I took out of it. Worked like a charm!
With this type of repair you don't need many tools, just a
screw driver, wood glue and mostly a few
Q tip swabs. I add a small amount of wood glue to the sockets and then spread t around using a Qtip. Make sure you get the entire area covered with glue.
Top and bottom of each spindle socket will need a small amount of glue spread all around so you get a good tight fit when you replace all the pieces back in the correct spots.
Try not to get glue on the outside of the socket and also don't use too much glue or it will come up and out when you replace the spindles. If that does happen, make sure to wipe off all the excess glue before it dries.
After you have the glue spread all around in the places you need it, replace all the parts and put the pieces back together.
Make sure you get a good tight fit on each socket, top and bottom before you tighten it all back together. I used the bottom of my glue bottle to lightly tap on the arm to make sure everything was snug in its place.
Lastly, and I forgot to show you, but I added some glue to the end of the arm where it meets the back of the chair before I tightened down the screw that hold its all together.
If you'd like to see video of me doing the repairs, go on over to my Instagram (ddcamp170) and look in my profile for this little dot.
She's all ready to be sat in, loved and enjoyed. I seriously don't know why it took me so long to do this, but I'm glad I finally got it done! What furniture projects are you currently working on?
If you want to see more of my Farmhouse Decor Ideas, click right here!
It doesn't have to be done all at once. It is a slow process in the works! C-ya next time!


It looks good there. Great job repairing it.
ReplyDeleteThank you so much ma'am! :)
DeleteDeedee,
ReplyDeleteHave you heard of a product called Swel-Lock by Behlen? I personally haven't used this but one of my favorite blogger has and swears by it. The blog is Reality Daydreams and the post about this product is Baby Doll Crib Rescue.
Maureen
P.S. Using my daughter's Facebook account as I don't have one.
I have not heard of it but thanks so much for the tip Maureen, I really appreciate it! :)
Delete