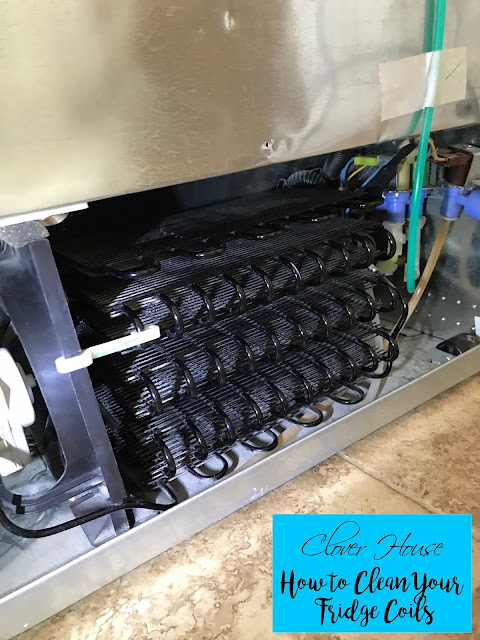
Refrigerators are expensive and if you can help it last as long as possible by keeping it dust bunny free, by all means, let's do it! Let me show you how I clean my fridge coils.
We have fur people who live in our house so I pull my fridge out about once per month and clean behind it, but I don't open the back and clean inside more than about twice per year, so about every six months is good if you have pets and once per year if you do not.
I walked out to the shop and got into the honey bun's tool box to find a 1/4" nut driver, that's the size our fridge takes. The old fridge we had just had phillips head screws on it.
Step 1.
Make sure the electricity is OFF to your fridge. Unplug it or flip the breaker switch. I unplug mine, because that way I'm sure it's off!
Step 2.
Remove the back cover.
Oh boy! It's gross in there isn't it? Well, now you know that mess is costing you some extra dollars on your power bill, so it's best to keep it clean!
Oh yeah, let's get up close and personal with all those dust bunnies living in there! Eeeewww!
Step 3.
Grab your shop vac and while using a slim lined tip, vacuum all those dust bunnies out of there! Be careful of your coils, you do not want to damage them and ruin your fridge. That would be bad!
After I have everything vacuumed out of there, I take a damp paper towel and wipe the remaining dust off of where I can reach. Again, be very careful when wiping down each part because all these little bits and pieces are what make the fridge work properly. You want to keep them all intact.
Don't worry if you can't get all of the dust off of everything, your fridge is already breathing better by now anyway.
Tah Dah! Looks so much better now! I'm pretty sure I can hear her breathing better too!
While I was at it, I went ahead and cleaned up all the other fridge neighborhoods that were housing the little dust bunnies. This is the side that's up against the cabinet.
This is all the front bottom vented area of the fridge. The vent itself just snaps right off. First, I vacuumed all the fuzz off of it then took it into the bathtub for a wash down. Next, I grabbed my shop vac again and removed all the fuzz hiding in under there. Yuck!
Next, I used my handy Clorox wipes to wipe all the spills and splashes down.
UPDATE: Don't use these chemical filled wipes! Ask me about going chemical free with all of your household cleaners!
Alrighty then! I bet you'll want to go check your fridge now to see if you have giant fuzz balls living in there like mine did! It just takes a quick thirty minutes to save yourself lots of money on your energy bill and who doesn't like to save money? I know I do!
While doing research I discovered THIS COIL BRUSH (click here) and I'm ordering one now! It will make cleaning the coils so much easier!
UPDATE: I've been using this brush for years now and I even use it to clean my dryer lent trap as well. It's awesome and multi purpose.
Would you like to see where else I had dust bunnies living in my house? Click on link below.
How to Clean Your Return Air Vent
And below are even more of my cleaning tips:
Would you like to see where else I had dust bunnies living in my house? Click on link below.
How to Clean Your Return Air Vent
And below are even more of my cleaning tips:


This is a great reminder to keep the fridge coils clean! I am off to clean mine! Thanks for sharing at Celebrate It!
ReplyDeleteThanks so much Teri! :)
DeleteI will never be able to unsee that. You have scared me for life. ;) As an adult you would think that'd be used to all that dust by now but like you said, "eeeewww!!" Thanks for sharing the proper way to clean up that mess.
ReplyDeleteThank you Mary and you're welcome! I hope I didn't really car you for life! lol! Have a great day!
Delete