Showing posts with label Money Saving Tips. Show all posts

Sunday, July 1, 2018

How to Clean Your HE Dryer

We have a set of front loading Whirlpool HE Duets, they are stacked, as you can see.  We purchased them in 2010.  So, I'm doing laundry one day and the dryer said NOPE, not today lady! Oh My Gosh!  Why don't these appliances give you any warning? I mean, leave me a note saying you're going on vacation or something!

For safety we used a stacking kit that holds them together and keep them from moving apart during the washing and drying processes.  Our dryer model number is WED95HEXW0, and this post will show you how we cleaned our dryer.  In the process of both of us on the internet and Youtube doing research on how to DIY home repairs of our dryer, I found out that you should clean your dryer at least once every two years.  I never knew that I was supposed to internally clean it/have it cleaned.  Oooopsie!

NOTE:  There are many different models of Whirpool machines, so if yours isn't the same model as ours, it may look totally different.
This is what our laundry room normally looks like on the weekends.  Both machines going literally all day long.  I'm the type of person that can't stand for the laundry to pile up, so its done every weekend, without fail.  Washed, dried, folded, hung and put away all in one day.....sometimes it takes me two days. 

Oh, by the way, you should try my homemade laundry soap and softener.  They are so good and we are saving so much money by using them!
Our laundry room is tiny, so we had to disassemble it to get to the machines.  If you want to see how we  created this room, click right here.
We moved in our home back in March of 2011 and so did these machines.  They have not moved since we placed them in their spot.  Um, eeeeww!!  Dust bunnies and dirt everywhere! Yuck!

NOTE:  Before you start with cleaning your dryer, please make sure you disconnect the machine from the electricity.  We also removed the dryer vent duct and the water line so we could pull the machines out away from the wall.
After disconnecting all the power in back, he removed the top cover.
This is looking in from the top.
There are LOTS of pieces (and one million screws) to remove to get to the inside parts that need to be cleaned.
There are several helpful Youtube videos that you should really watch before attempting this project.

WOW! It's really bad!


I used our small shop vac to clean all the dirt and debris from inside.
It was literally everywhere that little dust bunnies could wiggle in to.
This tool right here is awesome!  I not only use it for the dryer, but for my fridge as well.  Check out how to clean your fridge coils HERE.
I was cleaning every piece he removed from the machine.  I mean you might as well clean all of it before you put it back together.  I used our shop vac and Clorox wipes.
Before I vacuumed it out.  Yuck!
So much build up!
I don't even know how this machine was working!  Well, now its not working.....so.
Much better now!
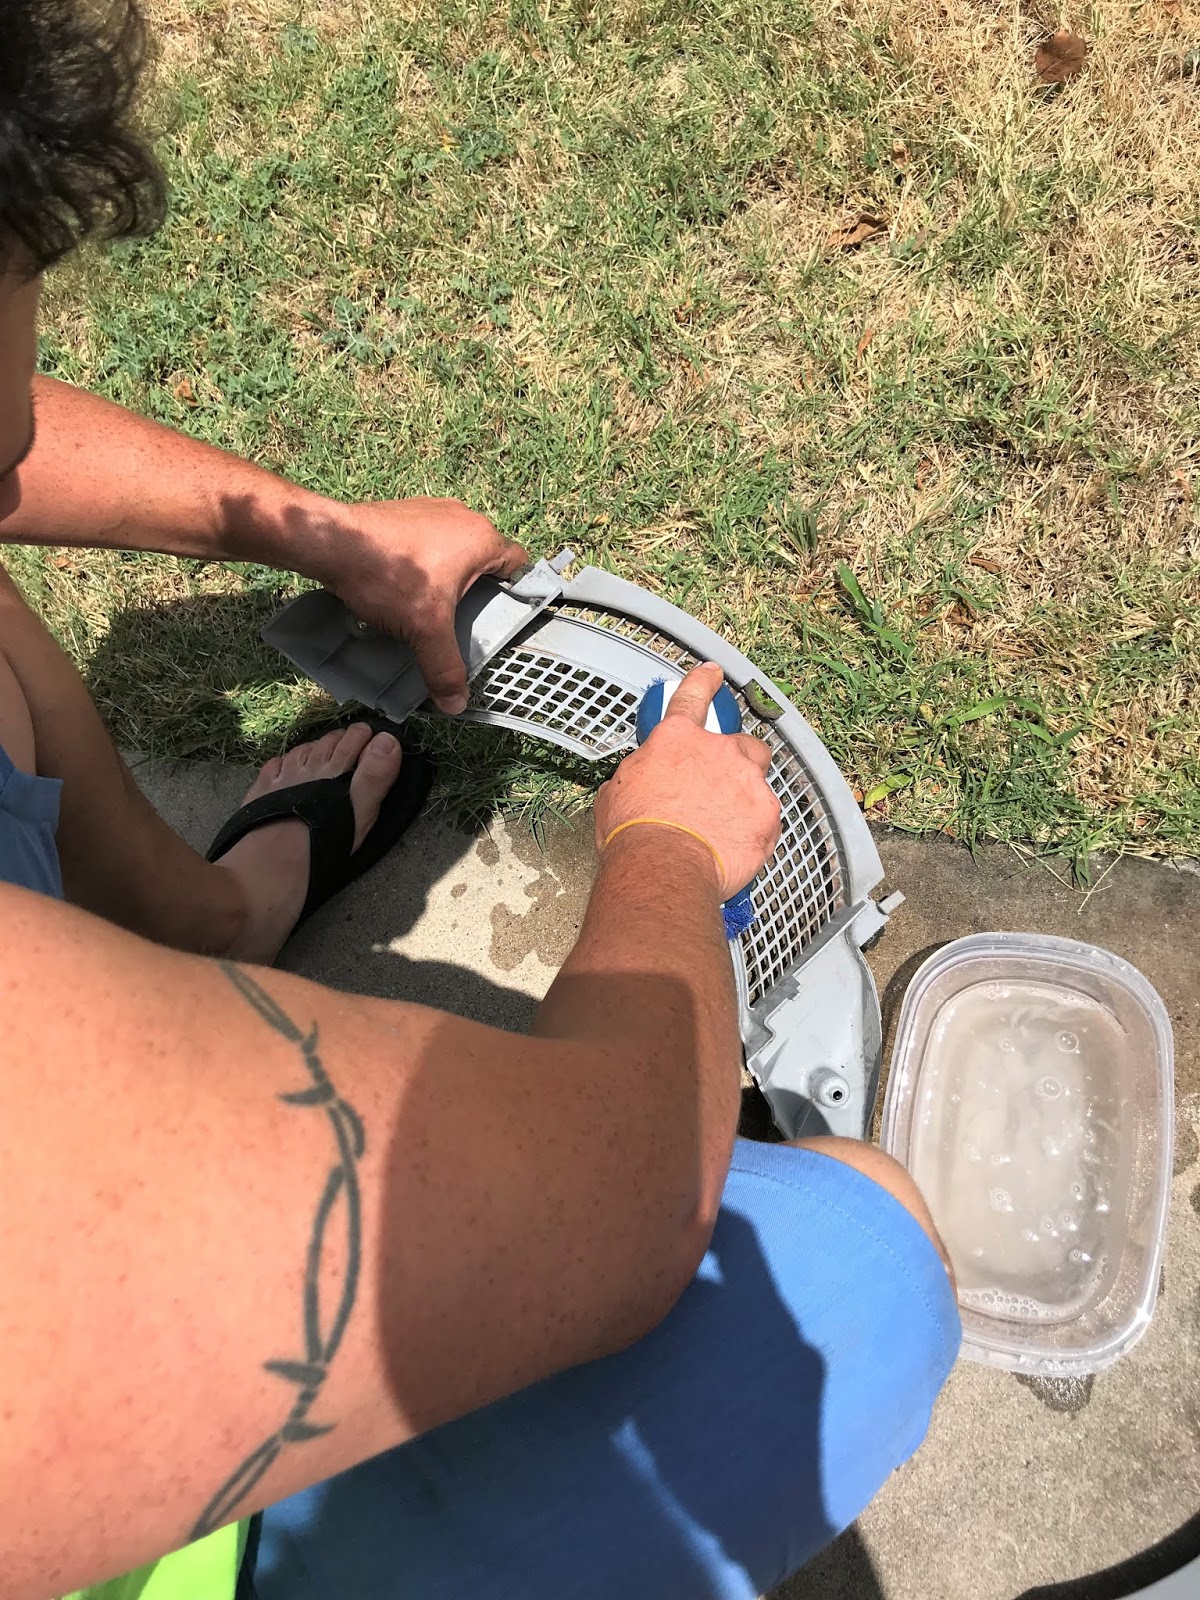
When you disassemble the parts for cleaning, make sure to take the lint trap down as far as you can because there was so much gross stuff hiding in there that we couldn't see until we broke it all the way down as far as we could.  We used a bit of soapy water to clean the lint trap holding area.  Just a few drops of blue Dawn in some warm water and a scrub brush to clean all the build up away.  Rinse and let dry in the sun.
Now that we have everything cleaned up, my honey went to checking everything to see what wasn't working.  He used his digital Multimeter for the testing.  All of the parts the internet told us to check appear to be working.  Hmmmm?
Next, before we put it back together to test it, hoping the clean up job had fixed it now, we decided to remove the back panel and clean in there too.  Not as bad as the front area, but I vacuumed it out anyways.

He put everything back together and ran a diagnostic check on it and it was still throwing error codes.  He cleared the codes and tried it to see if the cleaning fixed it.  It did not.  We were so sad.  He was done for the day.  We had been working on this thing all day!  The next day he was still researching trying to see what else he could check on it.  He had one more thing to check.
Remember this shot from the top when we took the lid off?  See that control board to the left?  He hadn't checked that yet, so he did.
 He spotted the burn mark on the tray it sits on, so he removed the board to get a closer look at it.
 Hmm, that does NOT look too good.
 It all looks perfectly fine from the top side.....
But when he turned it over to the back side, down toward the bottom,  right hand side, there is a color change in the green board and the terminal looks burned.  He knew to look there from where the burn mark was on the tray.  I thought for sure this was going to cost us an arm and a leg!
He grabbed his soldering kit and did a little repair on it.  The terminal was no longer making good contact, so it needed the solder to give it connection again.

Guess what?  IT WORKED!!  He fixed it, and all for FREE! Thank you honey! I love free at home, DIY repairs! All thanks to my honey bun because I can only clean up the dirty mess, not fix the broken problems! Ha,ha!

If you want to see what else we've done in our laundry room, please visit the links below where I have each project directly linked for you.


It doesn't have to be done all at once.  It is a slow process in the works! C-ya next time!

I'm Linking to:
These lovely and FUN parties!
Between Naps on the Porch
The Dedicated House  - (I was featured)

Pin It!

Sunday, April 15, 2018

Chalk Painted Picture Frame with Free Lavender Print

Remember this accent wall post right here were I shopped my own home to create this wall for FREE?  As I was putting away my Easter decor this year I wanted to add a little Spring vignette to the old phone chair in our bedroom so I went to my decor closet and starting shopping!
Farmhouse fresh coming right up!  I don't know about you, but when I decorate, I get something out, sit it down, step back, look, pick it back up, put something else down, step back, look.....etc. Continuing those steps until I'm happy with how it looks.  The above picture was the end results of changing these pieces around about forty times! lol!
At first the chunky wooden picture frame I picked out looked like this.  It just was not working with the whole vibe I was going for.  A little paint helps everything, right?
I grabbed a few items and proceeded to give the frame an update.  I found my calcium carbonat on Amazon.  It's the key ingredient to making your own chalk paint out of any kind of flat paint you might have on hand. I also grabbed some acrylic paint in antique white and a foam paint brush.

Here's the chalk paint recipe I use.  For this very small job, I did not measure.  I just squirted out a small amount of paint onto my plate and then sprinkled a tiny bit of powder and a few drops of water and I was mixing and painting in no time at all.
After I had my mixture to the right consistency, I grabbed my sponge brush and swiped some of the paint all over the frame.  I got a little heavy handed in some spots with the swiping so I grabbed a damp paper towel and wiped some of it off until I liked how it looked.
This is the end result.  I love it!  It's exactly the look I wanted.  I kinda wanted to chalk paint everything in my house that was a solid wood color! Ha, ha!  I didn't seal it, but I guess you could if you wanted to.

Now the best part!  The lavender print that Natalie over at My Vintage Porch is offering for FREE on her blog. Oh and guess what? This print is not the only one, she has another one that is perfect for summer!  Go get your free copies right here.  Thank you Natalie!
So, when you're on a budget and you need a little change to your decor, shop your own home and makeover an old item you've had that needs a little freshening up.  Before you know it, you'll have a brand new stash of decor to use!  Everything you see here in this little vignette (except the green candle) was either free or thrifted.  You CAN decorate very inexpensively if you want to.

If you want to see more of my Farmhouse Decor Ideas, click right here!

Here are a few more of my painting adventures:

$5 Bedside Table
Painting a Paneled Door with a Window 
Painting Our Laundry Room Cabinets 
Kithchen EAT Sign 
Holiday Ombre Pinecone Wreath 
Easy to Make Fancy Hand Lettered Sign
Flower Pot Makeover 

It doesn't have to be done all at once.  It is a slow process in the works! C-ya next time!


I'm Linking to:
These lovely and FUN parties!
Between Naps on the Porch
The Dedicated House  - (I was featured)


Pin It!

Sunday, February 25, 2018

Simple Homemade Hummus

Its been a while since I've shared a recipe, but today I have a recipe to share with you that I think you're going to love.  I already had several hummus recipes pinned, but they all called for tahini which I did not have, so I went back to Pinterst and found this recipe without tahini. Score!  Again, simple and easy, this recipe will take you no time at all to put together. 
We love hummus but its kind of spendy at the grocery store so we don't get it too often, but now we can have delicious hummus anytime we want it!  Normally the hummus we buy at the store is about $4.50 per tub, but this probably costs less than a dollar to make.  The chick peas are only 57 cents per can and we always have all the other ingredients on hand.  That is quite the savings!
Simple Homemade Hummus (No Tahini)

Ingredients

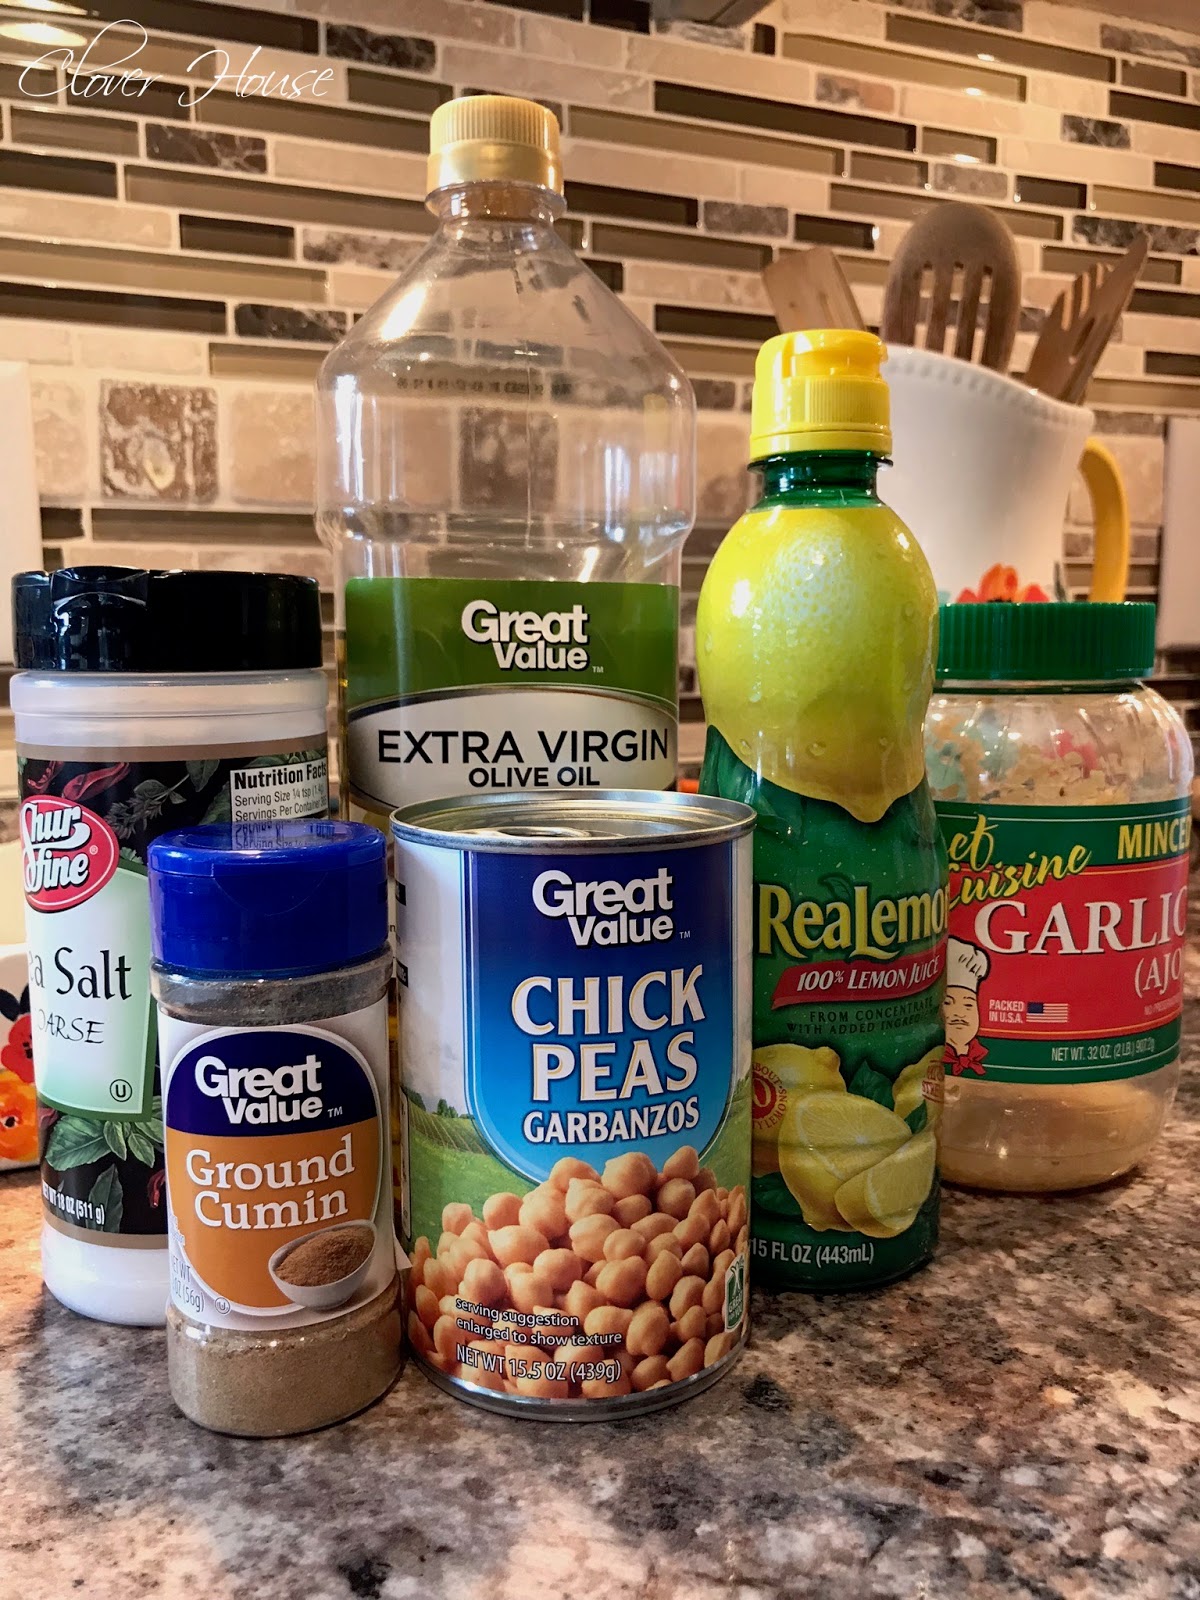
1 (15 oz.) can garbanzo beans (chickpeas), drained and rinsed
2 to 4 tbsp. water
2 tbsp. extra virgin olive oil
1 tbsp. lemon juice
1 garlic clove minced
3/4 tsp. ground cumin
1/4 to 1/2 tsp. sea salt
Red Pepper Flakes (optional)

Instructions
Add the garbanzo beans, 2 tablespoons of water, the olive oil, lemon juice, garlic, cumin, and 1/4 teaspoon of salt to a food processor (or blender). Process/blend until smooth and creamy. If needed, add additional water to thin out the hummus and more salt to your liking.  Sometimes I even add another splash of oil if needed.

Store tightly sealed in the refrigerator.  Serve it with your favorite snacks, like crackers (wheat thins are my fav), chopped veggies (carrots or celery) or whatever you like for dipping.
I don't have a food processor so I use my blender.  It doesn't get quite as smooth as store bought, but it is delicious none the less!  I always add extra garlic and then at the end I sprinkle on some red pepper flakes and stir it all together. Yum!

Side note to my friends and family:

I don't normally share really personal things here on our blog, but this is important to know and you may want to be checked out too.  Recently after a routine blood draw, it was brought to my attention by my doctor that I am drinking too much water (yeah, that happens) and also that I am malnourished! WHAT?  Apparently these things can happen and you don't even know it.  I will be 52 in August and I know your body is constantly changing as you get older but I was shocked to find out these new details about myself.  It was a bit scary to tell you the truth.  My doctor gave me pages of helpful information on diet and told me to add some different supplements to my daily diet as well.  I go back in 3 months for another blood draw to determine if the added supplements are helping.  I'll keep you posted on what I find out!

Are you Spring cleaning yet? Me too!  Click on the links below for some of my best cleaning tips.

Cleaning an HE Washer with Household Products

Remove Hard Water Buildup Naturally 

DIY Carpet Cleaning 

Cleaning Your Hairbrush the Easy Way 

Cleaning Your Oven

Cleaning Your Sink's Spray Nozzle

My Easy Way to Clean an Area Rug

Make Your Own Steam Mop Pads 


THIS JUST IN: Did you know you could use COUPONS on Amazon? Me either, but look right here for all your favorites and start saving, you know I am! :)

It doesn't have to be done all at once.  It is a slow process in the works! C-ya next time!

I'm Linking to:
These lovely and FUN parties!
Between Naps on the Porch
The Dedicated House  - (I was featured)

Pin It!

Sunday, February 18, 2018

My Easy Way to Clean an Area Rug

Like I said recently, I'm in Spring cleaning mode over here and I've discovered another way to save money while getting my house sparkling clean!

People who live here are somehow allergic to wiping their feet before entering the house and I've given up begging them to do so.  So, if you have people in your home that are "allergic" to wiping their feet too, please keep reading.
Why I bought a mostly white rug for a high traffic area in our home is still a mystery, even to me! Hey its really pretty, it matches my curtains and I wanted it! That's good enough, right?

At first I was thinking I was going to use THIS RECIPE and method, which is good, but then I remembered my new Bissell portable carpet cleaner and I went and grabbed it.
This little rug lives right in front of the sink area so it gets lots of traffic.  You can see the nice dirty spot there in the middle.  SOMEONE had mud on their feet.

Ok, now to cleaning it and get it back to looking new again.  To start with, vacuum your area rug to get all the loose debris off of it.
Dirty spots, here I come....you are getting ready to be outta here!
This is the back of my rug, this is not one you can just toss in the washer, which I would do if I could. I vacuumed both sides just to make sure I was getting all the dust and dirt from it before I got started with the cleaning.
As you can see, I'm cleaning the rug on my kitchen floor, that way there will be easy clean up when I'm done.

I'm using the same DIY cleaning solution that I used right here for removing a week old coffee stain from our light colored carpet

DIY Carpet Cleaning Mixture (for smaller cleaners):

1 cup of vinegar
1 scoop of OxyClean
Warm/Hot Water to the fill line on the tank

The clean water tank on this particular machine is 3/4 gallon capacity so its quite a bit smaller than the full size cleaner tanks.  If you need the recipe for a full size machine, look right here.

NOTE:  Although this mixture worked for our light colored carpet, I'm not sure about using OxyClean on darker colored carpets, so be sure to test it before you start just to be safe.

Yes, there will be a slight vinegar odor, but it dissipates in about 24 hours time.

First, I treated and scrubbed the really dirty spots.
1. Spray with solution
2. Scrub with brush
3. Suction the water from the rug.
After I got all the spots done, I sprayed the entire rug with the solution, let it set for a minute or two, scrubbed it with the brush all over.  Starting at the upper left hand corner suction water out of the rug working in straight lines from top to bottom, moving over each time until you get the whole rug done.  I did the last suctioning step twice.
Lucky for me it was a nice sunny day so I took the rug outside, laid it on the patio and let it dry.  It looks so much better!
This is the place where the dirty spot was, but not anymore! Yay!  I'm so glad this worked because I really like this rug!
Here it is all dry and looking new again.  Its seriously like brand new again!
I didn't really realize how dirty it was until it was clean again and then I did this side by side picture and I was amazed!
This is the smallest  Pioneer Woman Country Garden Rug that matches the curtains that I made from a Pioneer Woman Tablecloth.  You can read about that post right here.

Want to see more of my cleaning tips for using vinegar? Just click on the links below.

Cleaning an HE Washer with Household Products

Remove Hard Water Buildup Naturally 

DIY Carpet Cleaning 

Cleaning Your Hairbrush the Easy Way 

Cleaning Your Oven

Cleaning Your Sink's Spray Nozzle


THIS JUST IN: Did you know you could use COUPONS on Amazon? Me either, but look right here for all your favorites and start saving, you know I am!

GREAT NEWS!  I now have an Amazon Storefront!  If you ever want to purchase anything I'm showing you here, you can pop over to my shop and see what I've picked out for you! Click right here to visit.

It doesn't have to be done all at once.  It is a slow process in the works! C-ya next time!

I'm Linking to:
These lovely and FUN parties!
Between Naps on the Porch
The Dedicated House  - (I was featured)

Pin It!

Sunday, February 11, 2018

Make Your Own Steam Mop Pads

I'm already in Spring cleaning mode so I've been cleaning like a mad woman lately!  We bought a Swiffer Bissell Steamboost Mop recently and it came with two of the cleaning pads for it.  They smelled wonderful, but I was concerned that the solution on them may not be good for our three cats to be walking around on as well as the the refill pads are kind of expensive in my opinion, especially for as often as I mop my floors.
I decided to find a more natural way to clean my floors so this is my solution for saving money and *keeping my cats safe in the long run.
First of all I needed a cloth to attach to the mop to grab up all the yuckiness.  A microfiber cleaning cloth was what I decided on so off to the Dollar Tree I went and lucky enough, I got two towels for one dollar! Yep $1 yall!!!
FYI, this is the lazy, no cut, no sew method for my fellow impatient types out there! lol!

First I removed the tags from my towels (just my preference) then I centered the mop on the towel.
Fold the ends up to the edge of the mop on both sides.
You will see a little rubber slot on each corner to tuck your towel in to.  Its very grippy by the way.
Using one finger I tucked each corner into the provided slots making sure my towel was tight on the mop base.
For the placement demo I was showing you with a dry towel, but before actually mopping, I wet the towel and then wrung it out pretty well.
DIY Mopping Solution for Tile Floors

1 cup water
1 cup distilled white vinegar (for cooking)
1 cup rubbing alcohol (50%)
3 drops Dawn dish soap (blue)
10 - 20 drops essential oils (OPTIONAL)

NOTE:  *Some essential oils can be harmful to pets or cause a negative reaction so please research the oils you choose before adding them to your solution.  Lots of information to be found on Pinterest.
I used a kitchen funnel and an empty glass cleaner bottle for storing my solution. Recycle!
Make sure your steam mop has distilled water in it, plug it in to warm up and then spray a generous amount of your diy cleaning solution down.
This Swiffer Bissell Steamboost Mop has changed my mopping life!  I love it and I feel like my floors are getting much cleaner than when I used a nasty looking traditional mop.  I have no idea why I haven't gotten one before now.
Just keep spraying your solution and mopping until your towel has reached it maximum amount of "dirty", then change if necessary and repeat.
The towel is filthy but the floor is clean now!  I swept before I mopped and this microfiber towel still picked up bits and pieces of yuck that was left behind as well as grabbed the dirt too.  Now I just toss this in the washer and it will be good to go for next time.
I'm always trying to save money when I can and of course I'm going to share it with you each and every time!  I hope you enjoy this cleaning tip as much as I do.

Want to see more of my cleaning tips for using vinegar? Just click on the links below.

Cleaning an HE Washer with Household Products

Remove Hard Water Buildup Naturally 

DIY Carpet Cleaning 

Cleaning Your Hairbrush the Easy Way 

Cleaning Your Oven

Cleaning Your Sink's Spray Nozzle


THIS JUST IN: Did you know you could use COUPONS on Amazon? Me either, but look right here for all your favorites and start saving, you know I am! :)

It doesn't have to be done all at once.  It is a slow process in the works! C-ya next time!

I'm Linking to:
These lovely and FUN parties!
Between Naps on the Porch
The Dedicated House  - (I was featured)

Pin It!
01 09 10