Showing posts with label FREE. Show all posts

Sunday, April 15, 2018

Chalk Painted Picture Frame with Free Lavender Print

Remember this accent wall post right here were I shopped my own home to create this wall for FREE?  As I was putting away my Easter decor this year I wanted to add a little Spring vignette to the old phone chair in our bedroom so I went to my decor closet and starting shopping!
Farmhouse fresh coming right up!  I don't know about you, but when I decorate, I get something out, sit it down, step back, look, pick it back up, put something else down, step back, look.....etc. Continuing those steps until I'm happy with how it looks.  The above picture was the end results of changing these pieces around about forty times! lol!
At first the chunky wooden picture frame I picked out looked like this.  It just was not working with the whole vibe I was going for.  A little paint helps everything, right?
I grabbed a few items and proceeded to give the frame an update.  I found my calcium carbonat on Amazon.  It's the key ingredient to making your own chalk paint out of any kind of flat paint you might have on hand. I also grabbed some acrylic paint in antique white and a foam paint brush.

Here's the chalk paint recipe I use.  For this very small job, I did not measure.  I just squirted out a small amount of paint onto my plate and then sprinkled a tiny bit of powder and a few drops of water and I was mixing and painting in no time at all.
After I had my mixture to the right consistency, I grabbed my sponge brush and swiped some of the paint all over the frame.  I got a little heavy handed in some spots with the swiping so I grabbed a damp paper towel and wiped some of it off until I liked how it looked.
This is the end result.  I love it!  It's exactly the look I wanted.  I kinda wanted to chalk paint everything in my house that was a solid wood color! Ha, ha!  I didn't seal it, but I guess you could if you wanted to.

Now the best part!  The lavender print that Natalie over at My Vintage Porch is offering for FREE on her blog. Oh and guess what? This print is not the only one, she has another one that is perfect for summer!  Go get your free copies right here.  Thank you Natalie!
So, when you're on a budget and you need a little change to your decor, shop your own home and makeover an old item you've had that needs a little freshening up.  Before you know it, you'll have a brand new stash of decor to use!  Everything you see here in this little vignette (except the green candle) was either free or thrifted.  You CAN decorate very inexpensively if you want to.

If you want to see more of my Farmhouse Decor Ideas, click right here!

Here are a few more of my painting adventures:

$5 Bedside Table
Painting a Paneled Door with a Window 
Painting Our Laundry Room Cabinets 
Kithchen EAT Sign 
Holiday Ombre Pinecone Wreath 
Easy to Make Fancy Hand Lettered Sign
Flower Pot Makeover 

It doesn't have to be done all at once.  It is a slow process in the works! C-ya next time!


I'm Linking to:
These lovely and FUN parties!
Between Naps on the Porch
The Dedicated House  - (I was featured)


Pin It!

Sunday, December 6, 2015

Countdown to Christmas with Free Printables

I was blog hopping the other day playing the linky party game and I came across these cute little freebies for a Christmas count down from Finding Home Farms.  Click HERE for your freebie too!  Thank you Laura!
Of course I'm a little late getting started, but when I saw these cute images I had to make my very own advent calendar.
This was a fun little project to do, the hard part was done for me with all these cute little printables.
First, go to the link I gave you above and download your freebies, print them out and then cut them out.  I used my Nesties and my Cuttlebug to cut mine out, but you could also use a circle punch or just cut them out by hand.
I printed mine out on white card stock that I get at Walmart  I chose a cutting circle that was about 2 1/4" so that I would have a white border around each image.
Next I wanted a red border behind each image, so I chose a scalloped circle a little larger than my circle and grabbed some red textured card stock and cut out 25 scalloped circles.
I used Scotch Quick Dry Adhesive to stick the two pieces together.  Just a little in the center and smooth it out toward the edges.  After they are all glued and have dried well, punch a tiny hole at the top for the twine to thread through.
It takes a little while for all this cutting and sticking of 25 little pictures, so coffee is a must! LOL!  If you follow me on Instagram you may have already seen this little picture.  If not and you'd like to follow me, look for ddcamp170.
I used my chalkboard from the kitchen for the countdown space.  I took some small jute and hot glued three strands to tie my tags to.
I attached them in a staggering fashion using red and white baker's twine cut at 12 inches each.  So cute!
After I tied all the tags on, I decided to write "Christmas Countdown" across the top of the chalk board.
From the beginning.....
To the end.....its going to be fun counting down to Jesus' birthday. 
The best thing about this sweet little advent calendar is that you can use it year after year.  I love it!

It doesn't have to be done all at once.  It is a slow process in the works! C-ya next time!

I'm Linking to THESE lovely and FUN parties!

And here are a few more too!
Between Naps on the Porch
DIY Home Sweet Home
We Call It Junkin

Pin It!

Sunday, May 31, 2015

DIY Vinyl Door Greeting

Now back to our regularly scheduled program! LOL! I only say that because last week I shared a beauty tip instead of a household tip.  If its good you gotta share right?!?!! Go HERE to see last week's post.
We live in Texas and its been raining. A lot!  No really, like its been flooding and stuff!  So, one rainy Saturday morning (yesterday) I decide our front door wanted a make over, so I gave it one!
This was our boring little door to begin with.  It's not saying anything at all right now.  Lets fix that!
I used what I had on hand.  I love when I can do that!  So cool and so FREE!  For this project I used my Cricut Expressions machine, my ZooBalloo cartridge and some vinyl from Expressions Vinyl.

This welcome word is on page 123 of the ZooBalloo manual.  I cut my welcome out at 2 inches, removed the excess vinyl and left the word stuck to my cutting mat.  Next I cut a peice of transfer paper also from Expression Vinyl.
I peeled the backing off the transfer paper and pressed it onto the welcome word.  Use your finger to go over each letter to make sure the transfer paper is adhering to it.
Gently start to remove the transfer paper making sure your vinyl is attaching to it.  See how the "L" didn't want to go with the transfer paper? Just place it back over the letters and rub to get it going again.
The transfer paper is slightly tacky, so using the extra paper along the bottom of my word, I lined it up to where I wanted to permanently place it.
Firmly rub with your fingers to transfer the vinyl to the door.  I went over the entire word about three times to make sure it was clinging to the door.  Oh, one note of advice.  Make sure your door is clean and free of any dirt that would cause your vinyl to not want to stick.
After you've firmly pressed the greeting onto the door, remove the transfer paper by pulling at an angle so as to NOT lift your newly placed greeting off the door that you worked so hard to get into just the right place.
There ya go! I like it, but wait!  Why not add the house number while I'm at it.  Great idea, believe I will!
Ok, that's better.  Now I'm loving it.  If you follow me on Instagram, you may have seen this picture yesterday.  If your not already following me and you'd like to,  just search ddcamp170 on Instagram.
Here's my before and after shots.  What do you think?  More "welcoming" now? LOL!
Isn't it fun how such a small little added detail makes such a big difference?  Would you like to know how I made my SUMMER wreath?  Go HERE for the full tutorial.

It doesn't have to be done all at once.  It is a slow process in the works! C-ya next time!

I'm Linking to:

These lovely and FUN parties!
Between Naps on the Porch
DIY Home Sweet Home
We Call It Junkin

Pin It!

Sunday, April 26, 2015

Garden Plant Markers

A few weeks back we planted our garden and since my honey did all the planting, I kept forgetting where everything was located.  I'm pretty sure he was tired of me asking him....so....I made some plant markers using supplies I already had on hand.  Guess what? That makes them FREE! YAY!
Even the little plant clip art was free too!  Can you guess what I used as the markers yet?
You guessed it, left over wooden blind slats!  You're so smart!!  I hold on to these hoping to use them for something good and not have to throw them away.  Look HERE for another project I used them for.
I found this free veggie clip art on Freepik.com HERE.  They were perfect size for my project.

You will need the following items to re-create my plant markers:
Veggie Clip Art
Printer
Sharpie Marker - black permanent ink
Scissors
Wooden Slats cut to 12" lengths (I used our chop saw to cut these)
Mod Podge in the Outdoor formula
Foam paint brush (small)
After you print out your clip art, using sharp scissors, cut out each picture staying pretty close to the printed area.
I situated the clip art at the top of the markers for placement and then with the Sharpie, I wrote in the name of each vegetable.  Let the Sharpie dry really well and then proceed to using the Mod Podge to hold it all in place.
I swiped on a bit of glue, laid the clip art down, then went over the entire wording and clip art two more times with Mod Podge.  Let each thin coat dry really well before going on to the next.
And here it is out in the garden.  The markers slid into place really easy and now I don't have to ask my honey bun where each plant is anymore! LOL!
Have you made garden plant markers for your garden?  What did you use?  Leave a comment and let me know!

Check out last week's post about Making Your Own Organic Compost.

More garden projects:
Raised Bed Garden (Part 1)
Raised Bed Garden (Part 2) 
Raised Bed Garden (Part 3)
How to Make a Small Garden
Making Your Own Organic Compost 


It doesn't have to be done all at once.  It is a slow process in the works! C-ya next time!

I'm Linking to:

These lovely and FUN parties!
Between Naps on the Porch
DIY Home Sweet Home
We Call It Junkin

Pin It!

Sunday, February 15, 2015

Fence Picket Wall

I've wanted to do this project for a very long time now and for Valentine's Day this year, this was my present from my Honey! He's the bestest!
We finished this section of our master bathroom in just a few short hours.  We are going to do another larger wall over the tub soon.

Update: Click right here to see the other wall!
First we measured our area then gathered some choice fence pickets from our stack of recycled pickets out back. We've used from our stack several times before.  I'll list links at the end of this post if you want to go look!
We had to remove all the staples and nails from the pickets so that they would lay flush to the wall.
We started out with this very plain space and before the day was over, we had a lovely piece of art that we created together.  Perfect Valentine's Day huh?
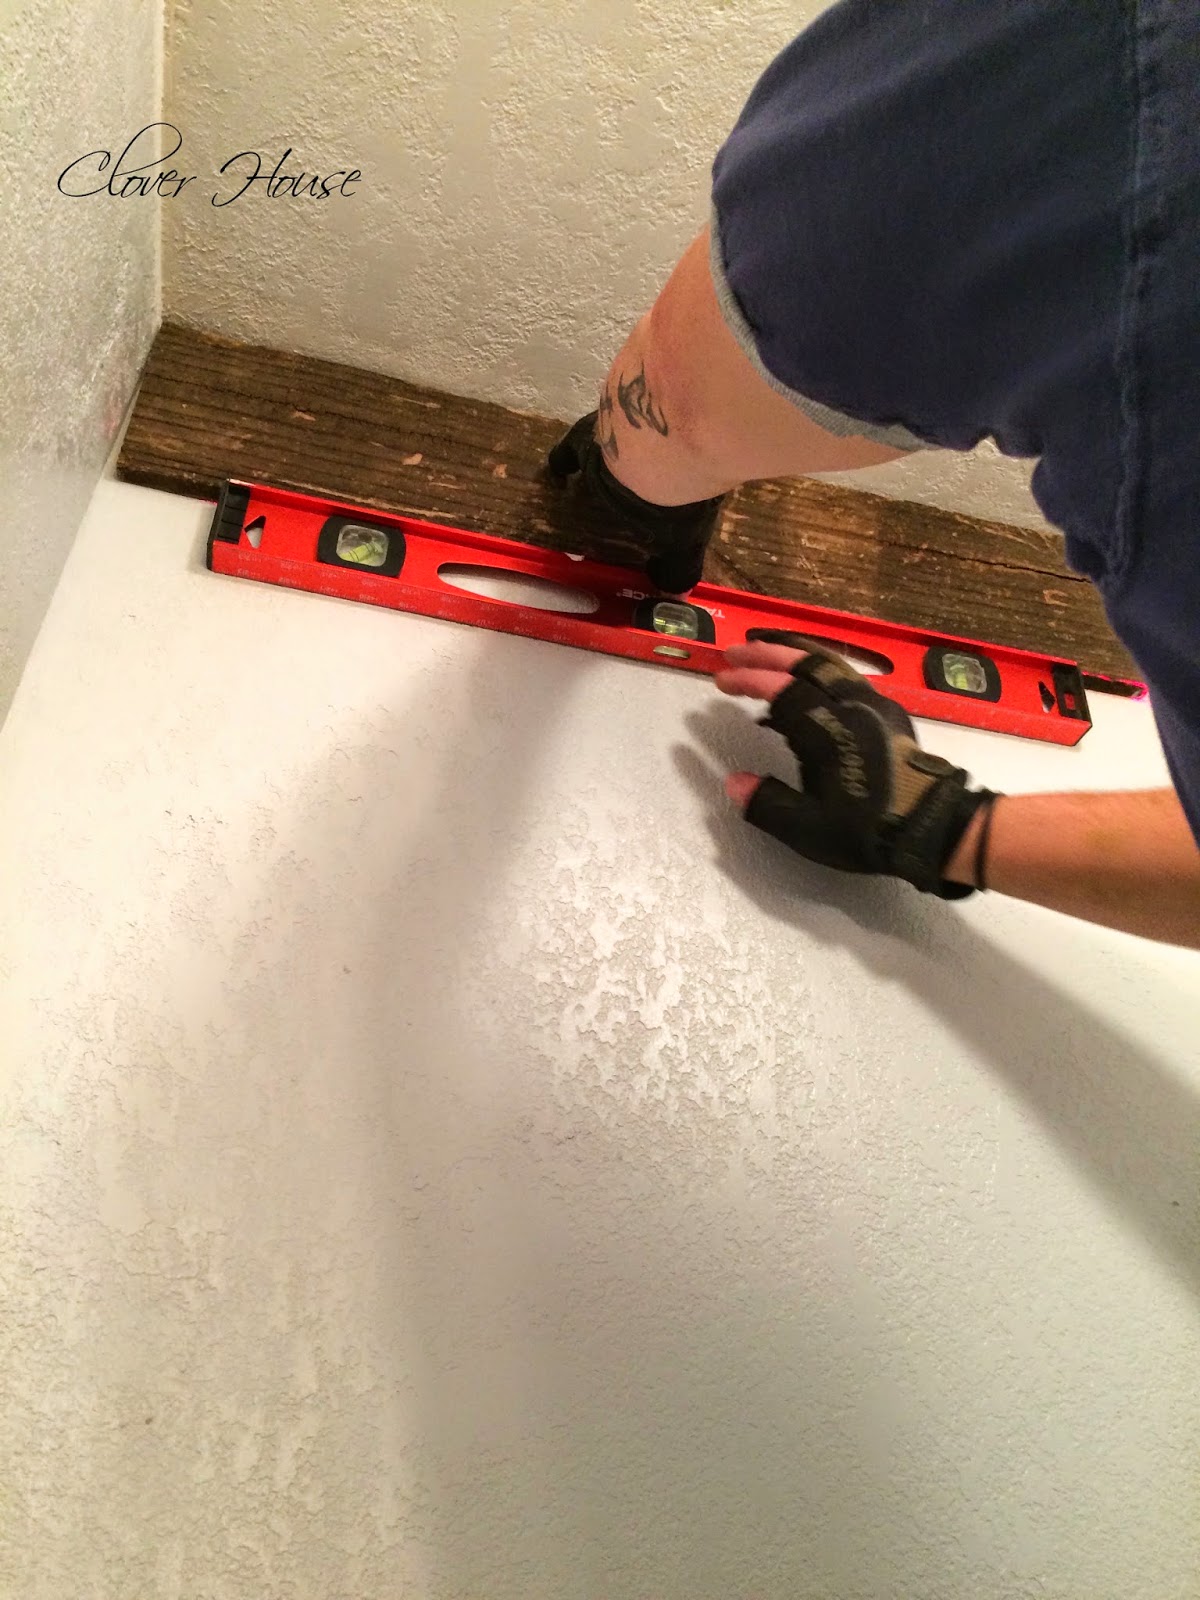
We decided to use two pieces of wood for each row.  We wanted a staggered look, so we used different lengths for each piece of each row.  After you decide on the length of the first boards, you will want to make very sure that your first row is level before proceeding or you could have a downward slope on one side or the other.
We took time to pick and choose each piece so that we had different looks side by side.  One light, one dark, etc.  I love the more rustic worn looking ones the best.
We used a small amount of liquid nails on the back of each plank and then used the nail gun to tack it to the studs.  The reason we used the glue is because some of the boards were a little warped from the weather and we wanted to make sure that stayed flat on the wall.  We used 1 1/4" brads in our nail gun to secure the boards.
My honey would measure and mark the wall of the size of each picket and I would write his measurements down on a note pad, then we would go out and cut 4 to 5 rows then come back and glue/brad each one to the wall.
NOTE: Be sure to make sure both pieces fit in their space before you add glue to the back.  You may possibly need to trim a bit before you stick it!
We got to this point and realized the picket would not fit behind the toilet tank.  My honey tried moving the entire toilet forward, but we did not have enough wiggle room to make it work.  The lid protruding out that was the problem.
My honey cleverly cut out a space for the lid to fit and then we carried on.  You can't even tell the cut is there now.
I think it turned awesome and I couldn't be any happier with it.  It really makes a difference in our bathroom already.  I can't wait to see the other wall finished!
Dontcha just love all the varying colors of the wood.  Mother nature did that y'all!  Such a cool piece of art  work.
Of course we have more work to do, but for now this little space in our bathroom really makes me smile!
My Honey said to me "most girls got candy and flowers for Valentine's Day, you got a picket fence wall!"  And I love it more than any candy or flowers he could have gotten me.  Its ok, you can be jealous! LOL!
One more look at the before and after shots.  Its amazing what a little FREE wood can do to such a small space!

ETA: I've had lots of questions about how I keep the picket wall clean in the toilet area.  We don't have any small children in our home and we are not messy bathroom users, so I just use the brush attachment on the vacuum cleaner to "clean" the wall when it needs it.

Want to see more of my Farmhouse Decor Ideas?  Click right here!

And as I promised, here are a few more of our picket fence projects for your viewing pleasure!

Fence Picket A/C Cover : Click HERE
Pretty Picket Planter: Click HERE
Picket Fence Stand: Click HERE
Picket Fence Shelf: Click HERE
Master Bathroom Mini Makeover: Click HERE

Do you like my Pillow covers? Get yourself one by clicking right here! Use my special discount code DD20 for 20% off your order.  The Bundle Box is excluded from this offer and you're limited to a one time use of my code per customer.  HURRY on over because they just released their Spring line and its going fast!  Please tell them DeeDee sent you!


It doesn't have to be done all at once.  It is a slow process in the works! C-ya next time!

I'm Linking to:

These lovely and FUN parties!
Between Naps on the Porch
DIY Home Sweet Home
We Call It Junkin


Pin It!
01 09 10