Showing posts with label outside. Show all posts

Sunday, June 11, 2023

I Painted Stripes on My Garden Shed

Hey yall, how are ya?

Well, it finally got hot in Texas.  We've been in the 90's lately but we've got some 100 degree days on the way soon.  That's actually pretty good for Texas, being the middle of June and just now heating up.  I'll take it.

I mentioned last week that I had not felt creative.  I'll be directly honest, I have been sad lately.  Sometimes life gets overwhelming and causes me to just shut down creatively.  I guess that's normal for most creative people, it is for me.  Anywhoodie doodie  I decided to do something fun to cheer myself up.  I decided to paint my shed in the back yard.

I actually got the idea a week or so ago but we've been having rain off and on and just didn't get to it until now.  This is an easy and quick project that makes a big difference.

First of all I cleared away all the "stuff" and pondered my plans.

I used my patio broom to sweep off any dirt or cobwebs.  I also used my leaf blower (not shown) to get all the dust off before I started painting.

This frame in my video cracked me up, so I had to share it.  While I was shaking up my left over paint I leaned out to see what the loud noise coming down the street was.  Other people's children and their loud vehicles.  I guess their tail was on fire!

Here's what I used:

Leftover paint, the same color I used for my front steps.

Paint brush - I used an angle brush so I could be more detailed.

Paper towels for drips.

Good music to paint to.

Do you like to paint?  I do!  Let's do it!

Starting at the top using a large brush because I thought that would make my job go faster, but I soon found out that I needed my angle brush, so I could cut straight lines and not get paint on the boards I wanted to leave white.  I painted every other wood panel, so I had to be really careful where the paint was going.  See, easy!

I love colorful and whimsy, so this paint style is perfect for the cottage garden I'm trying to achieve in my backyard.

When I finished the large panel of wood on the left, I moved on over to the small section to the right and did the same painting there.  

When I was done painting with the orange paint, I went back and touched up any booboos with my white paint.  While I was at it, I touched up any bare wooden spots to help keep the weather out.

I'm still debating if I should paint the top and bottom panel of the door orange.  Would that be too much? Sometimes I never know when to stop! lol!

This was a really easy and quick update that made a huge difference in the look of my little garden area and I love it!

Don't get me wrong, I was second guessing myself about half way through.  Cracking jokes to myself like..... Hello Whataburger, is that you?  Or.......The circus has come to town and ended up in my backyard! lol!

If you're not from the south and don't know what Whatburger is, for one you're missing out and two, orange and white stripes is their thing!  See here.

Thanks for visiting me! Come back soon to see what I do next. 

If you loved any of these ideas and want to save them for later, be sure to pin it to your favorite Pinterest board.  I have a Pinterest board set up for all kinds of fun stuff for the backyard and it's called Backyard IdeasI'm pinning something new on Pinterest every day. Won't you join me?

***I am a participant in the Amazon Services LLC Associates Program, an affiliate advertising program designed to provide a means for me to earn fees by linking to Amazon.com and affiliated sites.**


Pin It!

Sunday, May 1, 2022

My Patio Garden Tips

Hey there, happy May Day!

I hope all is well with you!  The weather is warming up and I am loving it!

Who's ready for Summer and all of the red, white and blue? Me, I am!!!!

Welcome to my patio garden!  A lot of my plants have moved right along with me, from one house to the next.  All of the pretty blooms you're about to see came mostly from bargain racks.  I think I've only paid full price for maybe two of my new plant babies so far this season.


Most of my bargain blooms came from Walmart's Clearance Rack.  I'd say most of them were about half price and all they really needed was some TLC.  Sometimes they are just over or under watered and need to be treated properly.

So many pretty Spring colors in these blooms.  This is a Cotton Candy Creeping Flox.  I've never had one of these, but half price plants get my attention every time!

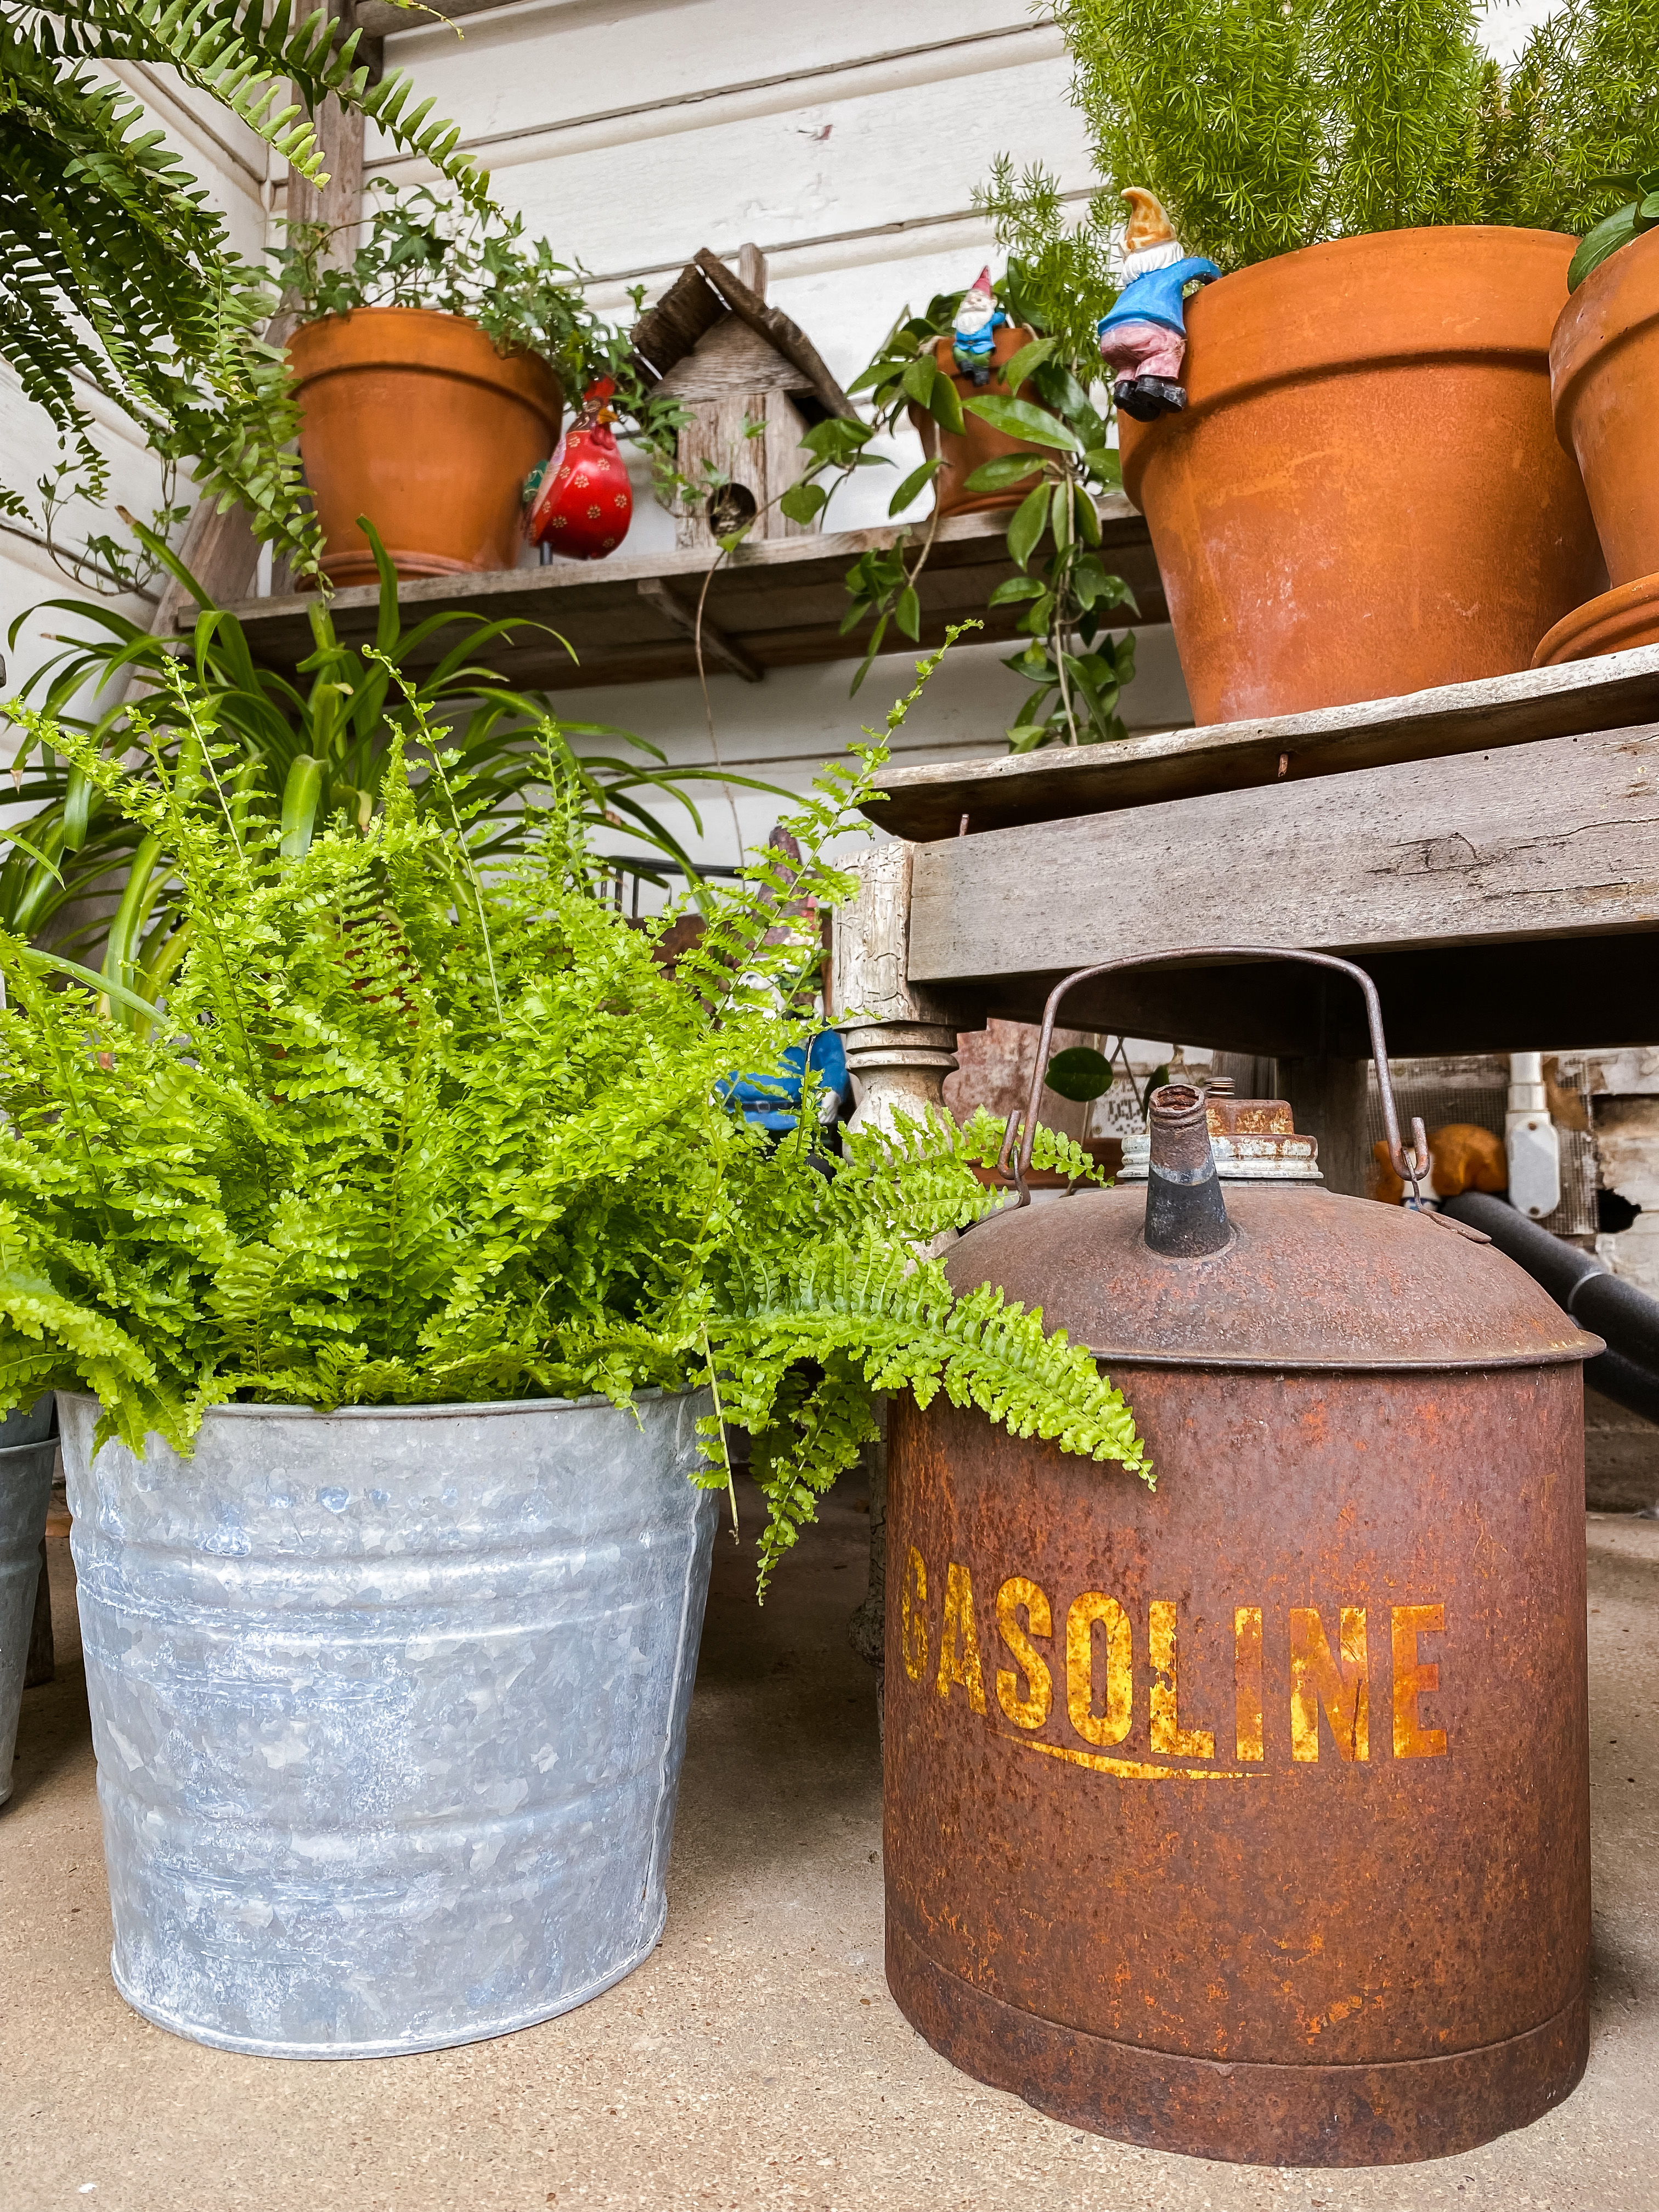
This Western Sword Fern is something I've also never had before.  I paid full price for him because look! He's so beautiful!  Don't all plants look prettier in old buckets hanging out with vintage goodness?  Yes, yes they do!  This gas can was my Papaw's and I love it!


Lots of pretty Petunias blooming right now.

These pansies had no blooms when I got them so I didn't know what color I was getting.  Surprise, they're beautiful!  The gorgeous green planter with hair pin legs was my Mamaw's.  So far it's lived through me moving a million times and I'm very happy about that.  I'd be heartbroken if it got ruined.  That's a Fox Tail Fern growing in there.

This Southwestern Mock Vervain was REALLY dry when I got it, its looking way different now that it has a new home and some yummy good rain water on the regular!

Speaking of rain water, do you catch your rain water and use it for your plants?  You should, it's the best to water all your plant babies with.


I just use an old wash tub with my gutter down spout directed into it for catching rain water.

I replaced the round tub with my big oblong tub to catch more water.  Look at the roses that are now bloomed out!

We are supposed to get more rain tonight so I need to go get my current supply of water poured up into buckets so I can catch more!


As you can tell, I love old vintage goodies to decorate with.  Mostly because I like looking at them while I sit out on the patio.
 

These are all fake plants, but let me show you some of my pretties.  Gas cans, paint cans and old rake heads.  Please tell me you think these rusty gems are pretty or we can't be friends! Lol! I'm just kiddin'!

The eucalyptus garland lights up.  It's on a battery operated timer to come on in the evening.

I just adore this old rusty minnow bucket and its rusty stringer.  Both this picture and the one above are from my Instagram page.  Just so you know, I don't leave the vintage doilies outside.  Again, the flowers are fake, so they can stay outside.

And the whole picture.  I hope to have every nook and cranny filled with pretty plants and vintage goodness, but that take time.

Let's go over our patio garden tips now:

TIP ONE:  Buy plants off the clearance rack!

TIP TWO: Surround your plants with vintage goodness to make them happier! *wink*

TIP THREE: Catch rain water to water your plant babies with, they like it better!

TIP FOUR: Do what makes YOU happy!


One night time picture to show you my pretty solar path lights by Gigalumi.  CLICK HERE to save 15% off of your order of anything on their website.  THESE are the ones I have.

I plan on making this area into a flower bed too.  Just haven't got that far yet.  Rome wasn't built in a day, right!

Here's a little night time action I just happened to catch.


These are the patio lights I'm using.  They are solar powered because I don't have any electrical outlets on my patio.  They are very nice quality for the price.  Find them here.  They give off a warm glow and have 8 different modes or settings.  I really just like the steady glow and don't really use the dancing modes so far.  Maybe some day.

One more thing before I go, I had the pleasure to work with Far & Wild Essential Oils.

*They are NON-MLM! - easy ordering direct from their website without any membership fees or monthly minimums typically associated with essential oils

*They offer direct to consumer pricing! They beat MLM pricing across the board on pretty much every one of their products (DoTerra, Young Living etc)

They are awesome to work with and their oils are fabulous!  Of the oils pictured here, SOOTHE is my favorite to diffuse.  But, for outside on the patio, you really need to grab some Lemongrass oil.  It will keep those Texas sized mosquitoes off of you!  Trust me!

Please use my code DEEDEE20 to receive 20% off your order of anything on their website.  CLICK HERE to start shopping.

If you loved any of these ideas and want to save them for later, be sure to pin it to your favorite Pinterest board.  I have a Pinterest board set up for all things back yard decor and its called Back Yard IdeasI'm pinning something new on Pinterest every day. Won't you join me?

***I am a participant in the Amazon Services LLC Associates Program, an affiliate advertising program designed to provide a means for me to earn fees by linking to Amazon.com and affiliated sites.***

Pin It!

Sunday, August 8, 2021

The Perfect Backyard Gazebo

 Hi there! Long time no blog here!

Our house is still for sale, we've had some nibbles, but no real bites yet.  It'll happen when its supposed to I reckon!

One bit of news, I got a new job!  This is a job that I love and don't hate going to everyday!  I'm working as a receptionist at a Veterinary clinic.  I get to talk to sweet animals every day.  I mean seriously, who wouldn't love that!

Anywhoooobs, let's get on to the gazebo I mentioned way up there in the title.

How cute is that?  Guess what?  I assembled almost all of it myself.  When I got to the part of attaching the top to the bottom, I had to have help.  Short lady problems ya know! lol!

Of course I had to create a photo shoot for IG! Ha!  Watermelon anyone?  That was the best watermelon too!

Just grab a fork and dig in! It's just not Summertime without watermelon, am I right?

The Aster Outdoor Gazebo is perfect for my current backyard and when I move, it will assure me a covered space even if my new house doesn't have one!  Yay!

Here are some details about this gazebo that I borrowed right from the site:

  • Vented Soft Top Roof: The two-tier Dome-Cabin Style Roof is weather resistant polyester and provides better stability in windy conditions, keeps proper airflow while you work or relax under it and helps reduce heat and wind stress on the canopy. The gazebo roof material is UPF 50+ protected, 99% UV blocked, water-resistant, CPAI-84 US Standard fire-retardant and is perfect for providing shade or rain protection during your outdoor events. The extended eaves provide additional shade
  • Sturdy Frame: The frame is heavy-duty, made of high-grade engineered steel and is powder-coated for rust-resistance and extra durability. The heavy-duty steel frame can withstand various weather elements, resist chipping, peeling, rust and corrosion. The frame will stand up to the elements for years to come. Also, the included 8 ground stakes will help provide more stability and security for this well-designed structure
  • Mosquito Netting on all sides: The insect netting comes with double-sided zippers to help secure the netting to help keep bugs out. The netting is see-thru and flame resistant. The netting has velcro straps and elastic ties to secure the netting in place and are easy to install and take off
  • Exquisite Design: The hanging hook inside the metal gazebo tent allows you to suspend a chandelier for additional lighting or any decoration, providing you with a more cozy ambiance. It also can be used to hang a fan, making you more comfortable and cool when relaxing outdoors in the summer. The hook load should not exceed 50 pounds. With straight-forward and easy to install instructions, you can quickly have a private gazebo to enjoy the great outdoors with ease
  • Multi Use: This fully assembled outdoor canopy gazebo provides 120 square feet of coverage, enough room for 6-7 people. It's a good choice for commercial or recreational use-parties, small business, outdoor backyard events, lawn, outdoor deck, garden, patio, or near a pool, grill, or BBQ pit and parties, sporting events, weddings, etc. Our 12x10 gazebo will make your outdoor space an oasis. 

Best of all, it was easy to assemble!  Please check out my IG highlights here for a video of the process.

Thank you for sticking around and waiting on me to blog every now and again!  I hope you are all doing well!

If you loved any of these ideas and want to save them for later, be sure to pin it to your favorite Pinterest board.  I have a Pinterest board set up for all things backyard related and its called Backyard IdeasI'm pinning something new every day. Won't you join me?

GREAT NEWS!  I have an Amazon Storefront!  If you ever want to purchase anything I'm showing you here, you can pop over to my shop and see what I've picked out and am probably using in my home right now! Click right here to visit.
 

It doesn't have to be done all at once.  It is a slow process in the works! C-ya next time!

***I am a participant in the Amazon Services LLC Associates Program, an affiliate advertising program designed to provide a means for me to earn fees by linking to Amazon.com and affiliated sites.***


Pin It!

Sunday, August 9, 2020

Our DIY Paver Patio with New Decor

Hi there! We've been busy making stuff happen over here at the 1922 Blue Bungalow!

So we've been here for only a short time, but it was important to us to have a space outside to hang out.  This patio happened very unexpectedly.  My honey was perusing through FB Market Place one evening and came upon these patio pavers for $1 each!  We couldn't resist it because pavers are expensive yall!
We built our patio all in one days time.  That includes us driving all the way to sellers house, digging the pavers out of the ground, loading them into our trailer and then driving back home to unload and place into a patio that looks like this! Whew!
This is how it looked just outside our sun room.  Lots of sand that is annoying to walk on and patchy grass.
 My honey used a rake and a hoe to remove all the grass he could before we started.  Then we leveled the ground out the best we could using a long 2 x 4 to smooth everything out level.
Then, we made use of lots of our moving boxes.  We laid them down to help keep the grass from growing up through the pavers.  That's one good use for moving boxes if you ask me!
We started on the far left hand side and stayed even with the little step out of the sun room.  We slowly, but sure, moved to the right filling in our space.
We had 168 pavers and still have lots left over.  We also made a side walk up the side of the house to the gate.  After we had all the pavers down, we used sand from our yard to fill in all the cracks.
Lastly we sprinkled the entire patio with water to settle the sand into all the cracks to see if we needed to add more.
We got the patio table and chairs from the same people for $100.
Next I added a few flowers to the little rock garden under the windows.
I used my honey's old fertilizer spreader to hold a few flowers and a sweet potato plant.  So cute!
To add color and make our new patio cozy, I got this beautiful red 9 foot market umbrella with push button tilt and crank (cover included) from Abba PatioYou can use my code DEE for 10% of your entire purchase site wide.
I also added some pretty chair cushions that I found on clearance at Home Depot for $17.00 each.  They are regularly $34.98.  Bargain!

21.5 in. x 24 in. Chili Medallion Outdoor High Back Dining Chair Cushion by Hampton Bay

A game of Scrabble anyone?  We found this vintage Scrabble game at a yard sale for $1.  I love using it for my decor.  The adorable metal caddy is from Just Joy Shop.  They have lots of cute things!
We like to have breakfast on the patio on our days off, so of course I have to doll the table up too!  Just a few pretty vintage goodies for a centerpiece.
We sat our BBQ table over to the side of the pavers so we can enjoy yummy grilled suppers out here too!
Do you like to have meals outside?  I especially love sitting out here in the morning sipping my coffee and enjoying all the nature sounds as the sun comes up.

If you loved this idea and want to save it for later, be sure to pin it to your favorite Pinterest board.  I have a Pinterest board set up just for all things related to Patio Decor, its called Patio Beauty and I'm pinning something new every day. Won't you join me?

GREAT NEWS!  I now have an Amazon Storefront!  If you ever want to purchase anything I'm showing you here, you can pop over to my shop and see what I've picked out for you! Click right here to visit.

It doesn't have to be done all at once.  It is a slow process in the works! C-ya next time!


Pin It!

Sunday, July 28, 2019

How to Install a Stock Tank Pool with a Waterfall

I've been wanting a stock tank pool, or as we call them, a redneck swimming pool for at least 3 years now.  I'm not going to lie, the stock tanks are expensive!  We happened across a bargain and got both of the tanks and all the flag stone for $75 total! Bargain of a lifetime right there!

There are lots of tutorials on how to install these pools and I've linked what I thought was the best one down below.  I'm basically going to show you how to add the waterfall tank since I haven't seen that feature much at all.
Both tanks are 6' x 2', one round and one oblong with a spout.  I couldn't find one with a spout to link for you online, so I found this really cool idea to use on a regular tank.

Both of our tanks are used, so we had a bit of restoration to do before we could attempt to fill them with water.  Our patch job won't last forever and we will probably have to fork over lots of money to replace one or both tanks some day.  But today, we have a spot to cool off in the Texas heat! My advice is buy new if you can.
Step 1: Choose your tank size and location to set it
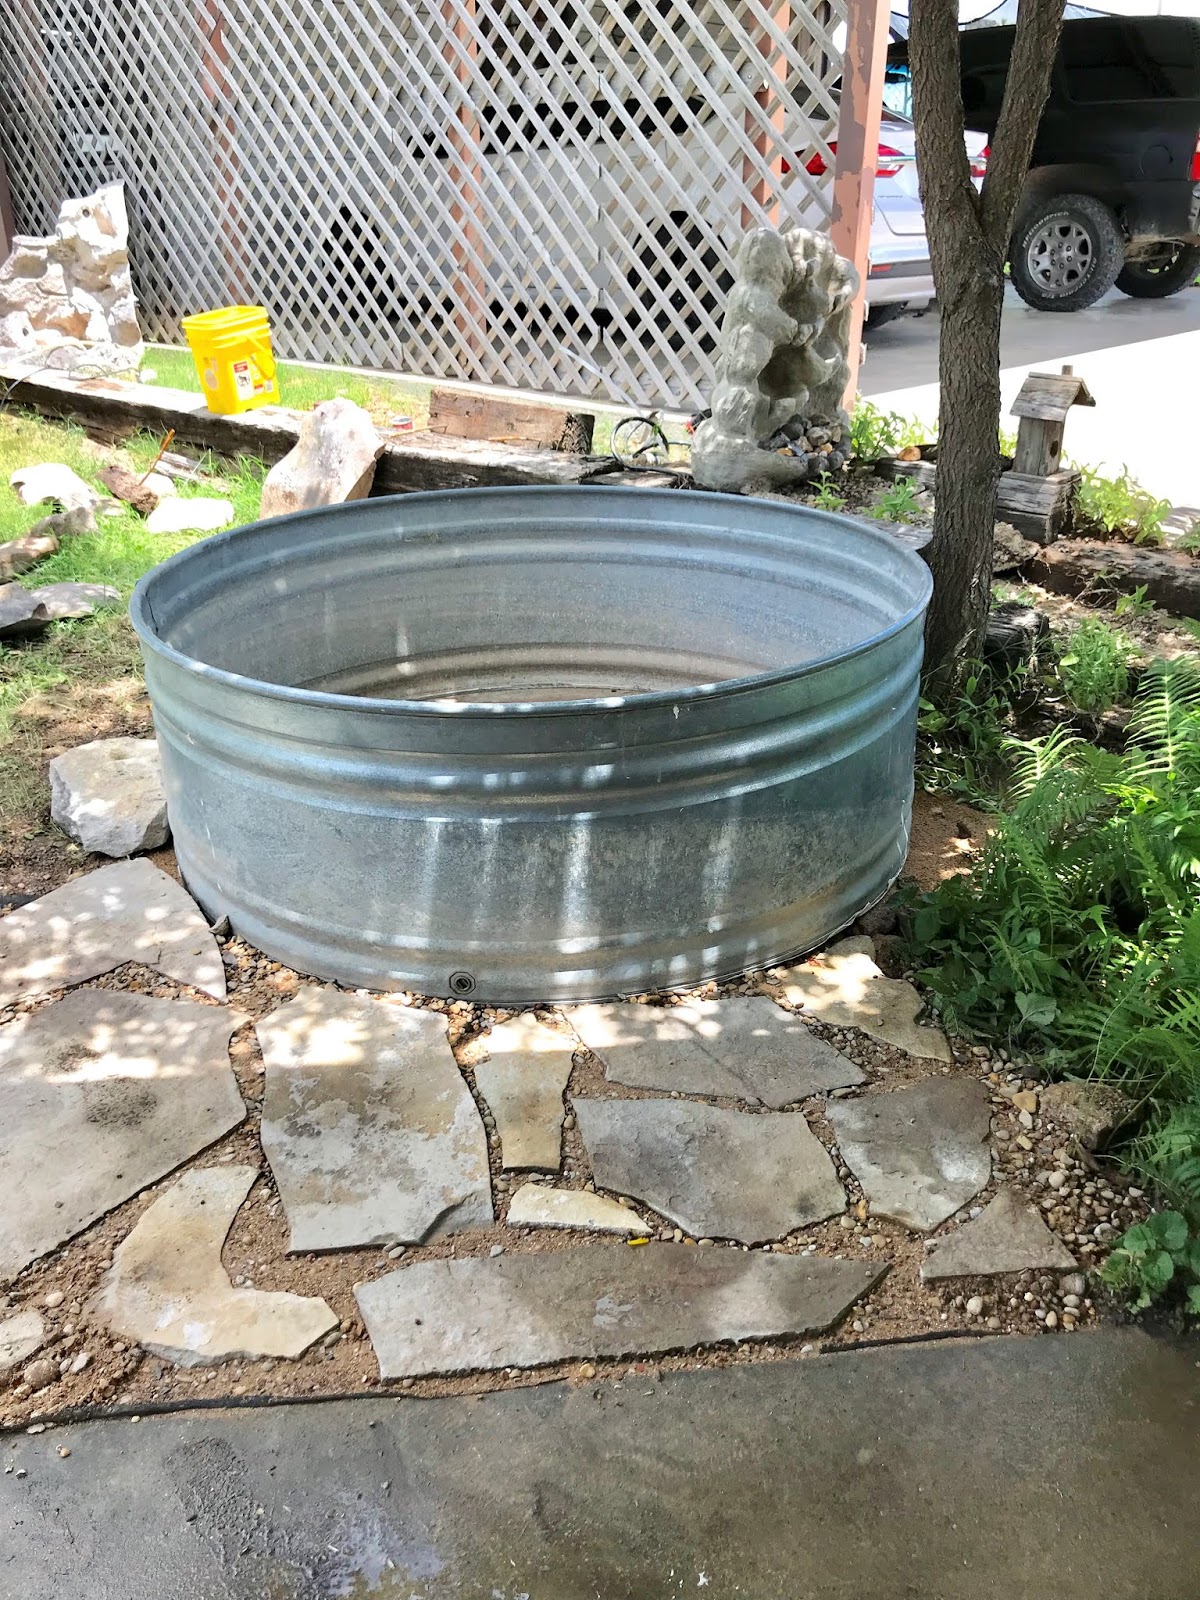
This spot is right off our patio and it used to be a fish pond waterfall feature.  The plastic in ground tub went by the wayside a couple of years ago so we pulled that out of the ground, tossed it in the dumpster and filled in the hole.  Now we have a perfect spot for our pool.  Lots of cleaning and prepping to do though.
Of course, my honey does all the manual labor, I'm just his assistant.  First we placed the round tank where we wanted it and he used the shovel to mark its spot.  He pushed the shovel into the ground all the way around the pool.  When we took the pool away, we knew where to clean and level the ground.
Next he watered it all down to get it to settle real well.
We used contractors sand from Lowe's to act as a leveling agent.  This is 3 bags worth.
He used a piece of 2 x 4 and his level to make sure it was all level so that when the pool was filled it wouldn't be leaning more on one side than another.  This is a very important step.
And again, watering it down to get it all to settle in level.
Next we laid down some landscaping cloth, covered it with more sand to ready it for all the rocks.
He strategically placed each flag stone the way he wanted it.  We then spread river rock over the entire area to settle into the sandy spaces. It took about 4 bags of river rock.  We also got that from Lowe's as well.

NOTE:  In hindsight, we would have skipped the sand step here.  We didn't think about all the sand that would possibly get into the pool. On another day, he actual took all the rock and as much sand up as he could and then put all the rock back.  It was a long tedious process so JUST SKIP THE SAND if its not UNDER the pool!
Step 2: Installing the Filter Pump - Please view this tutorial and video here, its very helpful!

Supplies We Used:
Intex Filter Pump - This includes an outlet, but no inlet strainer or valve.
Pump Inlet Strainer + Outlet w/ Two Valves: Note: It includes an outlet jet as well, which is already included with the Intex Filter Pump, we used this for our waterfall tank. You will not need the extra outlet jet if you just have one tank.
Intex Valves (2 pack) - This is not needed if you purchase the pump strainer above, but it is needed if you are NOT going to have a waterfall.
100% Silicone Caulk  
Extra Intex Filters
 
 
For our 6' x 2' stock tank (the round one) he carefully drilled two holes.  We chose to have our holes on one level instead of one high and one low like a lot of people do.  This way served our type of tank.  If you keep reading you'll see why, but in the end, we actually don't use one of these fittings and we just turned the valve to off now.

NOTE: Make sure you drill your hole on a flat area.  DO NOT drill on an indention or bump.  Your parts and pieces will not seal properly if you do.
Next we set up the pump as instructed from the box.
At this point if you have one tank only you can fill it with water and enjoy your pool.  We should have waited but we didn't, because were impatient.  We were still waiting on Amazon to deliver the final parts we needed for the oblong tank to become one with the round tank.
In the mean while we used a pond pump to circulate the water, which you can totally do, but I hated seeing the ugly black hose and wire draped over the side of the tanks, so my honey figured out a way to remedy that for me.
This is the water jet I ordered for the waterfall tank.  See I told you the tanks were used and in sad condition.  The waterfall tank is the worse. The round one was in pretty nice condition, thankfully, since its the one we get into.
This is what it looks like on the outside.  Since our tank is old and textured, we used silicone on the inside seal to make sure we had no leaks.

See that box between the tank and the white hose, that's our electric plug in box which was already here from the fish pond before.  This is another reason we chose this spot for our pool.
Now, we have the outlet (shooting water in) on the waterfall tank and the inlet (sucking water out) on the round tank and both hoses lead to the pump which we have sitting on a rock on the back side of the entire set up.  The hoses run under the pallet that I'm about to tell you about.
I'm backing up just a bit to show you how we raised the oblong tank up above the round one.  Like before, we put down landscaping cloth and sand and then sat the revised pallet (my honey is handy like that) on top and then put the tank on top of the pallet. We covered the pallet up with big rocks so it all blends in.
No more ugly black hoses in the way and we still have our waterfall feature which by the way, sounds delightful when you're just sitting pool side relaxing.
That little flamingo is our chlorination for the pools.  We found him at Walmart along with the chlorine tablets to put inside of him.
We also got a set of color changing lights to go in the pool for a fun look at night.
And lastly, we added pool noodles around the edge of the round pool for comfort.  When you're relaxing in the pool it cushions your head or neck and if you want to sit on the side of the pool, it cushions your bottom.  I found them on clearance at the Dollar General for 50 cents each!  It took 4 full noodles and a piece of another one to go all the way around it.  I love it!  Oh yes, and we got this pool net to keep our pool clean!

I hope this wasn't too confusing, but if you have questions, please ask! :)

It doesn't have to be done all at once.  It is a slow process in the works! C-ya next time!

GREAT NEWS!  I now have an Amazon Storefront!  If you ever want to purchase anything I'm showing you here, you can pop over to my shop and see what I've picked out for you! Click right here to visit.

If you loved this idea and want to save it for later, be sure to pin it to your favorite Pinterest board.  I have a Pinterest board all set up just for Pool Ideas That I Love and I'm pinning something new every day. Won't you join me?


I'm Linking to:
These lovely and FUN parties!
Between Naps on the Porch
The Dedicated House  - (I was featured)
French Country Cottage
Skip to my Lou
The Self Sufficient Home Acre

Pin It!
01 09 10