Showing posts with label Big Jobs. Show all posts

Sunday, October 25, 2020

How I Painted a Faux Rug on Our Front Steps

Hello there!  How's you Fall treating you?  Ours is currently treating us with some Winter weather!  Weird for Texas, but it is very cold and rainy here right now!

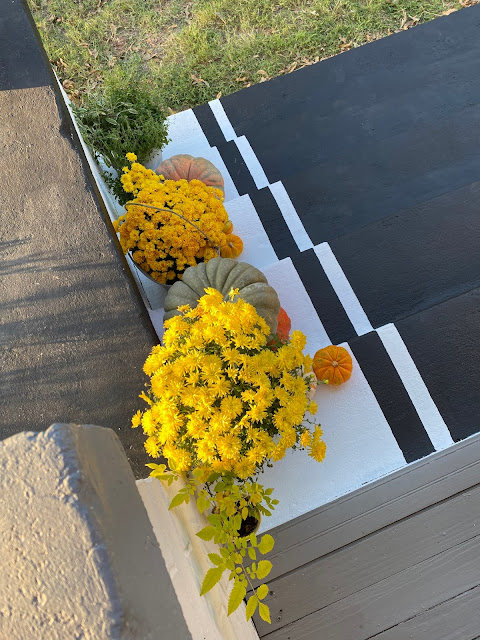
I wanted to share with you how I painted a faux rug on our front steps.  I am seriously loving how it turned out!


It was LOTS of work, but so worth it in the end.  My rug is very simple and I'm sure you could really go elaborate if you wanted to, but for me, I chose easy for the first time around!


It makes a very dramatic change for sure.  I added bunches of Fall goodness, like pumpkins and mums to really make it special!


STEP 1: PAINTING THE BASE

I gave the steps a good cleaning and then painted the entire thing white.  I used a small roller brush to apply the paints.  Here's what paints I used:

1 Gal. Ultra Pure White Textured Low-Lustre Enamel Interior/Exterior Anti-Slip Porch and Patio Floor Paint

and a small can of Behr Ultra Stain Blocking Paint and Primer in One in the Exterior Flat Deep base and had them tint it in black. Sorry, I can't link it because I could not find it on the site.


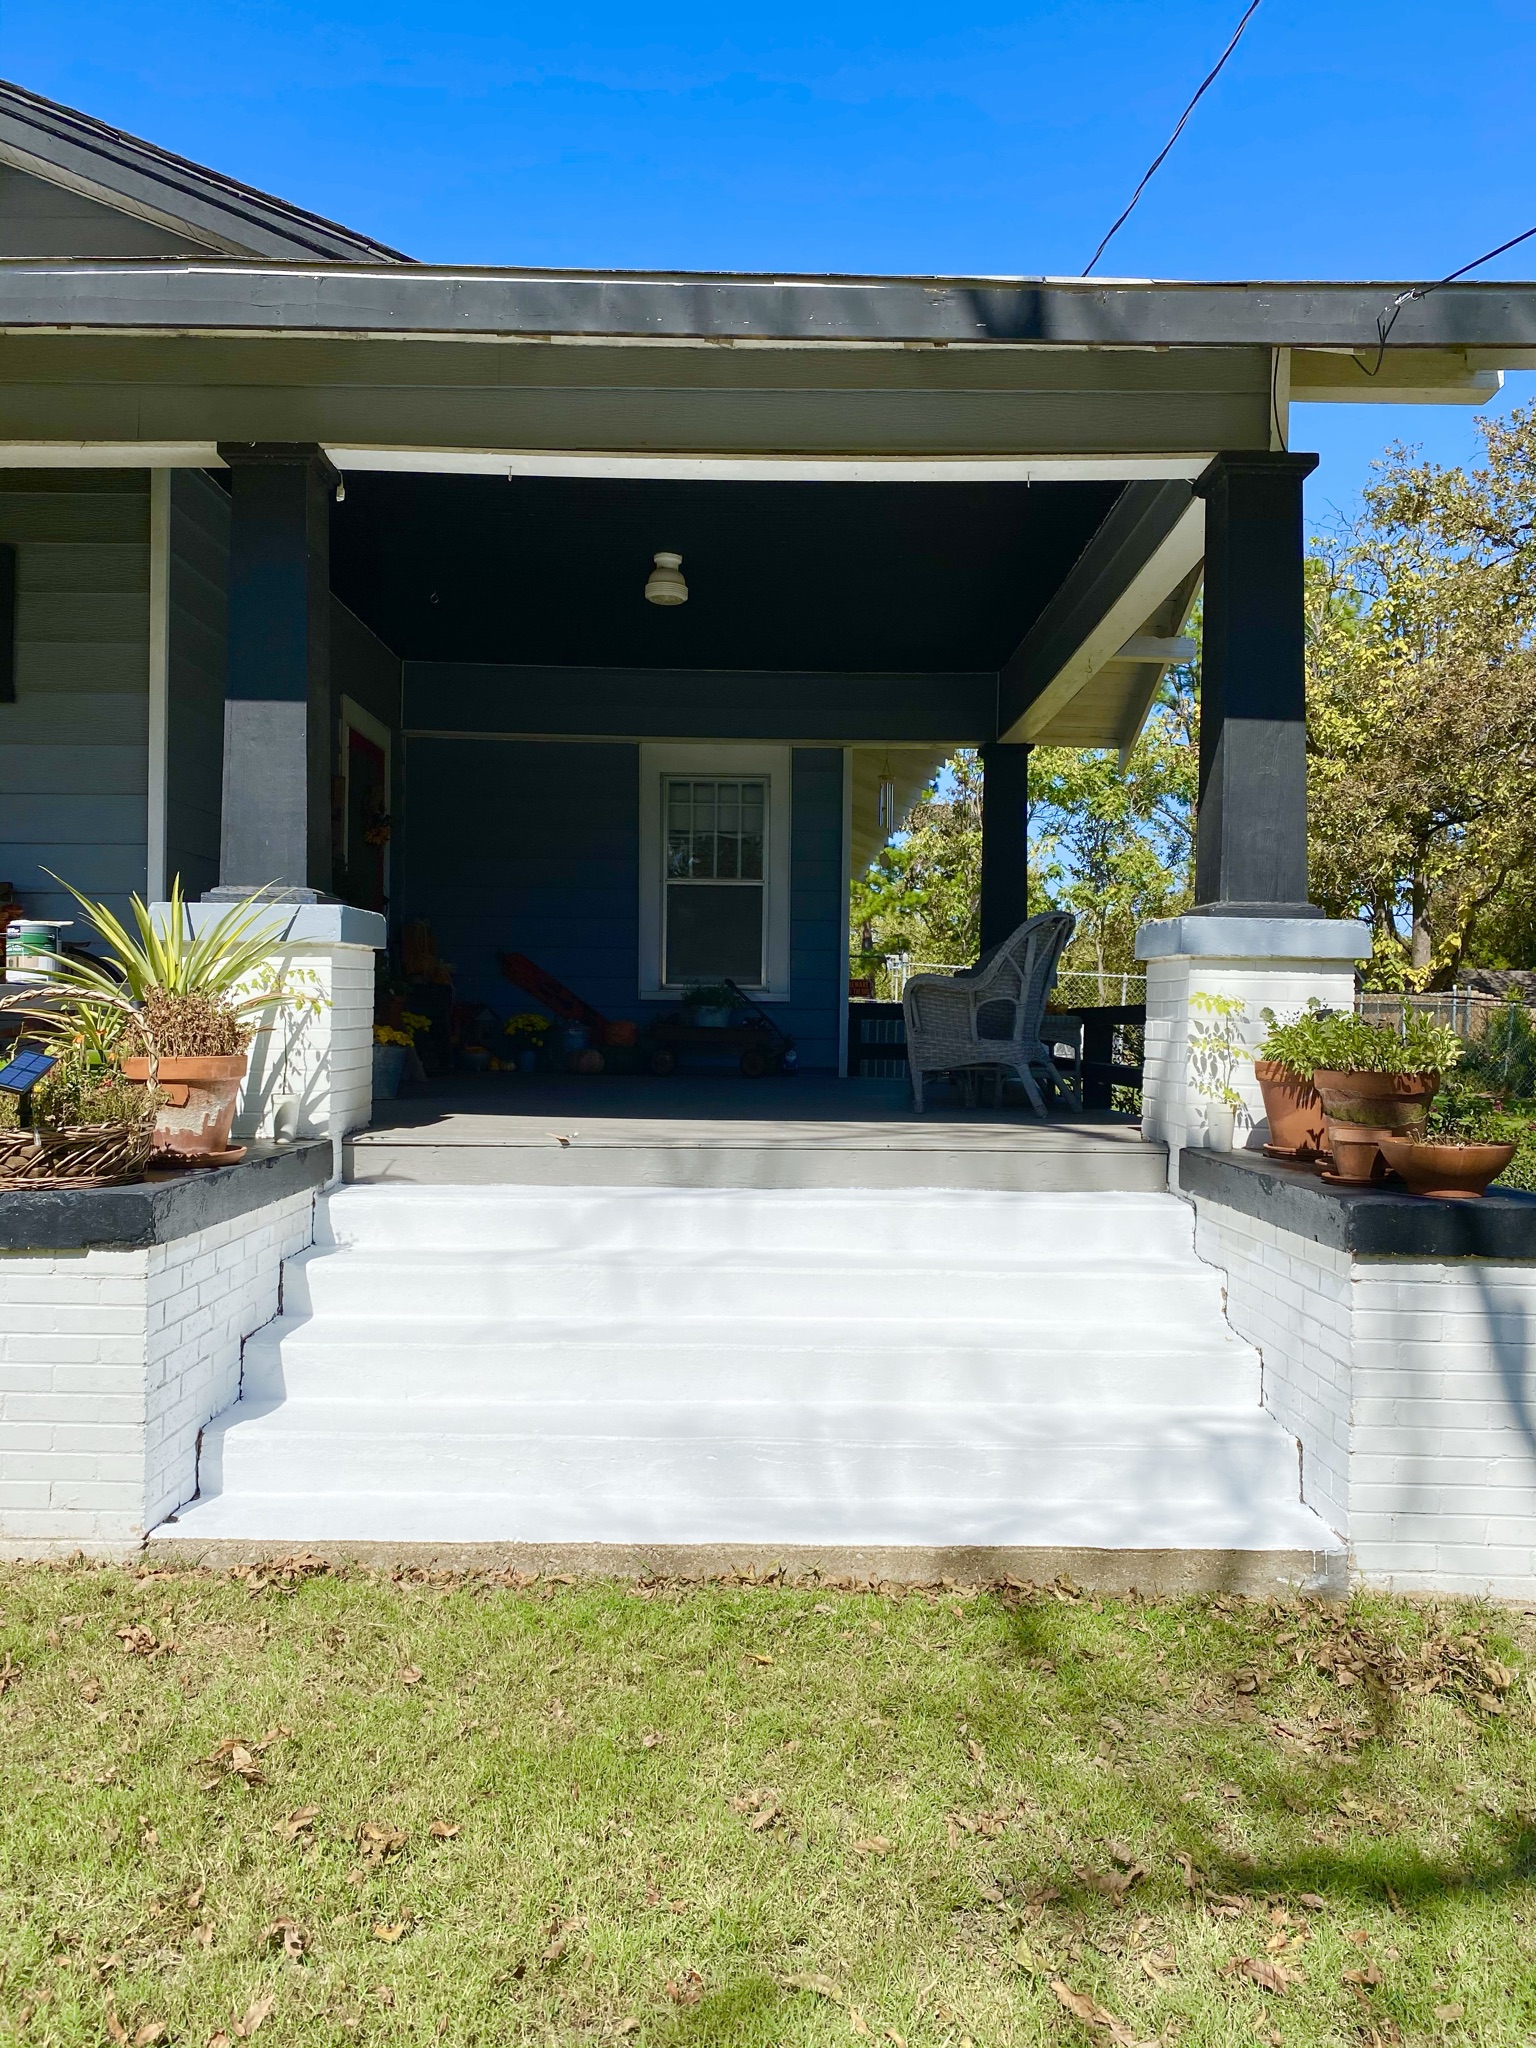
It's already looking much better!  The paint that was on the steps was not for porches and was starting to chip off in places.  Also, the concrete is very old and pitted, so it took two heavy coats of paint with lots of tapping brush work to fill in all the cracks and holes.  I almost used the entire gallon of white paint.
STEP 2: MARKING GUIDE LINES

Later in the evening after the paint was really good dry, we marked the lines for the tape to go down each step.  Trust me, you need guide lines on a space this big!  This part is totally up to you on how you want your end result to look.  We measured in from each side, 18 inches and marked a line.


We laid the 2 inch painter's tape on the line we just made and then measured 3 inches over from the tape edge and made another line.  I knew I wanted my white stripes smaller than the black stripes.

This is how our pencil marks looked all the way down.  This was my guide to lay down the tape on either side.
 

STEP 3:  LAYING DOWN THE TAPE

The next day I got to taping off the stripes and got ready to paint.  Since the tape is 2 inches wide, this left my white stripes 2 inches wide and the black stripes 3 inches wide.

NOTE: You want to rub the edges of the tape down as best as you can, its a chore and makes your fingers sore, but its necessary to keep as much paint as you can from seeping under the tape.

WARNING: Paint still gets under the tape!

STEP 4:  PAINTING ON THE "RUG"

Again, I used a small sponge roller (a new one because the one from the white paint was destroyed by the rough concrete) to paint on the flat black paint.  I took a good two coats and then lots of touch ups with a sponge brush too.  The concrete is not smooth and has lots of pits and chips to fill.
 
STEP 5:  REMOVE PAINTER'S TAPE

After two heavy coats of paint, I let it completely dry and then I removed the painter's tape.

Oh wow! It looks awesome from way back here! Lol!
 
STEP 6: TOUCH UPS

Up close, not so much! No matter how careful you put down the tape, it's going to seep under, it just is, its rough concrete!  I used a small sponge brush and the white paint and touched up the line to make them sharper.  Don't drink lots of coffee before this task! lol!

STEP 7:  ADMIRE YOUR HANDY WORK - LOTS!

Now to let it dry really well overnight.  I was so excited about how it turned out that I bet I came outside 15 more times just to stare at it! Ha!


The next morning I added my pumpkins and mums to the stairs and snapped about 1 million pictures!  It looks so pretty!


The white steps make everything look so much brighter, don't you think?

It looks really nice from the street too!  For a week after I painted the steps, I would slow down and look at them as I drove by! Hahah!

Let me know what you think down below!  Would you try this type of project?  It's kinda tedious, but so worth the end results!  Thanks for stopping by to see me!

Visit me over on Instagram @texasbluebingalow for more pretty views of this space!

If you loved this idea and want to save it for later, be sure to pin it to your favorite Pinterest board.  I have a Pinterest board set up just for all things related to Halloween and its called Our 1922 Blue Bungalow and I'm pinning something new every day. Won't you join me?

GREAT NEWS!  I now have an Amazon Storefront!  If you ever want to purchase anything I'm showing you here, you can pop over to my shop and see what I've picked out for you! Click right here to visit.
 

It doesn't have to be done all at once.  It is a slow process in the works! C-ya next time!

Pin It!

Sunday, October 6, 2019

Tiling Two Bathrooms in One Day

Yes, you read that right, we tiled two bathrooms in one day.  No, obviously they were not complete from start to finish in one day, but the actual laying of the tiles was done all in one day!  To say the least, we were exhausted by the end of that day! Whew!
We've previously done lots of work to both bathrooms, but we've never got around to redoing the floors.  Now we have!  This is the master bathroom, my favorite!
Since installing the tile floor, it is completely beautiful, well, I think so anyway!
We started out with this lovely 1980's linoleum flooring.  Isn't she a beaut! Nope? Yeah, me too! I hated that ugly flooring, seriously!
The linoleum was a slight booger bear to remove.  My husband took a scraper to it to try and make it a faster job.  There were spots that were curling up around the edges, but then there were spots that were literally stuck like they were adhered with super glue! Crazy!
Almost there!  You can see the left over glue remnants there along the edges.  There was also this super fine dust under there. I guess the actual backing of the linoleum was breaking down after so many years of traffic.
This flooring scraper tool is the best thing to have if you have old linoleum to take up off your floors.  It will save your knees and back in the long run.

Now on to the guest bathroom.  This is what it originally looked like when we moved in.  Those yellow walls were very alarming and that vinyl base board is such an awful thing to have in you home bathroom!  Isn't that stuff for public restrooms?  This bathroom had cheap peel and stick tiles which were only slightly better than the linoleum in the other bathroom, but at least it wasn't that ugly!

Previously we removed the vinyl base board stuff and it made an extremely awful mess of the sheet rock in some spots, so we knew we'd have to use a tall base board to cover all that up in the end.  But in the meanwhile, I updated the wall color to a beautiful shade of gray.  Much better!  We lived with the room like this for quite some time and I was ok with it.
Back to current days, together we removed the peel and stick tiles.  It didn't take long at all, but in the end it was an extremely sticky situation to walk on.

TIP: My honey got the idea to use a small amount of grout powder that we had left over from the entry hall tile job (you can see that here) to sprinkle and spread over the sticky floor.  We spread it around with our patio broom and then used the shop vac to remove the remaining powder.  It worked like a champ, no more sticky floor to work on!
Ok, next we mixed up the mortar to lay the tiles.  We used a 5 gallon bucket and a mortar mixer attached to our power drill to mix it.  The mortar mixer is a must, you need it!  We used one bag (seen below) of mortar mix to do both bathrooms.

Click right here to see the mortar, we got ours at Home Depot.

NOTE: We used gray mortar because we were using a gray grout, but if you use a light colored grout, you will want to use white mortar.


We used 6" x 24" wood look Premium Ceramic Tiles in the color Capel Ash from Home Depot.  They were a discontinued item so we bought all they had on hand.  Since we've done other tile jobs in our home, we had everything we needed tool wise.  You will either need to purchase a tile cutting machine or rent one, because there is no doubt you will have to cut tiles to fit your space.  We have a wet tile saw, but you can use a manual cutting device as well.  The flooring trowel is also a must when tiling and we used 1/8" tile spacers to get a nice even space in between each tile.
Now this sets for 24 hours before we add the grout.  On to the master bathroom!

NOTE: If by chance you get overzealous on the mortar and it comes up through your grout lines, take a flat head screw driver and remove it before it completely sets.  You'll save yourself lots of headache if you do so!  Also, don't forget to remove your spacers after about 30 minutes of sitting.
Before you start your grouting job, you will need at least two large buckets of clean water, grout sponges, a rubber grout float and knee pads! Don't leave off the knee pads!

Here's the sanded grout we used, its from Home Depot.
After all the grout is in, we let it sit for about 15 minutes and then start the sponge clean up process.  Make sure you are using a damp sponge and not a dripping wet sponge.  You don't want too much excess water going on your freshly grouted tile.
Here it is with the all new floor and beautiful baseboards! Now doesn't that look nice? Yes it does, if I do say so myself!
I don't have all the step by step pictures of the master bathroom because we were trying to hurry before our mortar went too dry, so I was helping too and couldn't take the time to snap pictures.  Basically it was the same steps as above for this room.
Here's a little flash back of when I painted over the bright blinding yellow to a softer prettier gray.
And, the previous owners had a leak in the a/c unit (its in the attic) and never painted the ceiling, so I did that too!
I also gave the door a nice coat of white paint and painted the hardware while I was at it too.
Tah Dah! Isn't it pretty? I think so too!  A beautiful tiled floor makes all the difference in a bathroom, so even though its exhausting work, its always worth it in the end!

Click here if you want to see what else we've done to the master bathroom.

If you loved this idea and want to save it for later, be sure to pin it to your favorite Pinterest board.  I have a Pinterest board all set up just for Bathroom Beauty and I'm pinning something new every day. Won't you join me?

GREAT NEWS!  I now have an Amazon Storefront!  If you ever want to purchase anything I'm showing you here, you can pop over to my shop and see what I've picked out for you! Click right here to visit.


It doesn't have to be done all at once.  It is a slow process in the works! C-ya next time!


I'm Linking to:
These lovely and FUN parties!
Between Naps on the Porch
The Dedicated House  - (I was featured)
French Country Cottage
Skip to my Lou
The Self Sufficient Home Acre

Pin It!

Sunday, July 28, 2019

How to Install a Stock Tank Pool with a Waterfall

I've been wanting a stock tank pool, or as we call them, a redneck swimming pool for at least 3 years now.  I'm not going to lie, the stock tanks are expensive!  We happened across a bargain and got both of the tanks and all the flag stone for $75 total! Bargain of a lifetime right there!

There are lots of tutorials on how to install these pools and I've linked what I thought was the best one down below.  I'm basically going to show you how to add the waterfall tank since I haven't seen that feature much at all.
Both tanks are 6' x 2', one round and one oblong with a spout.  I couldn't find one with a spout to link for you online, so I found this really cool idea to use on a regular tank.

Both of our tanks are used, so we had a bit of restoration to do before we could attempt to fill them with water.  Our patch job won't last forever and we will probably have to fork over lots of money to replace one or both tanks some day.  But today, we have a spot to cool off in the Texas heat! My advice is buy new if you can.
Step 1: Choose your tank size and location to set it
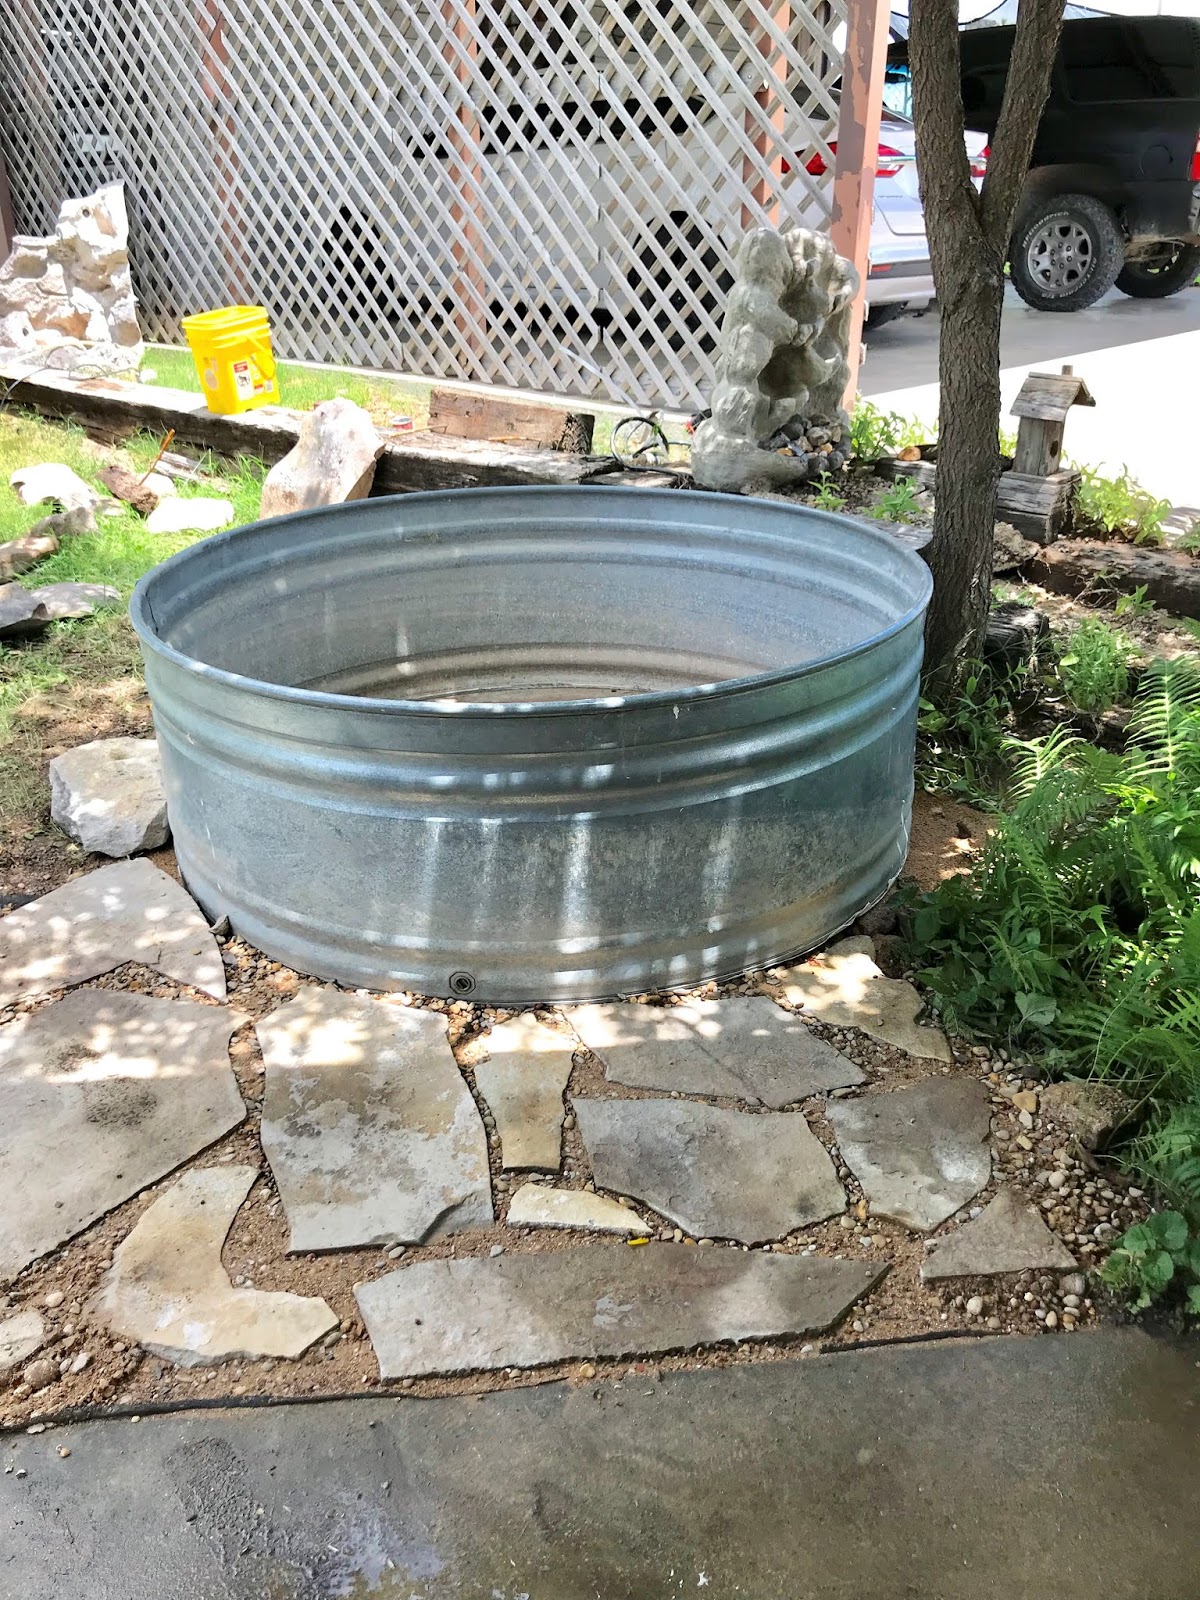
This spot is right off our patio and it used to be a fish pond waterfall feature.  The plastic in ground tub went by the wayside a couple of years ago so we pulled that out of the ground, tossed it in the dumpster and filled in the hole.  Now we have a perfect spot for our pool.  Lots of cleaning and prepping to do though.
Of course, my honey does all the manual labor, I'm just his assistant.  First we placed the round tank where we wanted it and he used the shovel to mark its spot.  He pushed the shovel into the ground all the way around the pool.  When we took the pool away, we knew where to clean and level the ground.
Next he watered it all down to get it to settle real well.
We used contractors sand from Lowe's to act as a leveling agent.  This is 3 bags worth.
He used a piece of 2 x 4 and his level to make sure it was all level so that when the pool was filled it wouldn't be leaning more on one side than another.  This is a very important step.
And again, watering it down to get it all to settle in level.
Next we laid down some landscaping cloth, covered it with more sand to ready it for all the rocks.
He strategically placed each flag stone the way he wanted it.  We then spread river rock over the entire area to settle into the sandy spaces. It took about 4 bags of river rock.  We also got that from Lowe's as well.

NOTE:  In hindsight, we would have skipped the sand step here.  We didn't think about all the sand that would possibly get into the pool. On another day, he actual took all the rock and as much sand up as he could and then put all the rock back.  It was a long tedious process so JUST SKIP THE SAND if its not UNDER the pool!
Step 2: Installing the Filter Pump - Please view this tutorial and video here, its very helpful!

Supplies We Used:
Intex Filter Pump - This includes an outlet, but no inlet strainer or valve.
Pump Inlet Strainer + Outlet w/ Two Valves: Note: It includes an outlet jet as well, which is already included with the Intex Filter Pump, we used this for our waterfall tank. You will not need the extra outlet jet if you just have one tank.
Intex Valves (2 pack) - This is not needed if you purchase the pump strainer above, but it is needed if you are NOT going to have a waterfall.
100% Silicone Caulk  
Extra Intex Filters
 
 
For our 6' x 2' stock tank (the round one) he carefully drilled two holes.  We chose to have our holes on one level instead of one high and one low like a lot of people do.  This way served our type of tank.  If you keep reading you'll see why, but in the end, we actually don't use one of these fittings and we just turned the valve to off now.

NOTE: Make sure you drill your hole on a flat area.  DO NOT drill on an indention or bump.  Your parts and pieces will not seal properly if you do.
Next we set up the pump as instructed from the box.
At this point if you have one tank only you can fill it with water and enjoy your pool.  We should have waited but we didn't, because were impatient.  We were still waiting on Amazon to deliver the final parts we needed for the oblong tank to become one with the round tank.
In the mean while we used a pond pump to circulate the water, which you can totally do, but I hated seeing the ugly black hose and wire draped over the side of the tanks, so my honey figured out a way to remedy that for me.
This is the water jet I ordered for the waterfall tank.  See I told you the tanks were used and in sad condition.  The waterfall tank is the worse. The round one was in pretty nice condition, thankfully, since its the one we get into.
This is what it looks like on the outside.  Since our tank is old and textured, we used silicone on the inside seal to make sure we had no leaks.

See that box between the tank and the white hose, that's our electric plug in box which was already here from the fish pond before.  This is another reason we chose this spot for our pool.
Now, we have the outlet (shooting water in) on the waterfall tank and the inlet (sucking water out) on the round tank and both hoses lead to the pump which we have sitting on a rock on the back side of the entire set up.  The hoses run under the pallet that I'm about to tell you about.
I'm backing up just a bit to show you how we raised the oblong tank up above the round one.  Like before, we put down landscaping cloth and sand and then sat the revised pallet (my honey is handy like that) on top and then put the tank on top of the pallet. We covered the pallet up with big rocks so it all blends in.
No more ugly black hoses in the way and we still have our waterfall feature which by the way, sounds delightful when you're just sitting pool side relaxing.
That little flamingo is our chlorination for the pools.  We found him at Walmart along with the chlorine tablets to put inside of him.
We also got a set of color changing lights to go in the pool for a fun look at night.
And lastly, we added pool noodles around the edge of the round pool for comfort.  When you're relaxing in the pool it cushions your head or neck and if you want to sit on the side of the pool, it cushions your bottom.  I found them on clearance at the Dollar General for 50 cents each!  It took 4 full noodles and a piece of another one to go all the way around it.  I love it!  Oh yes, and we got this pool net to keep our pool clean!

I hope this wasn't too confusing, but if you have questions, please ask! :)

It doesn't have to be done all at once.  It is a slow process in the works! C-ya next time!

GREAT NEWS!  I now have an Amazon Storefront!  If you ever want to purchase anything I'm showing you here, you can pop over to my shop and see what I've picked out for you! Click right here to visit.

If you loved this idea and want to save it for later, be sure to pin it to your favorite Pinterest board.  I have a Pinterest board all set up just for Pool Ideas That I Love and I'm pinning something new every day. Won't you join me?


I'm Linking to:
These lovely and FUN parties!
Between Naps on the Porch
The Dedicated House  - (I was featured)
French Country Cottage
Skip to my Lou
The Self Sufficient Home Acre

Pin It!
01 09 10