Showing posts with label Patio. Show all posts

Sunday, June 5, 2022

Budget Friendly Outdoor Curtains for my Patio

Hey there!

So I did a project over the long Memorial Day weekend.  I put up drop cloth curtains on one side of my patio to keep out the hot evening sun.  Boy, does it help!My only outdoor space here at my new home is my patio.  It's very small, but I'm making the best of it. There's lots to do, but its becoming very comfy and cozy, little by little.

I used the following items to make my curtain rod:

1 - 10' piece of EMT 1/2" conduit

3 - 1/2" Conduit Hangers

3 - 12 x 1 1/2 Wood Screws

I held the conduit up to the beam to get my placing.

Next, I drilled three pilot holes so the screws would go into the wood without splitting the wood and causing problems.
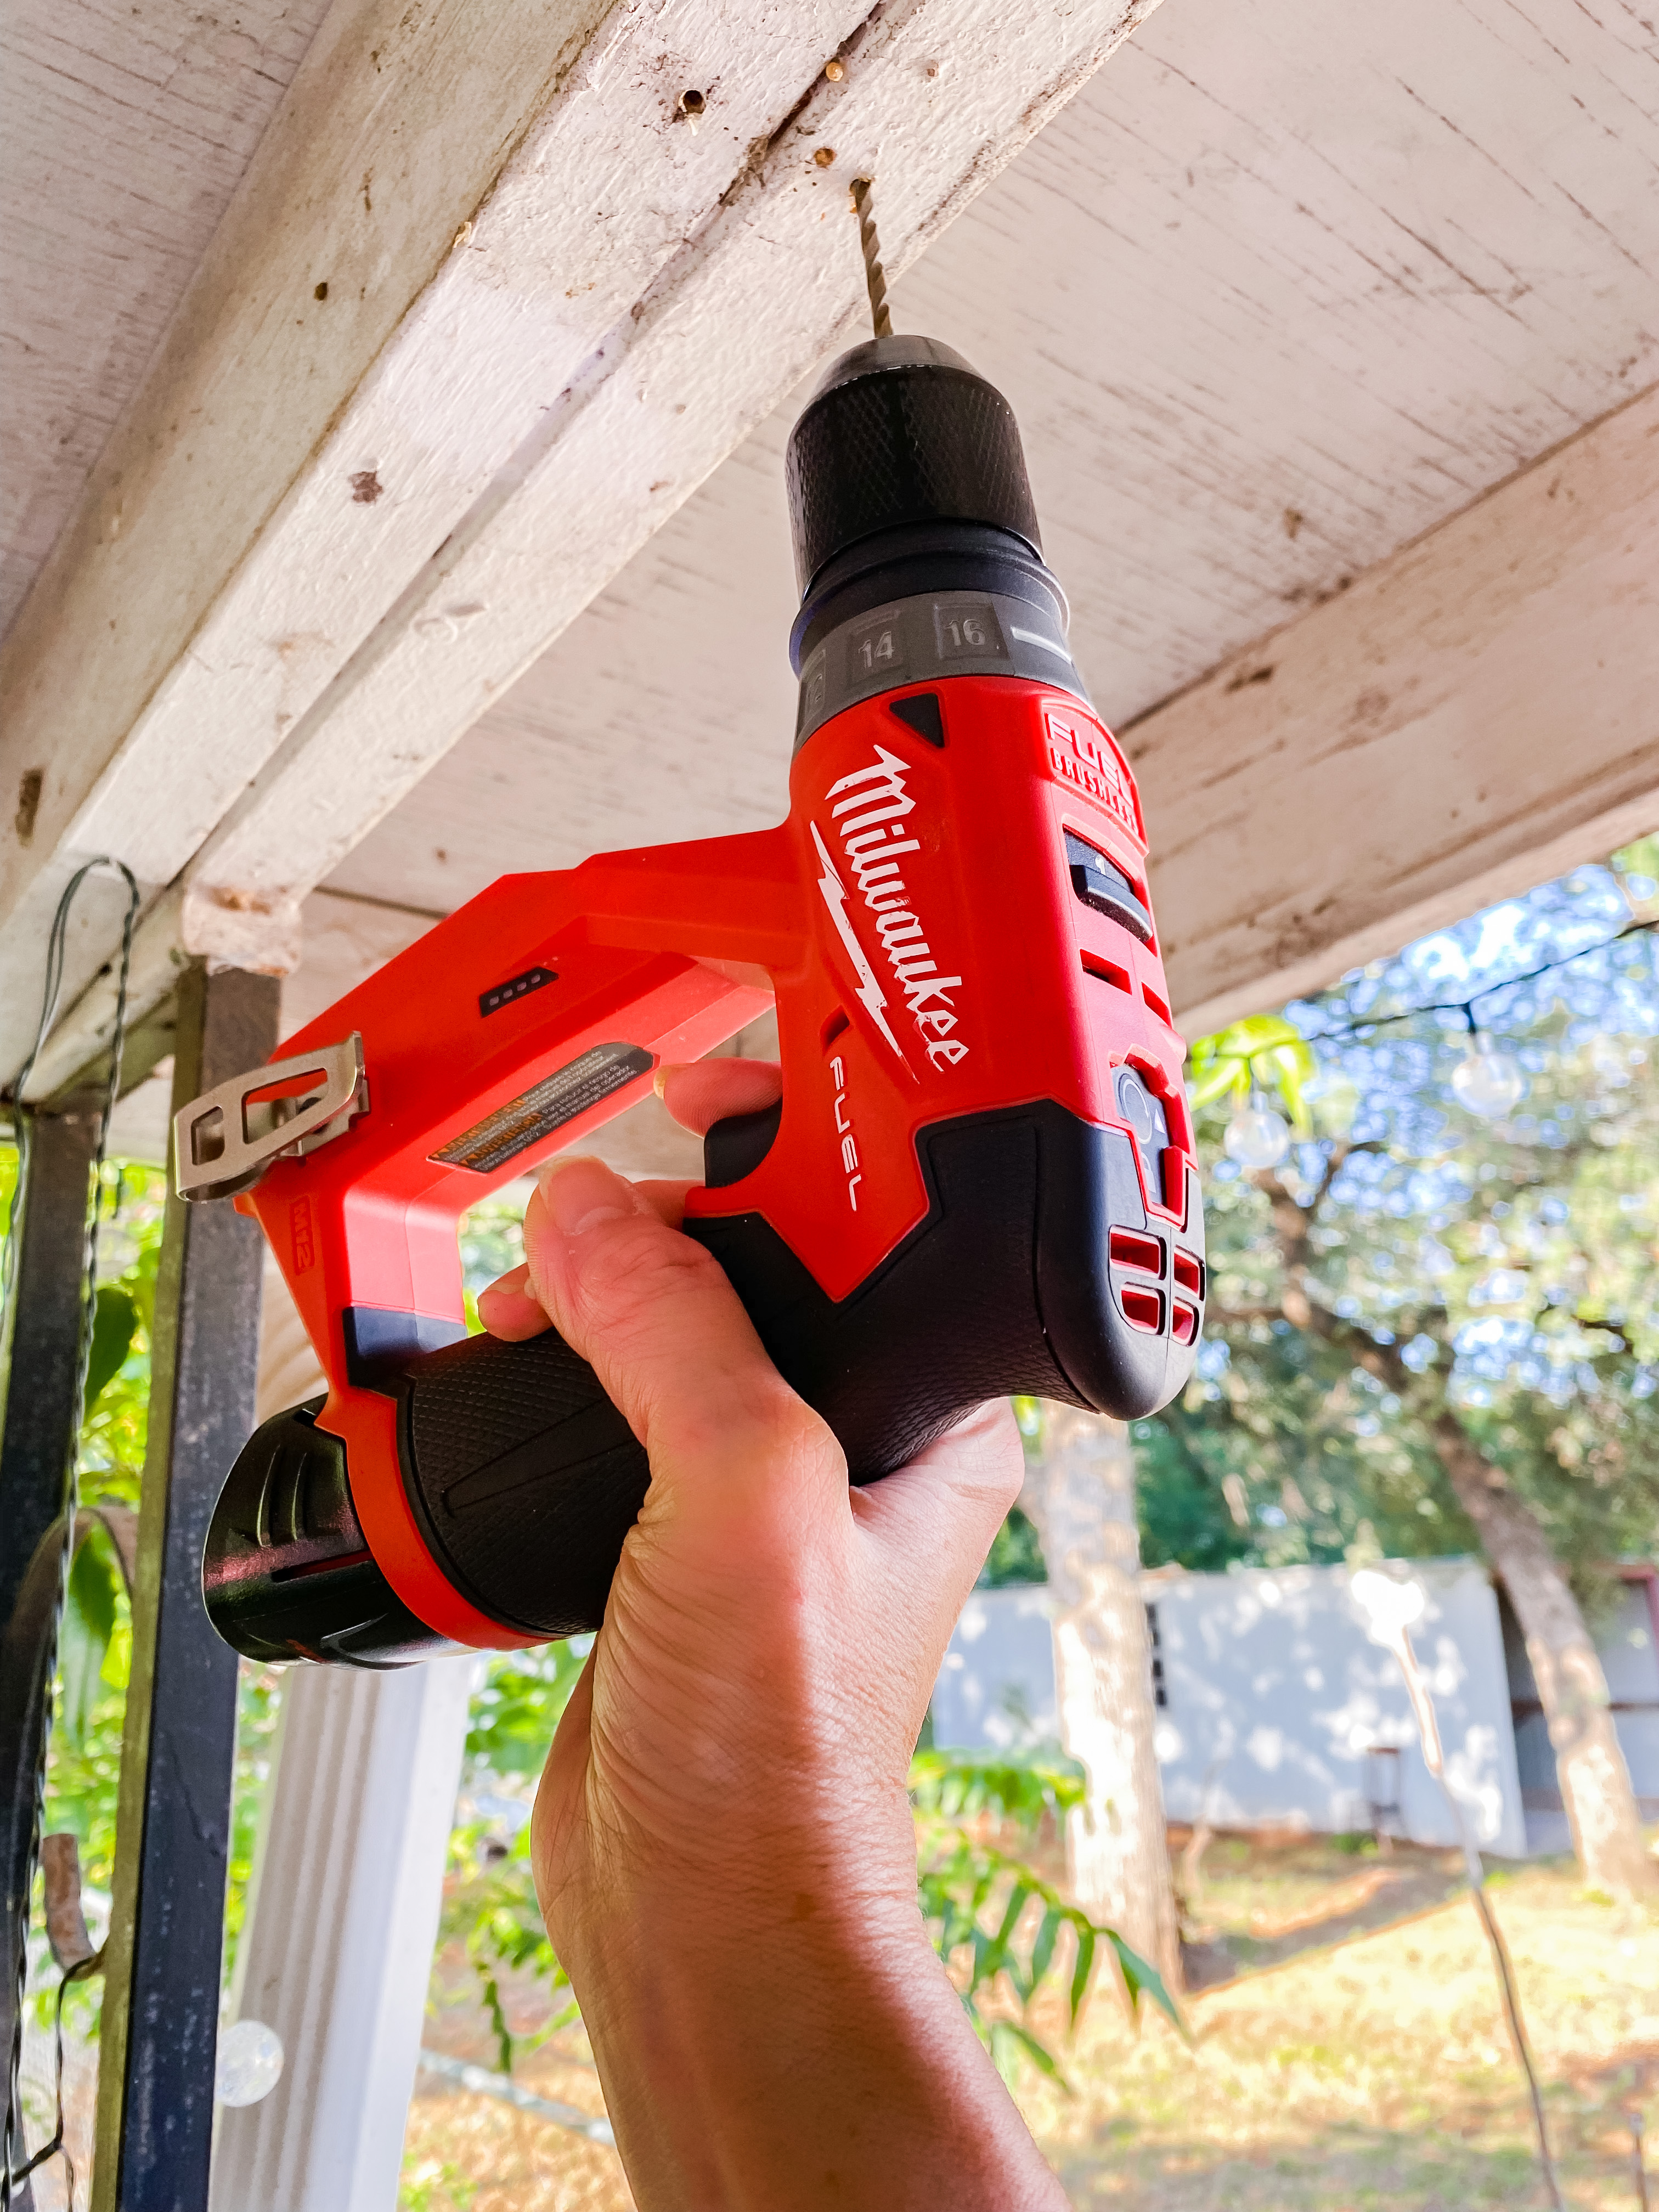
My Milwaukee M12 Fuel is lightweight and easy for me to use.  If you're a lady, you need one of these tools too!

Then I added the conduit hangers using my wood screws in the three pre-designated spots.


Drilling the pilot holes made it very easy to install the hangers.

I used these ring hooks to hang the curtains on the rod.  Next I added the hooks to the conduit, then I inserted the conduit into the hangers and tightened down the screws on the holder to secure it.

You have to slightly lift up on the conduit to get it to sit in its "groove".  This allows you to tighten the screw.

I used two (2) 9 x 12 drop cloths for my curtains.  The drop cloths were too long so I folded them over at the top and created a valance on each curtain.

I really love how it turned out.  I am mostly proud that I completed the entire project all by myself.  My oldest son offered to come over and help me.  He's the one that went and got the conduit for me.  The 10' length would not go inside of my car.

I decided to try it myself and if I couldn't do it then my son would come over and save the day.  That was not necessary because, I DID IT MYSELF! :)

I moved the hanger out 12" from each end to allow the breeze to still come around and in the patio area.

I think the curtains add a little more cozy to my patio area and I LOVE IT!  What do you think?

This is my view for now. I am working on getting my backyard just the way I want it.  Lots to do!

I hope you've enjoyed my little project and try it yourself!

If you loved any of these ideas and want to save them for later, be sure to pin it to your favorite Pinterest board.  I have a Pinterest board set up for all kinds of patio ideas and its called Patio BeautyI'm pinning something new on Pinterest every day. Won't you join me?

***I am a participant in the Amazon Services LLC Associates Program, an affiliate advertising program designed to provide a means for me to earn fees by linking to Amazon.com and affiliated sites.***

Pin It!

Sunday, May 22, 2022

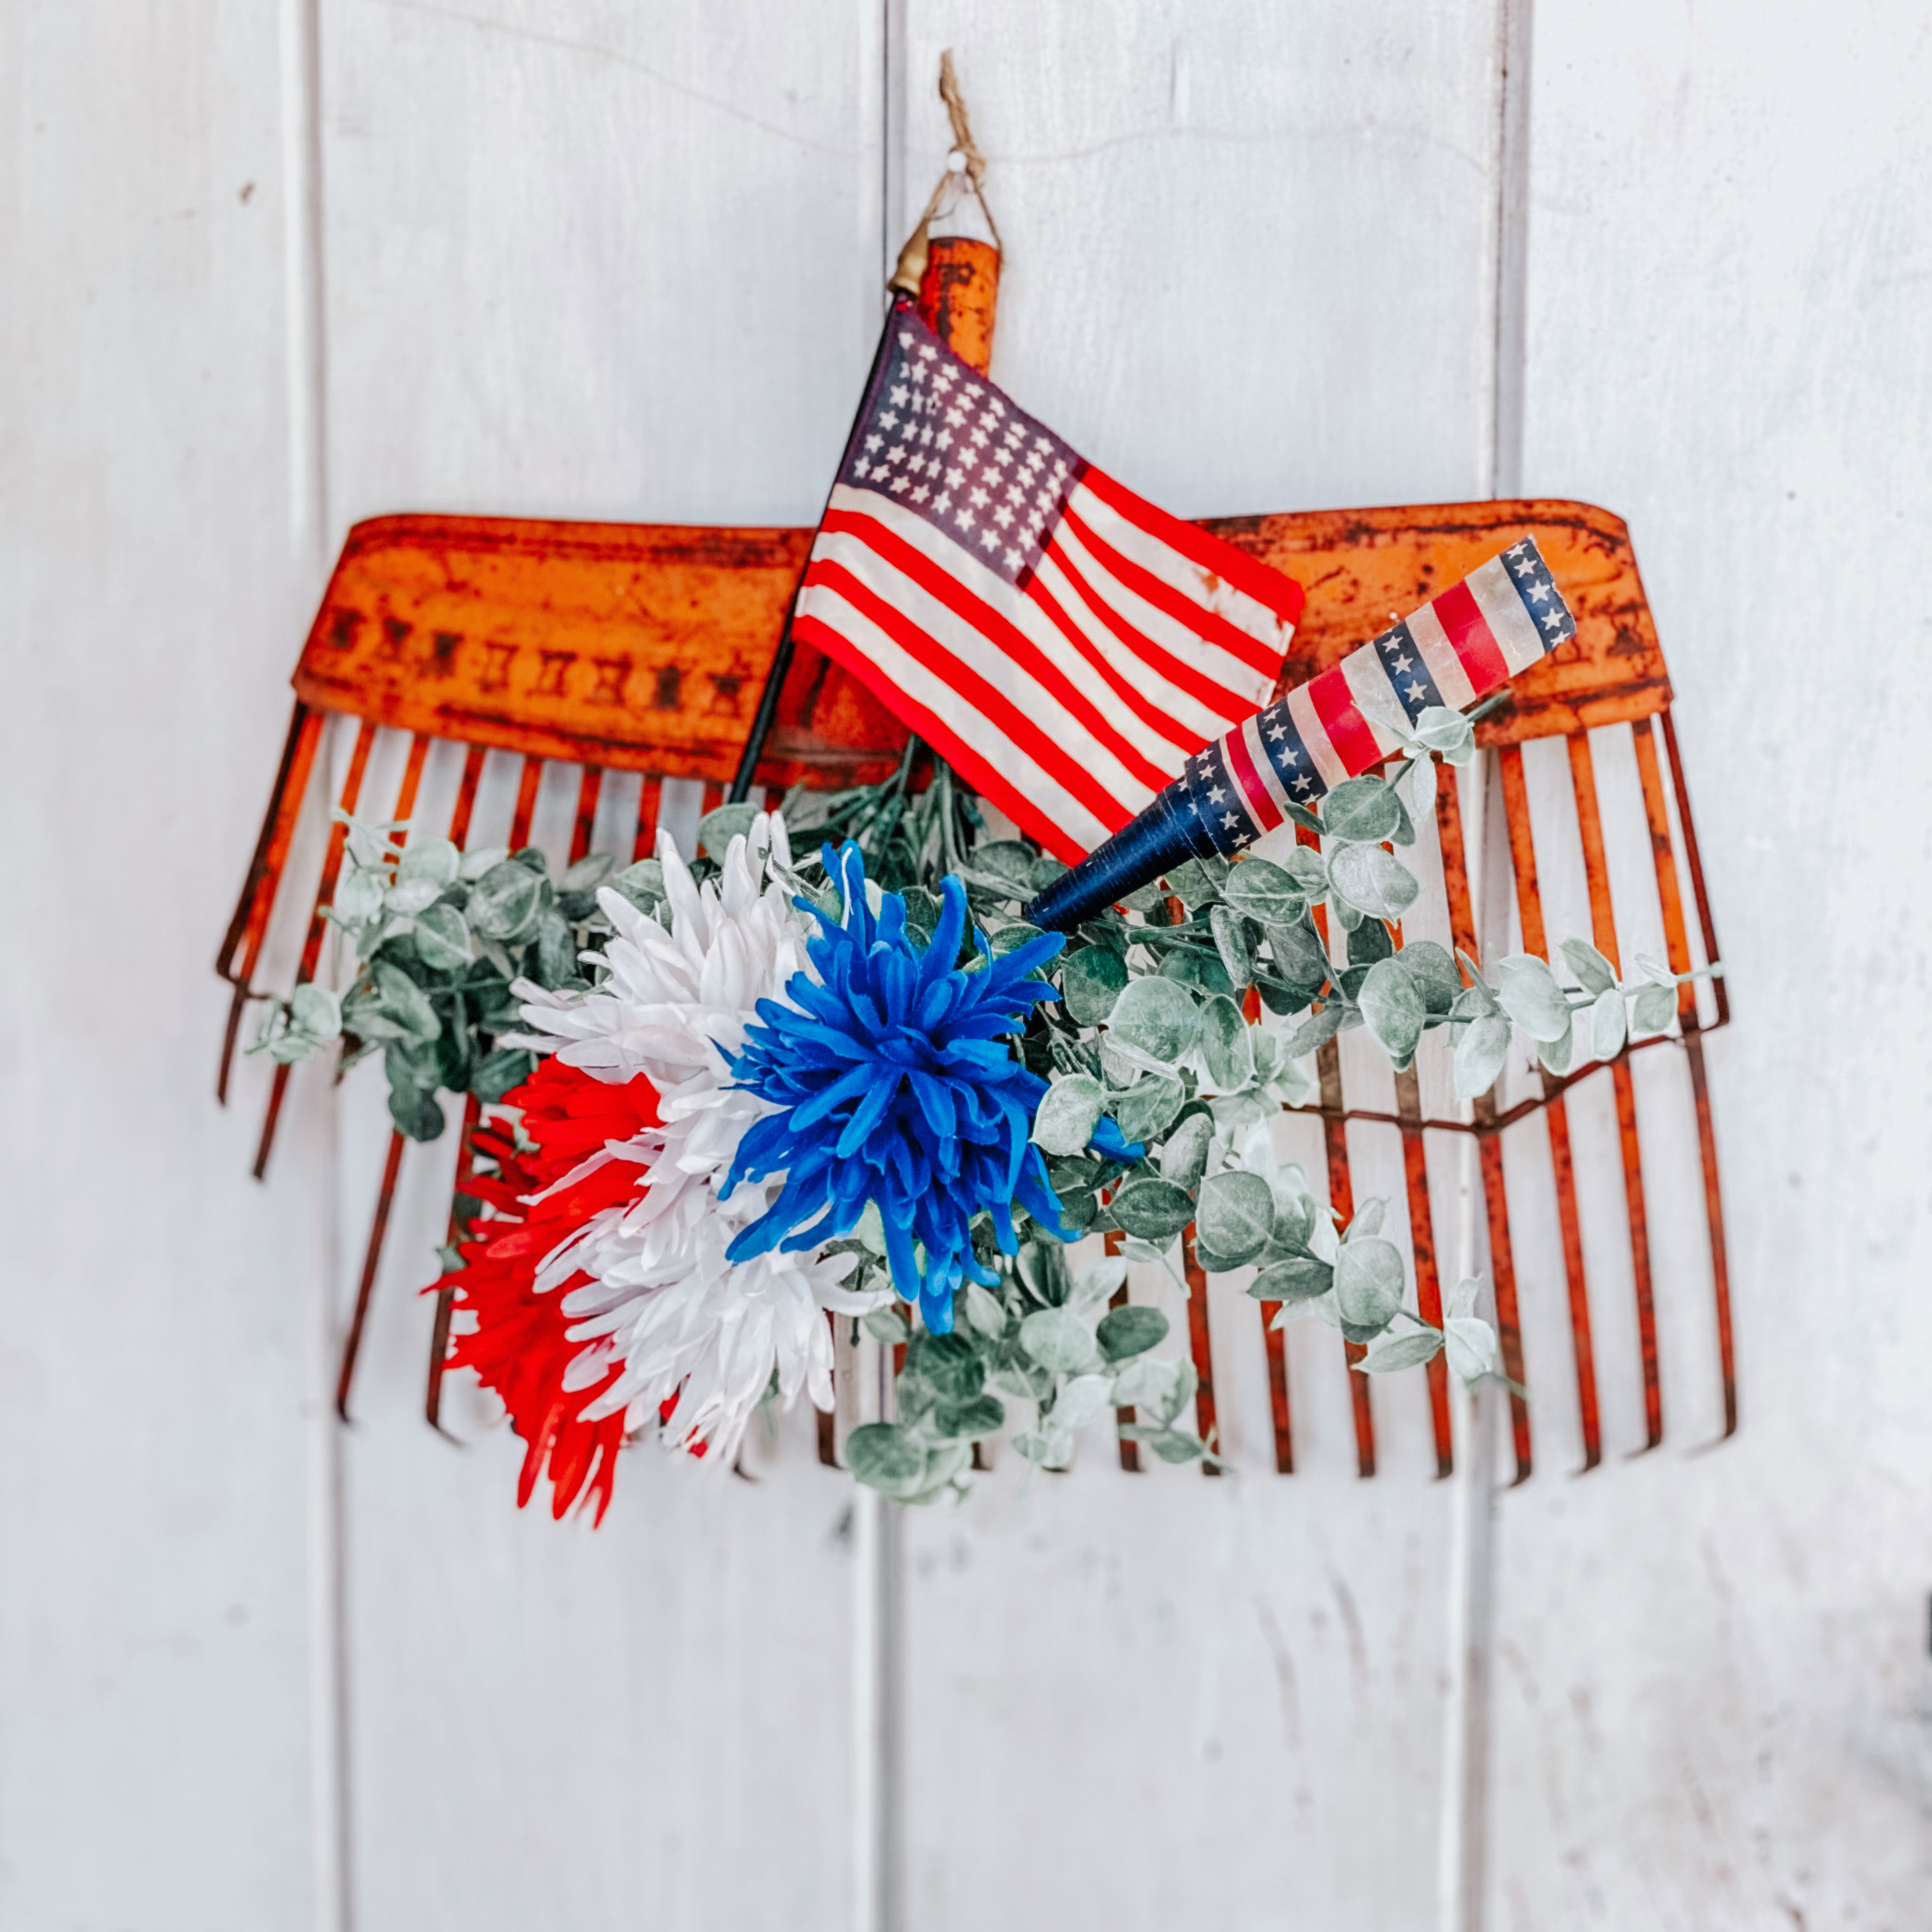
Vintage Rake Head Turned Wreath

Hello there!  How's it going in your world?  We are actually having a cold snap currently.  It has been in the upper 90s and a few days up past 100 here in Texas already, but today its in the low 60s.

What the heck Mother Nature?

Yall! I made a thing! A patriotic thing! It's temporary because I'm going to change out the decor for the holidays or seasons. This is part of my patio decor.  Did you see that post yet?  Click HERE.

Yesterday I went over to my Mama's house to clean up her back patio area and I came home with a rusty treasure that I just had to make pretty!

Wanna make one too? Ok, here's how I made mine temporary.  You could make it permanent by attaching all the pieces to the rake head.

You will need:

One old rake head

One bundle of greenery, I used eucalyptus

One bundle of red, white and blue faux flowers

Two flags or other patriotic decorations


Bend over the ends of the greenery and flower bundles to create a hook shape.


Hook one on either side of the top, where the handle used to be.  Speaking of where the handle used to be, I tied a piece of twine to create a hanger for my rake wreath.

Now add a vintage flag to cover up the "hooks".  I just tucked it into the greenery like this.

And then do the same with your other decorations.

Now when the red, white and blue season is over, I can remove these decorations and add the next season's decor to my old rake head.

Fun Fact: I probably used this rake when I was kid.  I'm one of those weird people who likes to do yard work.  Do you like to do yard work?

I hope I've inspired you to pull out all of your red, white and blue goodies and get to decorating soon!

Check out my last post right here to see more of my old junk collection. 

If you loved any of these ideas and want to save them for later, be sure to pin it to your favorite Pinterest board.  I have a Pinterest board set up for all things back yard decor and its called Back Yard IdeasI'm pinning something new on Pinterest every day. Won't you join me?

***I am a participant in the Amazon Services LLC Associates Program, an affiliate advertising program designed to provide a means for me to earn fees by linking to Amazon.com and affiliated sites.***

Pin It!

Sunday, August 8, 2021

The Perfect Backyard Gazebo

 Hi there! Long time no blog here!

Our house is still for sale, we've had some nibbles, but no real bites yet.  It'll happen when its supposed to I reckon!

One bit of news, I got a new job!  This is a job that I love and don't hate going to everyday!  I'm working as a receptionist at a Veterinary clinic.  I get to talk to sweet animals every day.  I mean seriously, who wouldn't love that!

Anywhoooobs, let's get on to the gazebo I mentioned way up there in the title.

How cute is that?  Guess what?  I assembled almost all of it myself.  When I got to the part of attaching the top to the bottom, I had to have help.  Short lady problems ya know! lol!

Of course I had to create a photo shoot for IG! Ha!  Watermelon anyone?  That was the best watermelon too!

Just grab a fork and dig in! It's just not Summertime without watermelon, am I right?

The Aster Outdoor Gazebo is perfect for my current backyard and when I move, it will assure me a covered space even if my new house doesn't have one!  Yay!

Here are some details about this gazebo that I borrowed right from the site:

  • Vented Soft Top Roof: The two-tier Dome-Cabin Style Roof is weather resistant polyester and provides better stability in windy conditions, keeps proper airflow while you work or relax under it and helps reduce heat and wind stress on the canopy. The gazebo roof material is UPF 50+ protected, 99% UV blocked, water-resistant, CPAI-84 US Standard fire-retardant and is perfect for providing shade or rain protection during your outdoor events. The extended eaves provide additional shade
  • Sturdy Frame: The frame is heavy-duty, made of high-grade engineered steel and is powder-coated for rust-resistance and extra durability. The heavy-duty steel frame can withstand various weather elements, resist chipping, peeling, rust and corrosion. The frame will stand up to the elements for years to come. Also, the included 8 ground stakes will help provide more stability and security for this well-designed structure
  • Mosquito Netting on all sides: The insect netting comes with double-sided zippers to help secure the netting to help keep bugs out. The netting is see-thru and flame resistant. The netting has velcro straps and elastic ties to secure the netting in place and are easy to install and take off
  • Exquisite Design: The hanging hook inside the metal gazebo tent allows you to suspend a chandelier for additional lighting or any decoration, providing you with a more cozy ambiance. It also can be used to hang a fan, making you more comfortable and cool when relaxing outdoors in the summer. The hook load should not exceed 50 pounds. With straight-forward and easy to install instructions, you can quickly have a private gazebo to enjoy the great outdoors with ease
  • Multi Use: This fully assembled outdoor canopy gazebo provides 120 square feet of coverage, enough room for 6-7 people. It's a good choice for commercial or recreational use-parties, small business, outdoor backyard events, lawn, outdoor deck, garden, patio, or near a pool, grill, or BBQ pit and parties, sporting events, weddings, etc. Our 12x10 gazebo will make your outdoor space an oasis. 

Best of all, it was easy to assemble!  Please check out my IG highlights here for a video of the process.

Thank you for sticking around and waiting on me to blog every now and again!  I hope you are all doing well!

If you loved any of these ideas and want to save them for later, be sure to pin it to your favorite Pinterest board.  I have a Pinterest board set up for all things backyard related and its called Backyard IdeasI'm pinning something new every day. Won't you join me?

GREAT NEWS!  I have an Amazon Storefront!  If you ever want to purchase anything I'm showing you here, you can pop over to my shop and see what I've picked out and am probably using in my home right now! Click right here to visit.
 

It doesn't have to be done all at once.  It is a slow process in the works! C-ya next time!

***I am a participant in the Amazon Services LLC Associates Program, an affiliate advertising program designed to provide a means for me to earn fees by linking to Amazon.com and affiliated sites.***


Pin It!

Sunday, August 9, 2020

Our DIY Paver Patio with New Decor

Hi there! We've been busy making stuff happen over here at the 1922 Blue Bungalow!

So we've been here for only a short time, but it was important to us to have a space outside to hang out.  This patio happened very unexpectedly.  My honey was perusing through FB Market Place one evening and came upon these patio pavers for $1 each!  We couldn't resist it because pavers are expensive yall!
We built our patio all in one days time.  That includes us driving all the way to sellers house, digging the pavers out of the ground, loading them into our trailer and then driving back home to unload and place into a patio that looks like this! Whew!
This is how it looked just outside our sun room.  Lots of sand that is annoying to walk on and patchy grass.
 My honey used a rake and a hoe to remove all the grass he could before we started.  Then we leveled the ground out the best we could using a long 2 x 4 to smooth everything out level.
Then, we made use of lots of our moving boxes.  We laid them down to help keep the grass from growing up through the pavers.  That's one good use for moving boxes if you ask me!
We started on the far left hand side and stayed even with the little step out of the sun room.  We slowly, but sure, moved to the right filling in our space.
We had 168 pavers and still have lots left over.  We also made a side walk up the side of the house to the gate.  After we had all the pavers down, we used sand from our yard to fill in all the cracks.
Lastly we sprinkled the entire patio with water to settle the sand into all the cracks to see if we needed to add more.
We got the patio table and chairs from the same people for $100.
Next I added a few flowers to the little rock garden under the windows.
I used my honey's old fertilizer spreader to hold a few flowers and a sweet potato plant.  So cute!
To add color and make our new patio cozy, I got this beautiful red 9 foot market umbrella with push button tilt and crank (cover included) from Abba PatioYou can use my code DEE for 10% of your entire purchase site wide.
I also added some pretty chair cushions that I found on clearance at Home Depot for $17.00 each.  They are regularly $34.98.  Bargain!

21.5 in. x 24 in. Chili Medallion Outdoor High Back Dining Chair Cushion by Hampton Bay

A game of Scrabble anyone?  We found this vintage Scrabble game at a yard sale for $1.  I love using it for my decor.  The adorable metal caddy is from Just Joy Shop.  They have lots of cute things!
We like to have breakfast on the patio on our days off, so of course I have to doll the table up too!  Just a few pretty vintage goodies for a centerpiece.
We sat our BBQ table over to the side of the pavers so we can enjoy yummy grilled suppers out here too!
Do you like to have meals outside?  I especially love sitting out here in the morning sipping my coffee and enjoying all the nature sounds as the sun comes up.

If you loved this idea and want to save it for later, be sure to pin it to your favorite Pinterest board.  I have a Pinterest board set up just for all things related to Patio Decor, its called Patio Beauty and I'm pinning something new every day. Won't you join me?

GREAT NEWS!  I now have an Amazon Storefront!  If you ever want to purchase anything I'm showing you here, you can pop over to my shop and see what I've picked out for you! Click right here to visit.

It doesn't have to be done all at once.  It is a slow process in the works! C-ya next time!


Pin It!
01 09 10