We have a set of front loading Whirlpool HE Duets, they are stacked, as you can see. We purchased them in 2010. So, I'm doing laundry one day and the dryer said NOPE, not today lady! Oh My Gosh! Why don't these appliances give you any warning? I mean, leave me a note saying you're going on vacation or something!
For safety we used
a stacking kit that holds them together and keep them from moving apart during the washing and drying processes. Our dryer model number is WED95HEXW0, and this post will show you how we cleaned our dryer. In the process of both of us on the internet and Youtube doing research on how to DIY home repairs of our dryer, I found out that
you should clean your dryer at least once every two years. I never knew that I was supposed to internally clean it/have it cleaned. Oooopsie!
NOTE: There are many different models of Whirpool machines, so if yours isn't the same model as ours, it may look totally different.
This is what our laundry room normally looks like on the weekends. Both machines going literally all day long. I'm the type of person that can't stand for the laundry to pile up, so its done every weekend, without fail. Washed, dried, folded, hung and put away all in one day.....sometimes it takes me two days.
Oh, by the way, you should try
my homemade laundry soap and
softener. They are so good and we are saving so much money by using them!
Our laundry room is tiny, so we had to disassemble it to get to the machines. If you want to see how we created this room,
click right here.
We moved in our home back in March of 2011 and so did these machines. They have not moved since we placed them in their spot. Um, eeeeww!! Dust bunnies and dirt everywhere! Yuck!
NOTE: Before you start with cleaning your dryer, please make sure you disconnect the machine from the electricity. We also removed the dryer vent duct and the water line so we could pull the machines out away from the wall.
After disconnecting all the power in back, he removed the top cover.
This is looking in from the top.
There are LOTS of pieces (and one million screws) to remove to get to the inside parts that need to be cleaned.
There are several helpful Youtube videos that you should really watch before attempting this project.
WOW! It's really bad!
I used
our small shop vac to clean all the dirt and debris from inside.
It was literally everywhere that little dust bunnies could wiggle in to.
This tool right here is awesome! I not only use it for the dryer, but for my fridge as well. Check out how to
clean your fridge coils HERE.
I was cleaning every piece he removed from the machine. I mean you might as well clean all of it before you put it back together. I used
our shop vac and
Clorox wipes.
Before I vacuumed it out. Yuck!
So much build up!
I don't even know how this machine was working! Well, now its not working.....so.
Much better now!
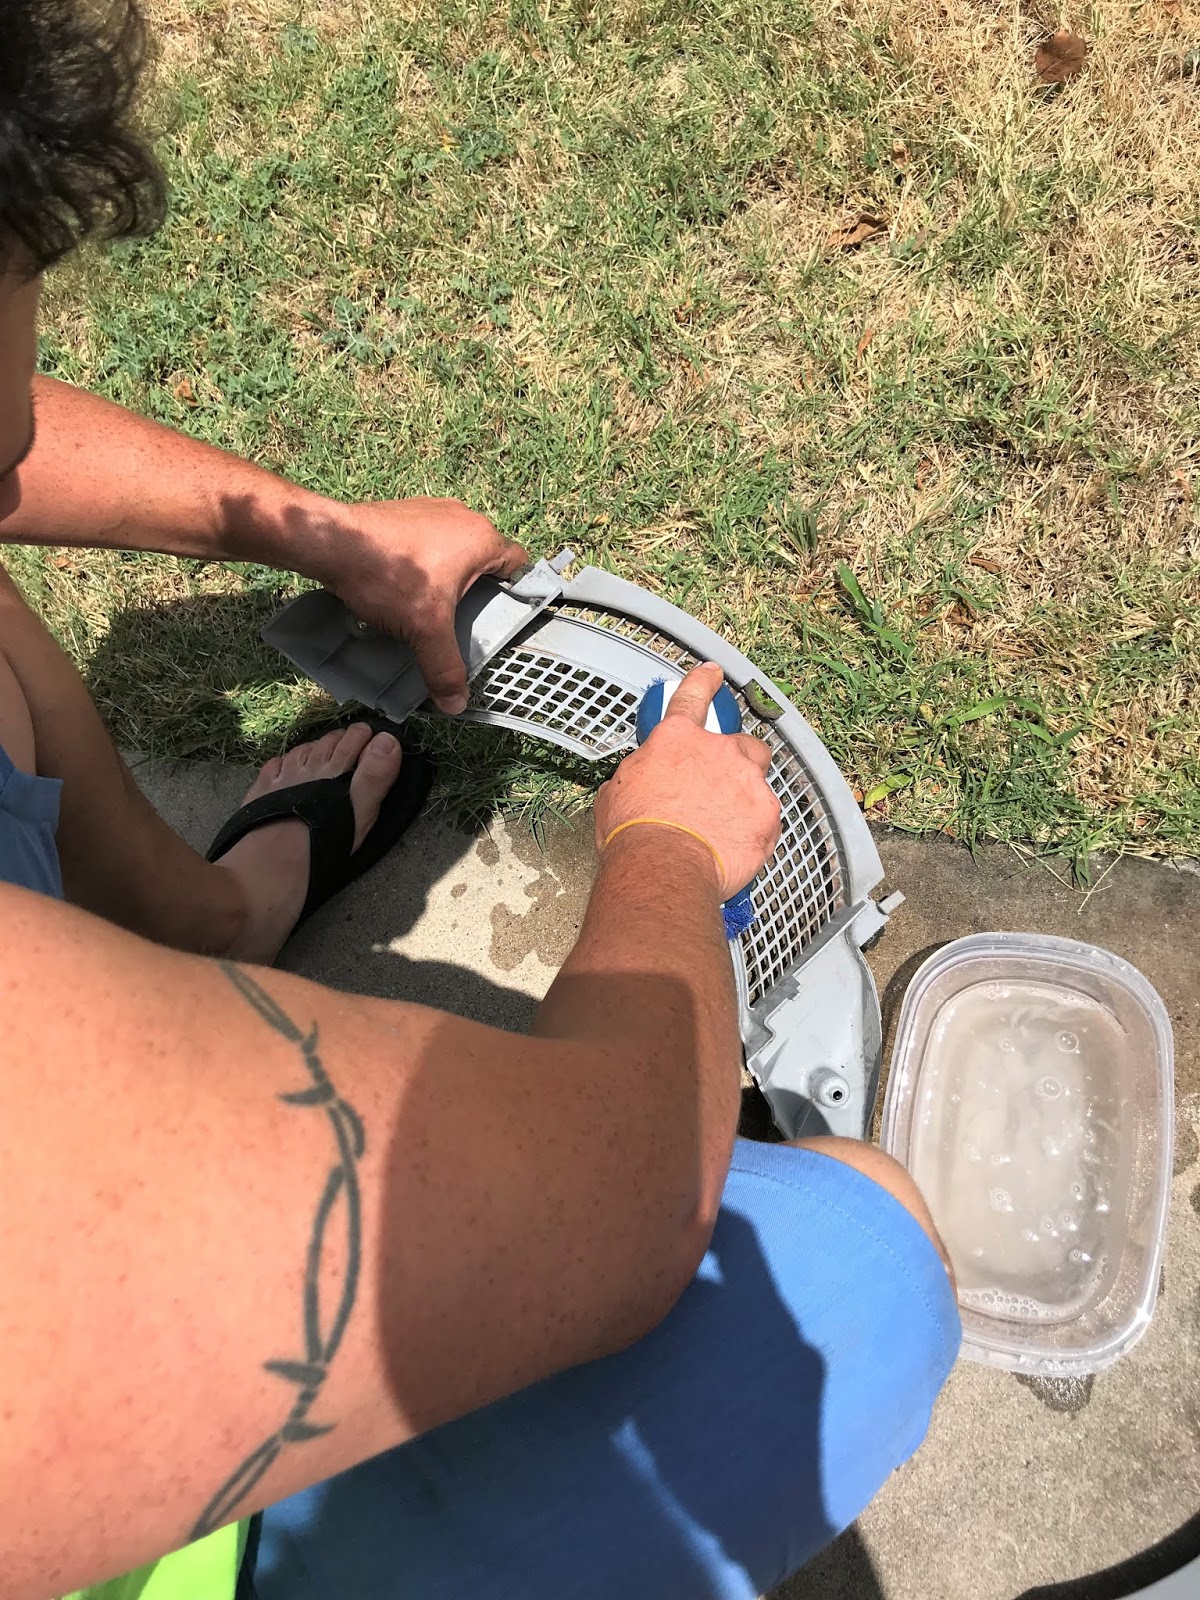
When you disassemble the parts for cleaning, make sure to take the lint trap down as far as you can because there was so much gross stuff hiding in there that we couldn't see until we broke it all the way down as far as we could. We used a bit of soapy water to clean the lint trap holding area. Just a few drops of
blue Dawn in some warm water and
a scrub brush to clean all the build up away. Rinse and let dry in the sun.
Now that we have everything cleaned up, my honey went to checking everything to see what wasn't working. He used his
digital Multimeter for the testing. All of the parts the internet told us to check appear to be working. Hmmmm?
Next, before we put it back together to test it, hoping the clean up job had fixed it now, we decided to remove the back panel and clean in there too. Not as bad as the front area, but I vacuumed it out anyways.
He put everything back together and ran a diagnostic check on it and it was still throwing error codes. He cleared the codes and tried it to see if the cleaning fixed it.
It did not. We were so sad. He was done for the day. We had been working on this thing all day! The next day he was still researching trying to see what else he could check on it. He had one more thing to check.
Remember this shot from the top when we took the lid off? See that control board to the left? He hadn't checked that yet, so he did.
He spotted the burn mark on the tray it sits on, so he removed the board to get a closer look at it.
Hmm, that does NOT look too good.
It all looks perfectly fine from the top side.....
But when he turned it over to the back side, down toward the bottom, right hand side, there is a color change in the green board and the terminal looks burned. He knew to look there from where the burn mark was on the tray. I thought for sure this was going to cost us an arm and a leg!
He grabbed his
soldering kit and did a little repair on it. The terminal was no longer making good contact, so it needed the solder to give it connection again.
Guess what?
IT WORKED!! He fixed it, and all for FREE! Thank you honey! I love free at home, DIY repairs! All thanks to my honey bun because I can only clean up the dirty mess, not fix the broken problems! Ha,ha!
If you want to see what else we've done in our laundry room, please
visit the links below where I have each project directly linked for you.
It doesn't have to be done all at once. It is a slow process in the works! C-ya next time!
I'm Linking to:
These lovely and FUN parties!
Between Naps on the Porch
The Dedicated House - (I was featured)


Good job to your hubby. It's wonderful having husbands who can work on things.
ReplyDeleteThis is great information. Just this last week my dryer started to make an awful growling noice. Thought for sure we were loosing the motor or the wheels. Nope just a $1.88 in change down around the fan. Vacuumed and cleaned now too
ReplyDelete